
Your concierge, set up for your kind of property.
Everyone starts with Part 1: your account and first property. Then follow the track for your property: an Airbnb, another short-term rental, a home you rent to tenants, or apartments you manage.
What kind of property do you have?
Everyone does Part 1 first (about 5 minutes). Then follow only your own track.
Not sure? Short-term guests (nights or weeks) = Track A or B. Tenants on a lease = Track C or D. Managers with many units: do Track C first, then Track D.
Before you start: gather these
You don't need all of them. The more you give, the smarter your concierge is on day one.
- Your listing text (Airbnb, VRBO, Booking.com) or, for tenants, your building rules: rent terms, trash days, parking, pets.
- Your house manual or resident handbook (PDF or text), if you have one.
- The street address of the property.
- Wi-Fi name and password.
- Entry codes: door keypad, lockbox, gate, shed.
- 3 to 8 good photos of the home. The first becomes the big welcome image.
- Your favorite local spots (coffee, dinner, a hike).
- The mobile number and email where you want alerts.
- Landlords and managers: your list of units (a spreadsheet works).
Set up your account and first property
Every owner does these 9 steps once. Then jump to your track.
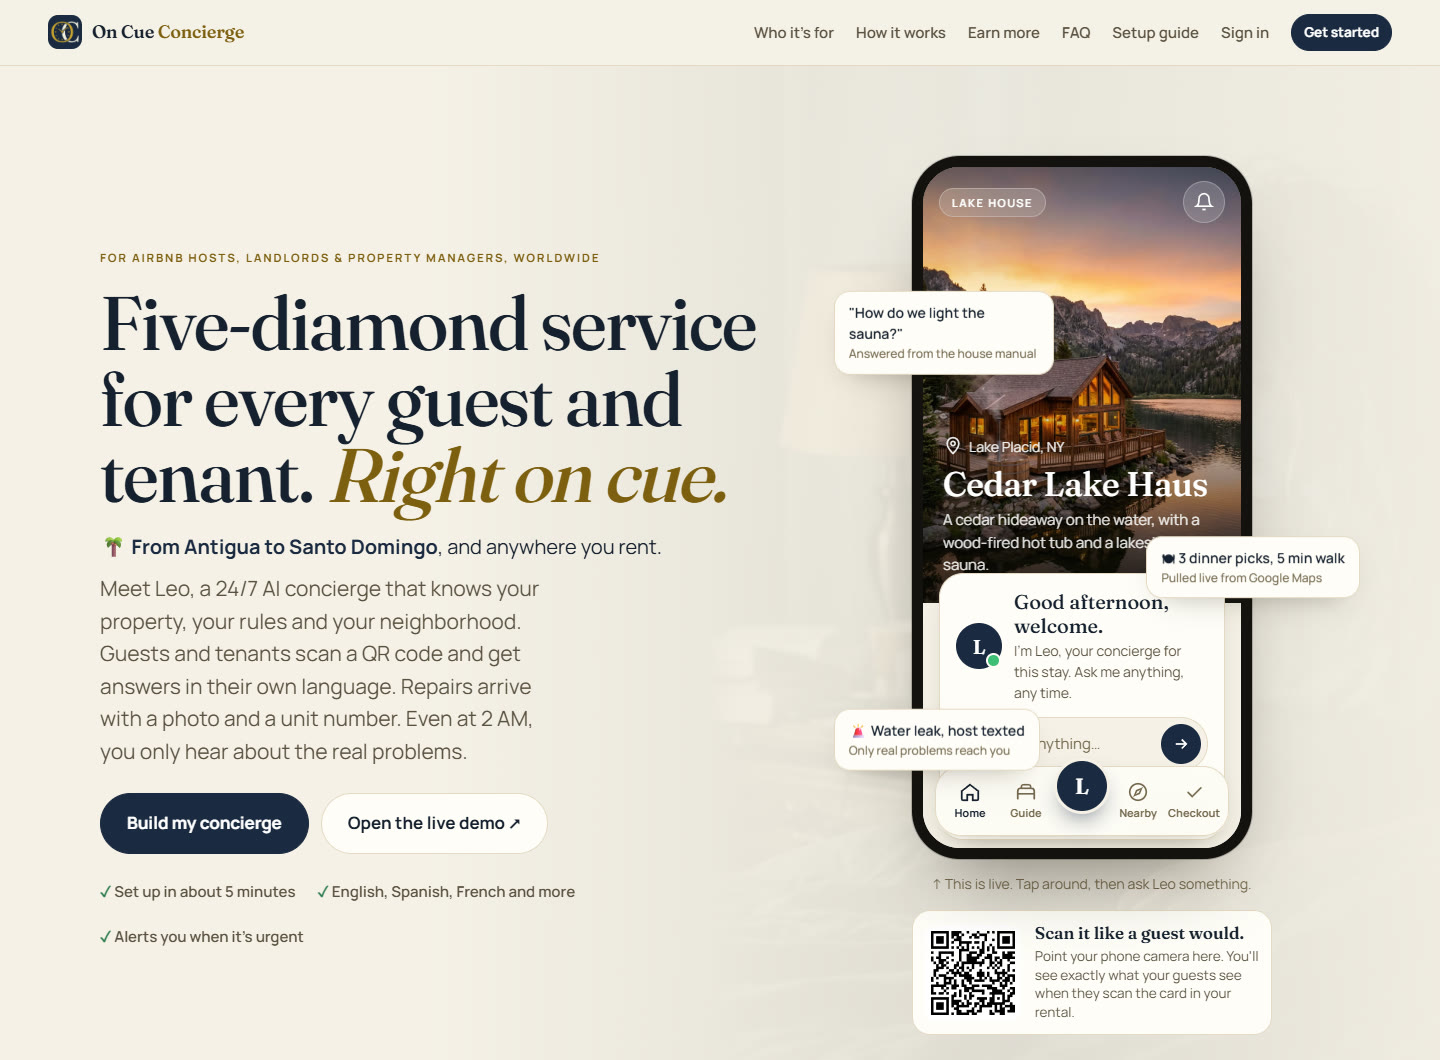
Open the website and click "Get started"
Go to your-site.vercel.app. Click Get started (top right) or Build my concierge.
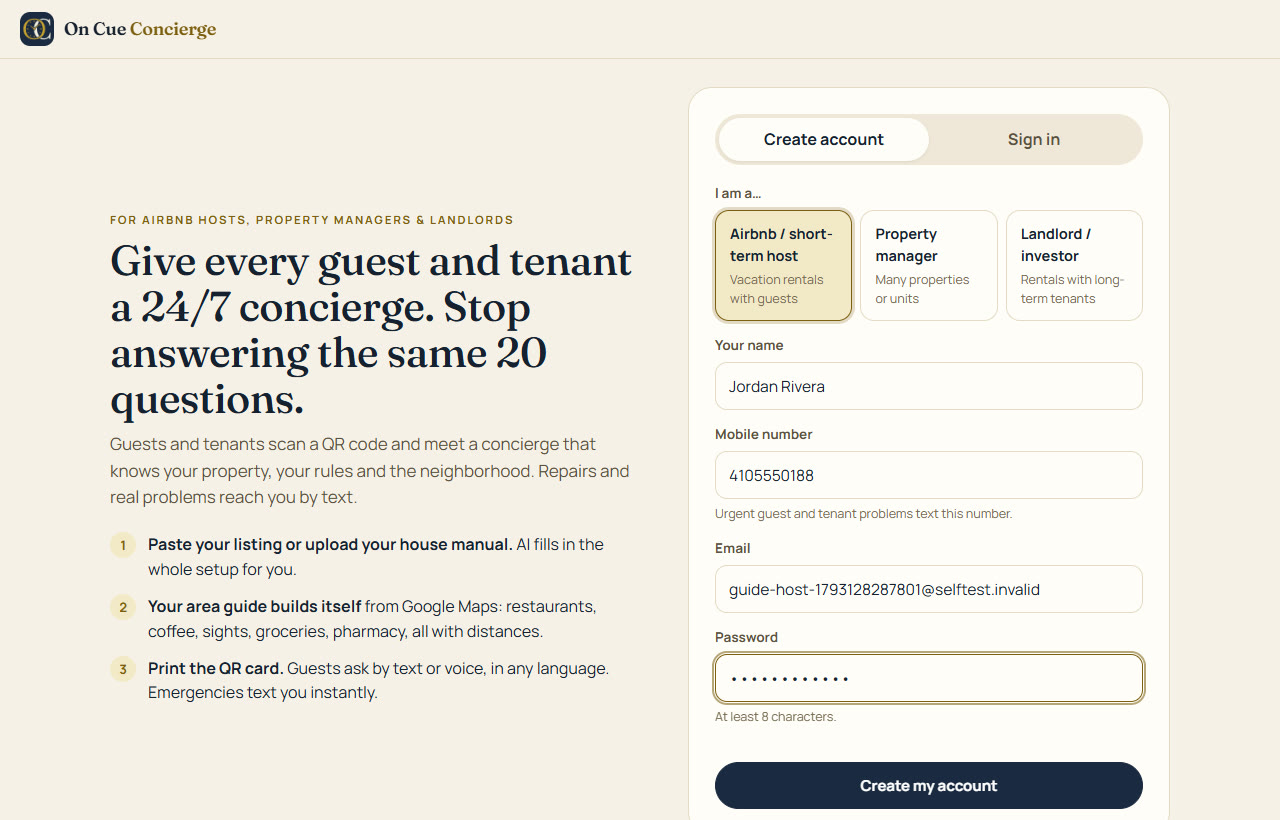
Fill in your details
- I am a…: Airbnb / short-term host (Tracks A and B), property manager (Track D) or landlord / investor (Track C). Landlords and managers start on long-term tenants.
- Your name: guests and tenants see your first name on the welcome note.
- Mobile number: urgent problems text this number.
- Email: your login and where alert emails go.
- Password: at least 8 characters.
Click Create account & build my concierge.
Pick who stays there and paste what you already have
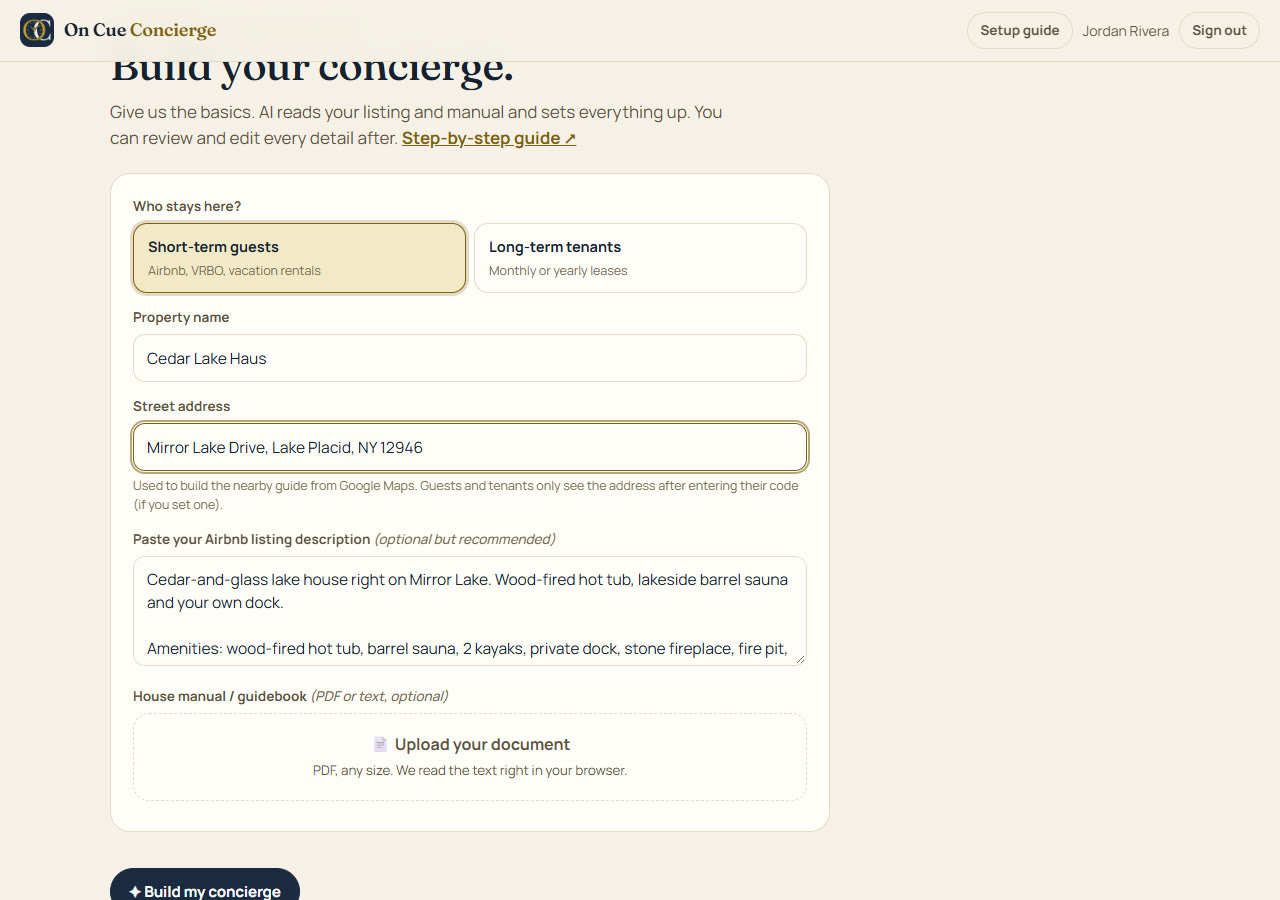 12345
- 1Who stays here?: Short-term guests (Tracks A and B) or Long-term tenants (Tracks C and D).
- 2Property name: what guests see in big letters, e.g. "Cedar Lake Haus".
- 3Street address: used to build your nearby guide from Google Maps.
- 4Listing description: paste your listing text (description, amenities, house rules), or for tenants your building rules. Track A shows exactly what to copy.
- 5House manual or resident handbook: click to upload your PDF. It's read right in your browser.
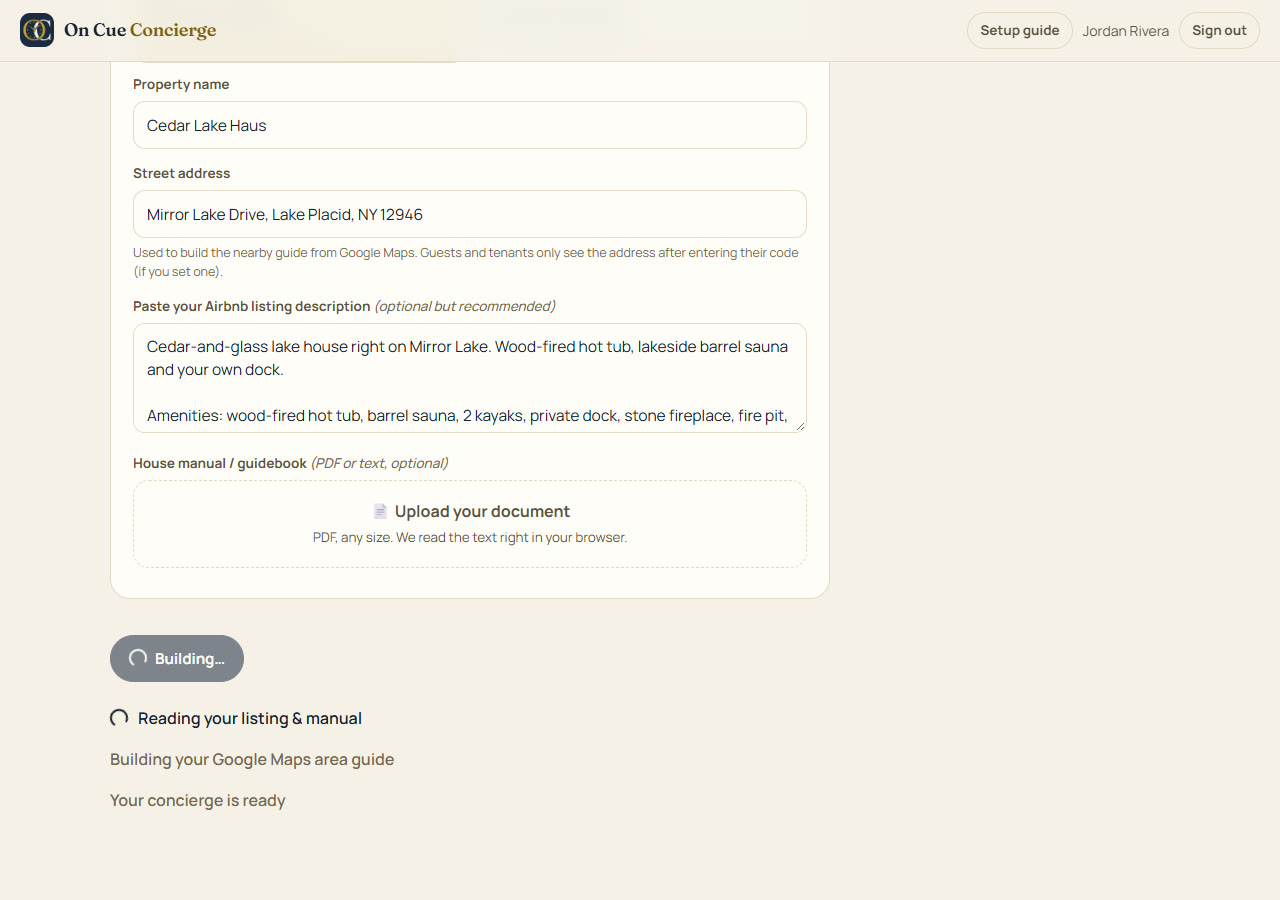
Click "Build my concierge" and wait about a minute
You'll see three steps tick off:
- Reading your listing & manual
- Building your Google Maps area guide (about 50 to 60 real places)
- Your concierge is ready
You land on your QR code page
Your concierge is already live. You get a guest link and QR code that belong to this property only. Before you print anything, follow your track to check the details.
Your properties list
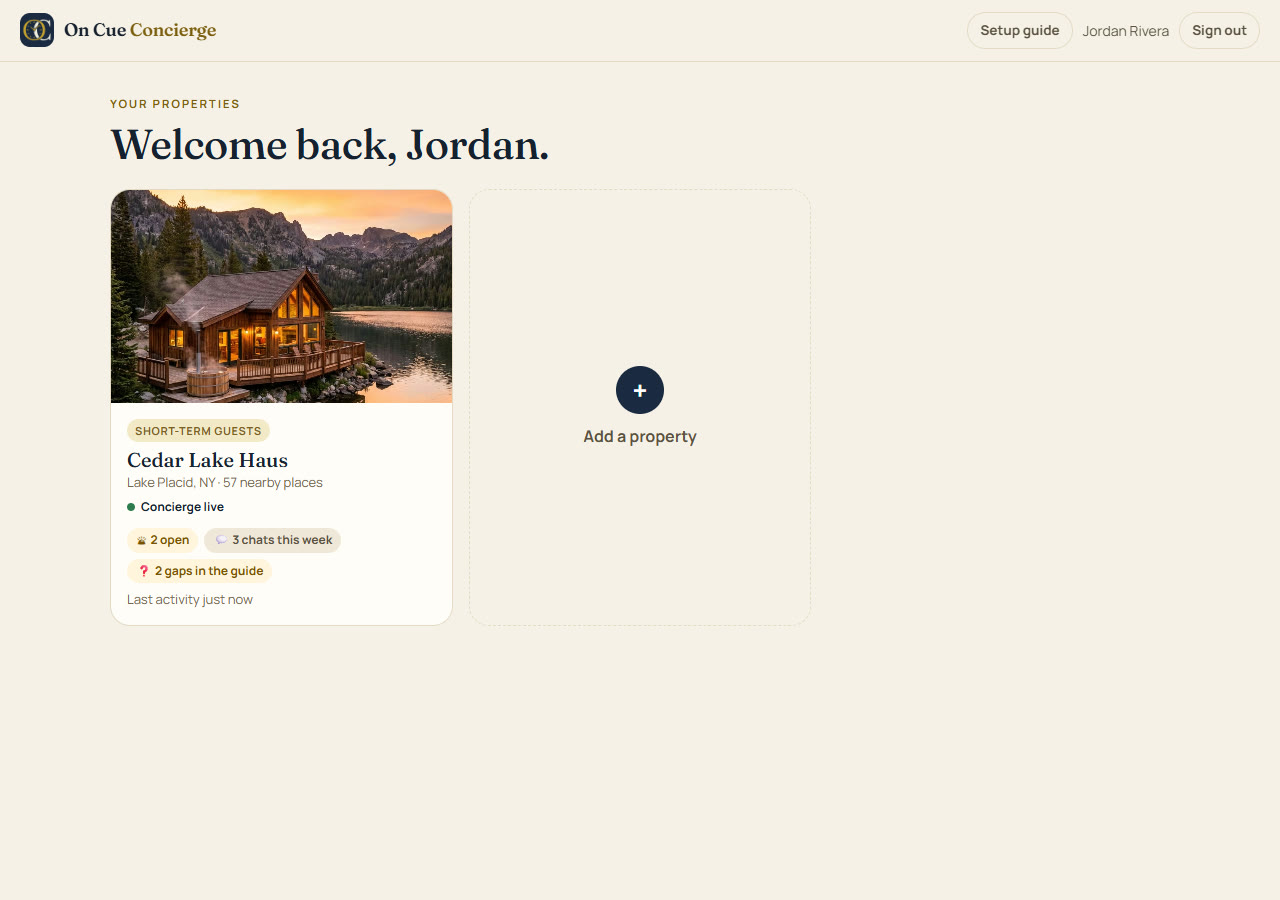
Click the logo or All properties any time to see every home you manage. Click a card to edit it, or Add a property for the next one. Each property gets its own QR code.
Each card has a health strip: open alerts or requests (red when one is urgent), chats this week, and gaps in the guide (questions Leo wasn't sure about). Fix the red ones first.
Follow your setup score
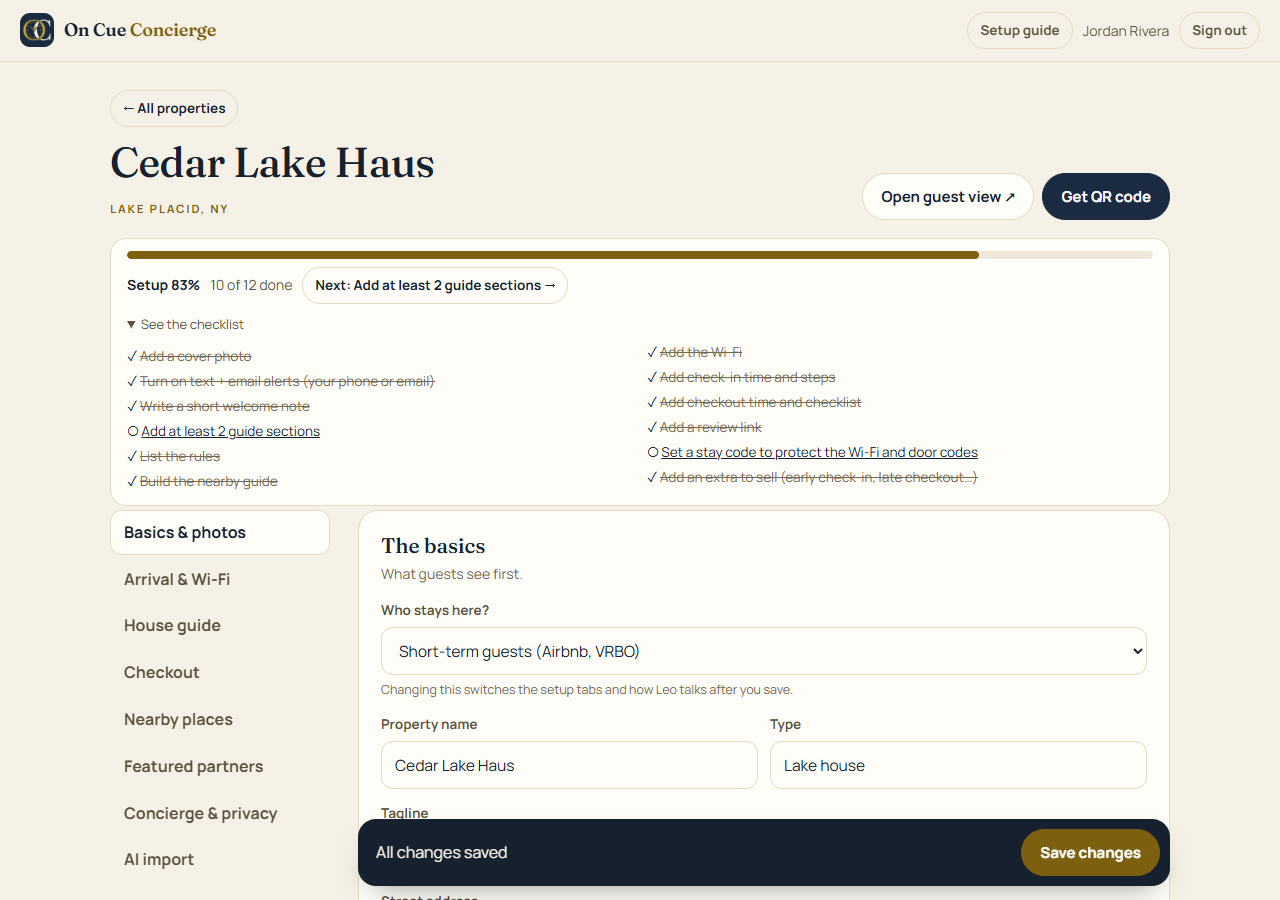
Under each property name is a setup score: 12 quick checks that make Leo smarter (cover photo, Wi-Fi, check-in, guide sections, review link, stay code, an extra to sell and more).
 123
- 1Setup bar: how far along you are, e.g. 10 of 12 done.
- 2Next: one click jumps to the tab that fixes the next missing item.
- 3See the checklist: every check, with a link to its tab. Done items are crossed out.
How you get alerted
Leo texts and emails you instantly when a guest or tenant needs a person:
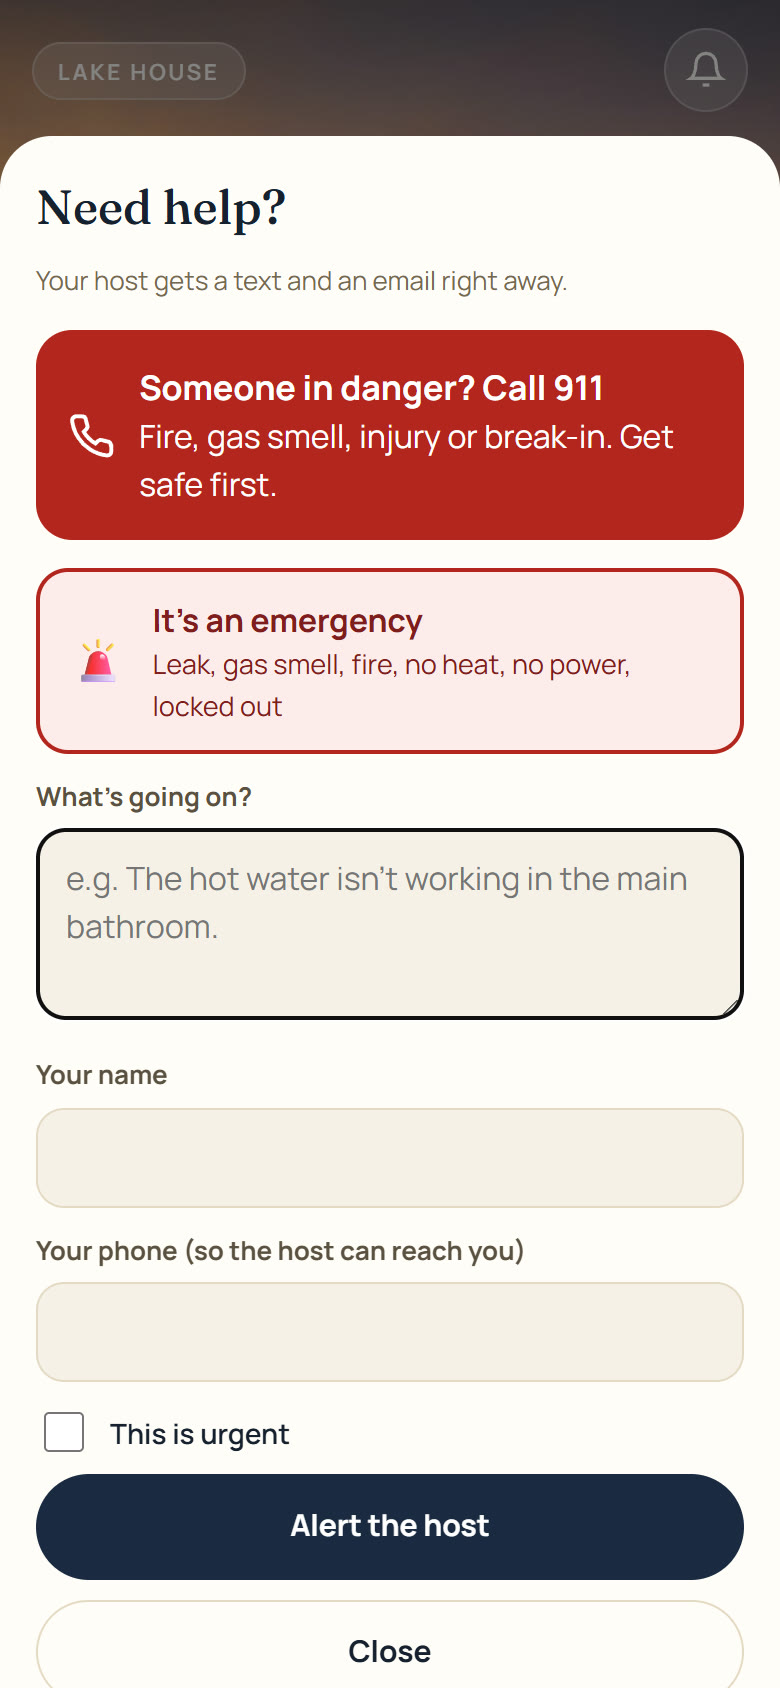
- There's an emergency: fire, gas smell, flooding, injury, break-in. He tells the guest to call 911 first.
- Something is broken and basic troubleshooting didn't fix it (Wi-Fi, heat, AC, hot water, appliances).
- A guest is locked out, or there's a noise, pest or cleanliness issue.
- A guest wants something only you can approve: early check-in, late checkout, extra guests, pets.
- A guest asks for you or presses Alert the host. For tenants: every repair request (Tracks C and D).
| You receive | What it contains |
|---|---|
| Text message | 🚨 URGENT or 🛎, property name, what's wrong, the person's name and phone, a link to the conversation. |
| The same summary plus the last few messages of the chat, with an "Open the conversation" button. |
Use the Inbox
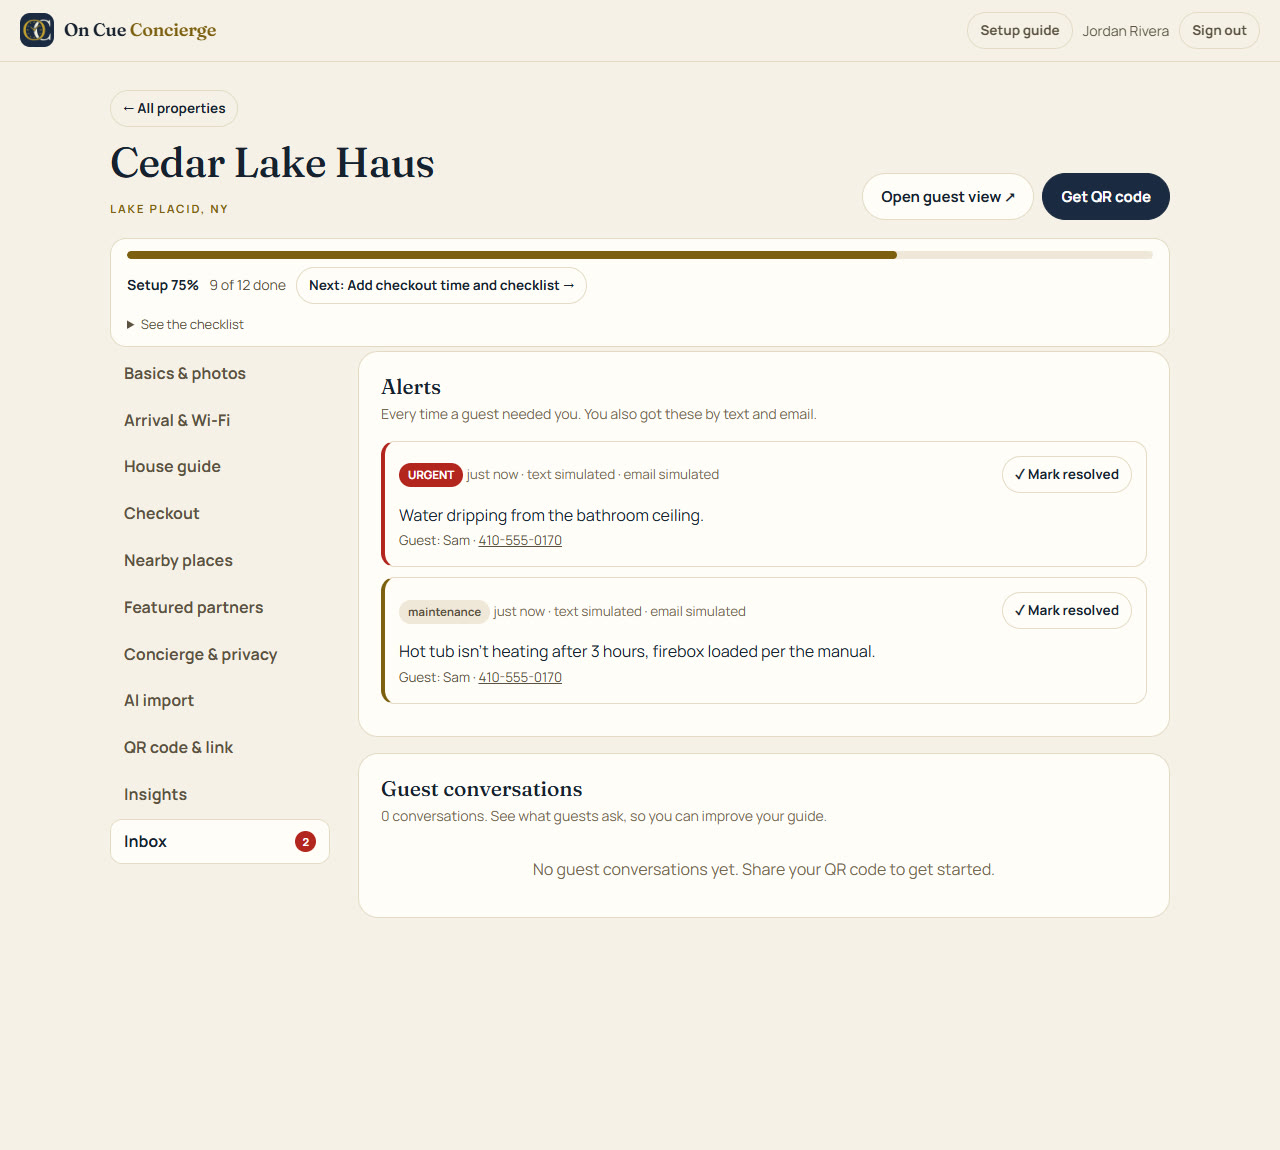
- Alerts: every time a guest needed you. Red = urgent. Click View chat to read the conversation, then ✓ Mark resolved when it's handled.
- Guest conversations: every chat, so you can see what guests really ask and add those answers to your guide.
- The red number on the Inbox tab = open alerts.
Now pick your track
Not sure? Short-term guests (nights or weeks) = Track A or B. Tenants on a lease = Track C or D. Managers with many units: do Track C first, then Track D.
If you host on Airbnb
Your guests get a concierge on their phone from the moment they book. These steps set up every tab a guest uses, then send happy guests to your Airbnb review.
Copy your Airbnb listing into Leo
Leo learns your home from your listing text. Open your listing on airbnb.com (or the Airbnb app → Listings), then copy these parts:
- The description and The space
- What this place offers (amenities)
- House rules, check-in and checkout times
- Your guidebook or house manual if you have one (or upload the PDF)
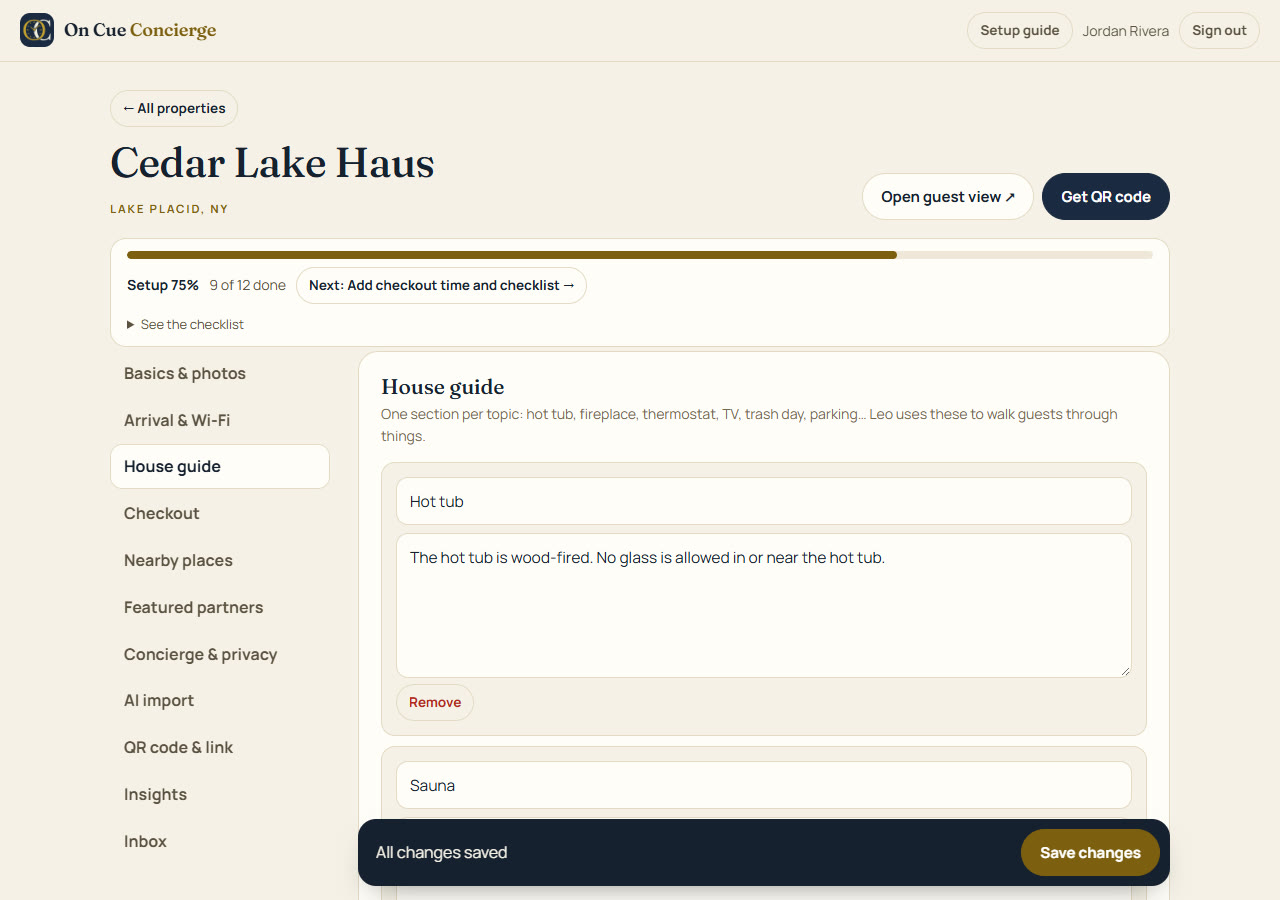
Paste it on the build screen (Part 1, step 3), or later on the AI import tab, and click ✦ Fill my setup with AI. It fills empty fields only, unless you switch on Replace existing fields.
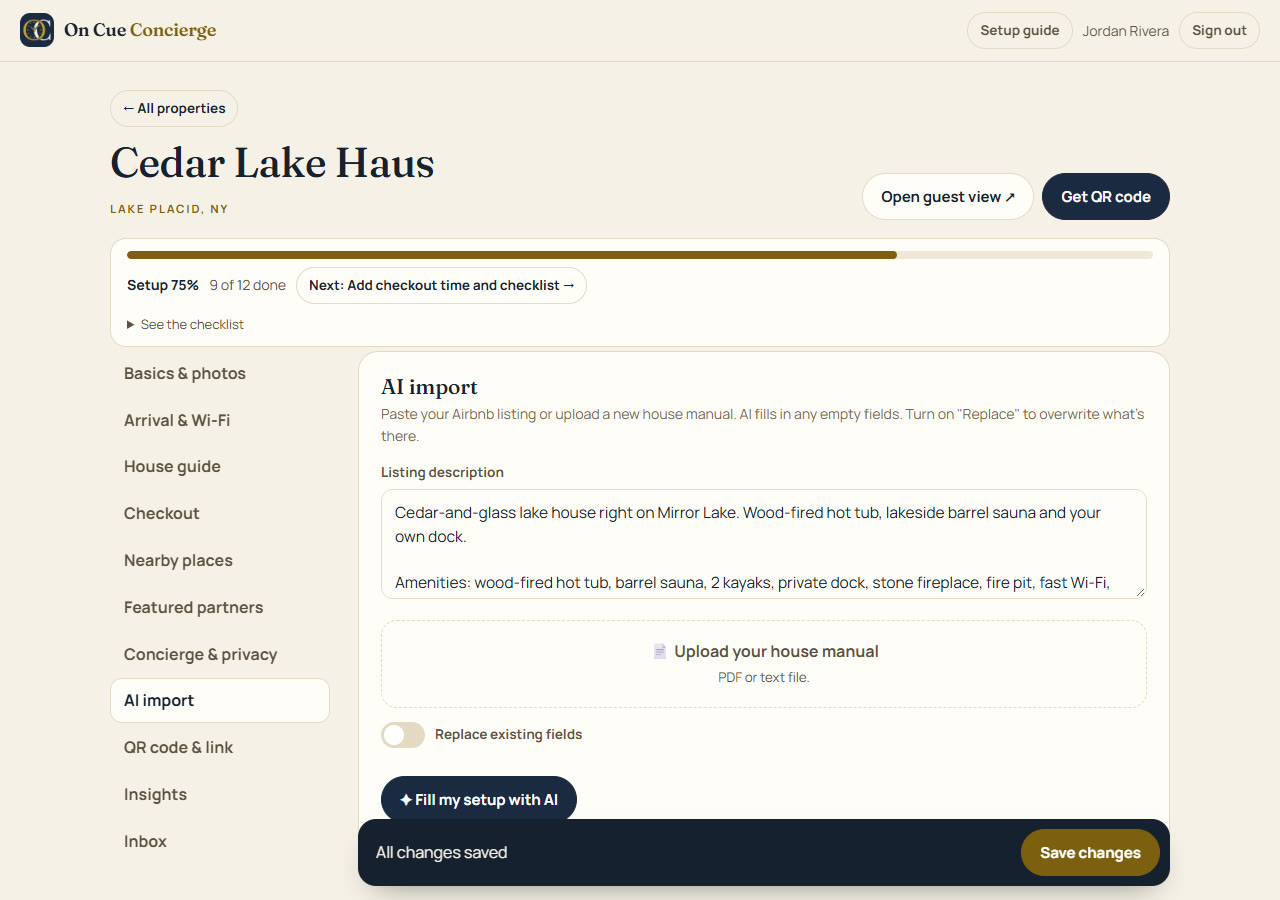
Basics & photos
- Check the name, type (Lake house, Condo…) and tagline.
- Click + Add photos and choose 3 to 8 pictures. They're resized automatically.
- Click any photo to make it the cover. Click × to remove one.
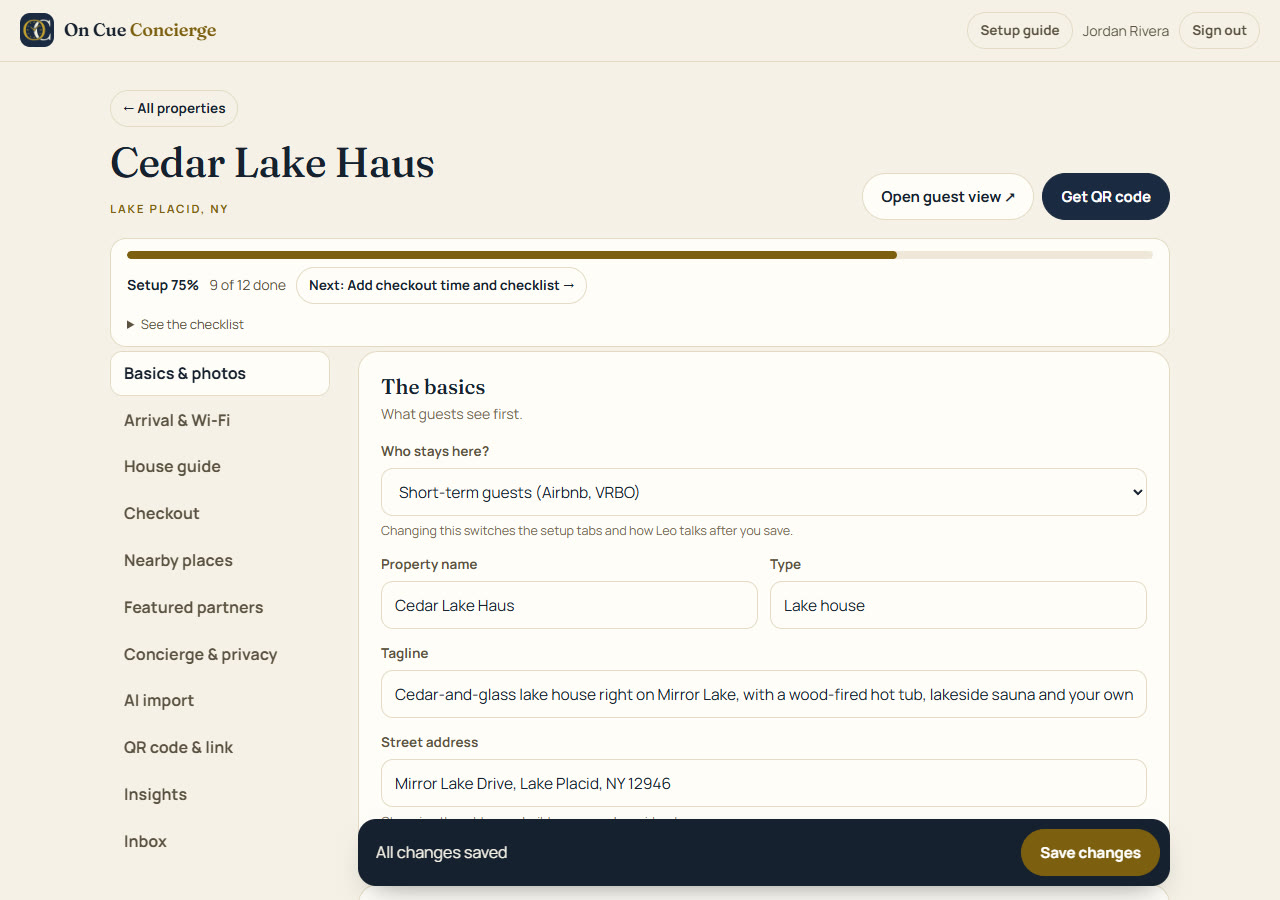
Arrival & Wi-Fi
- Check-in time, e.g. 4:00 PM.
- Arrival instructions: parking, which door, first things to know.
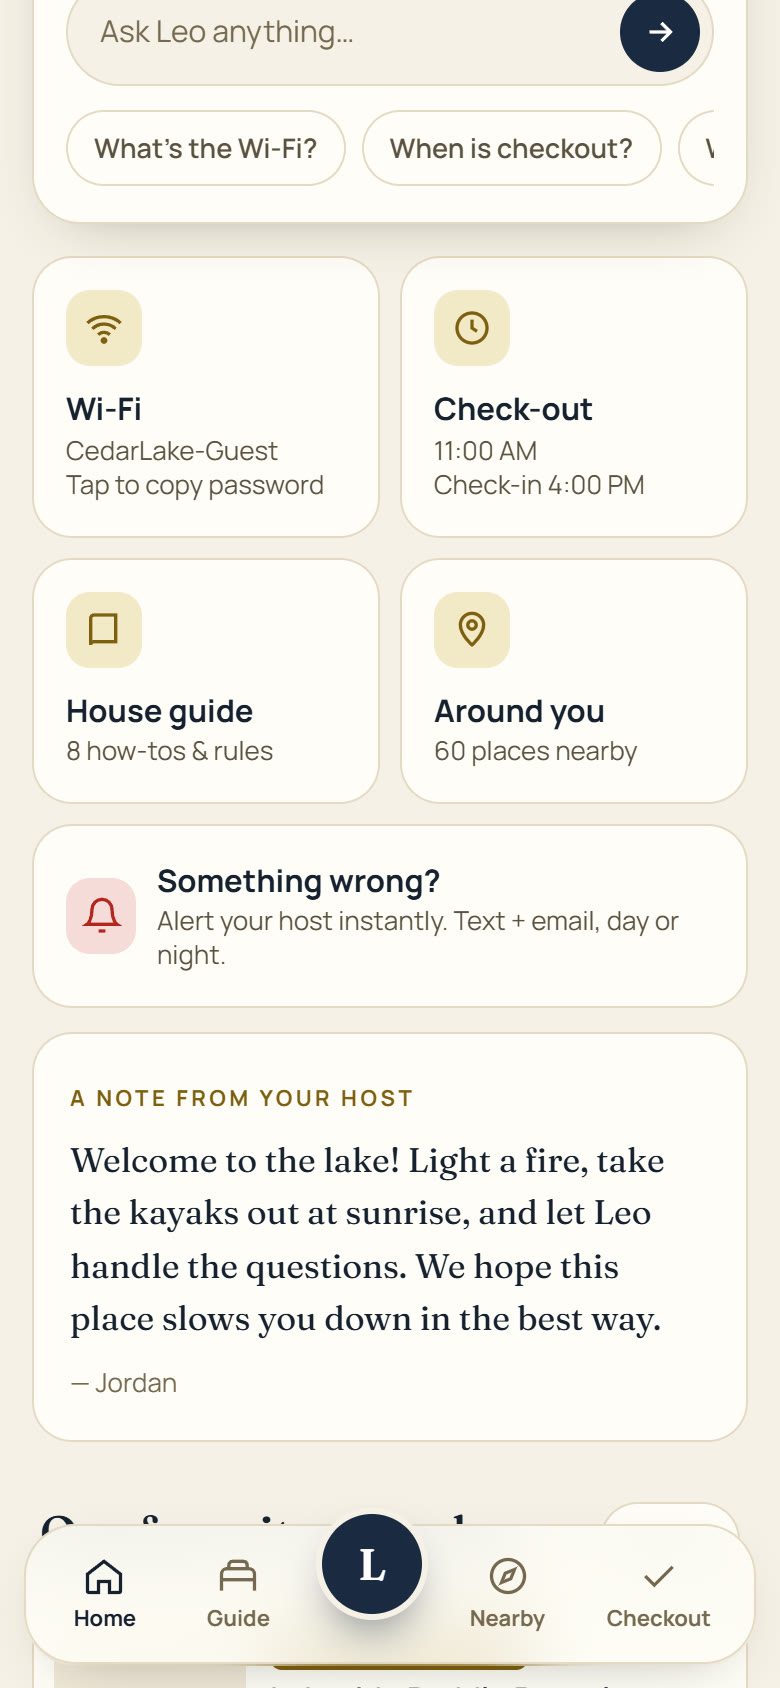
- Wi-Fi network name and password. Guests can tap to copy it.
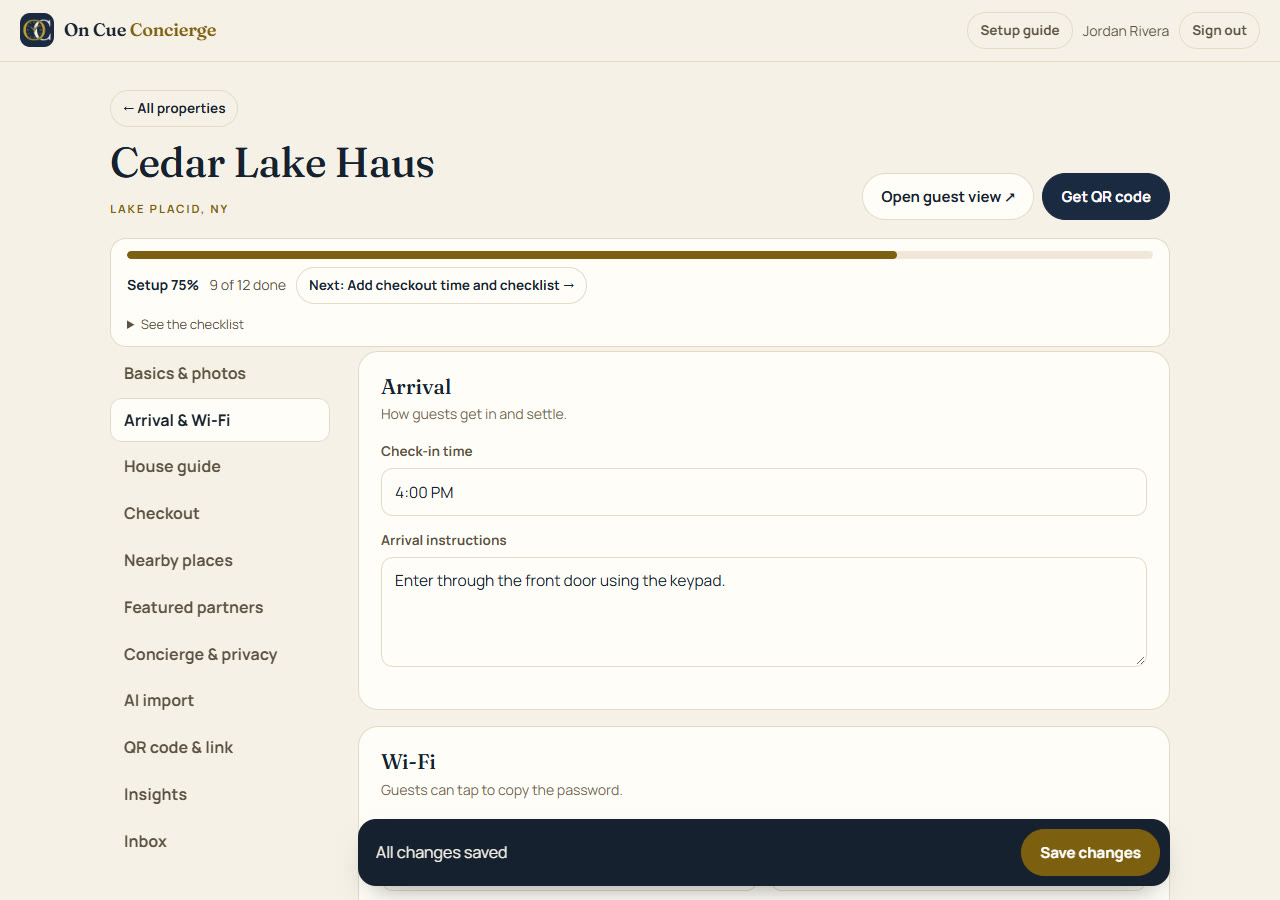
House guide
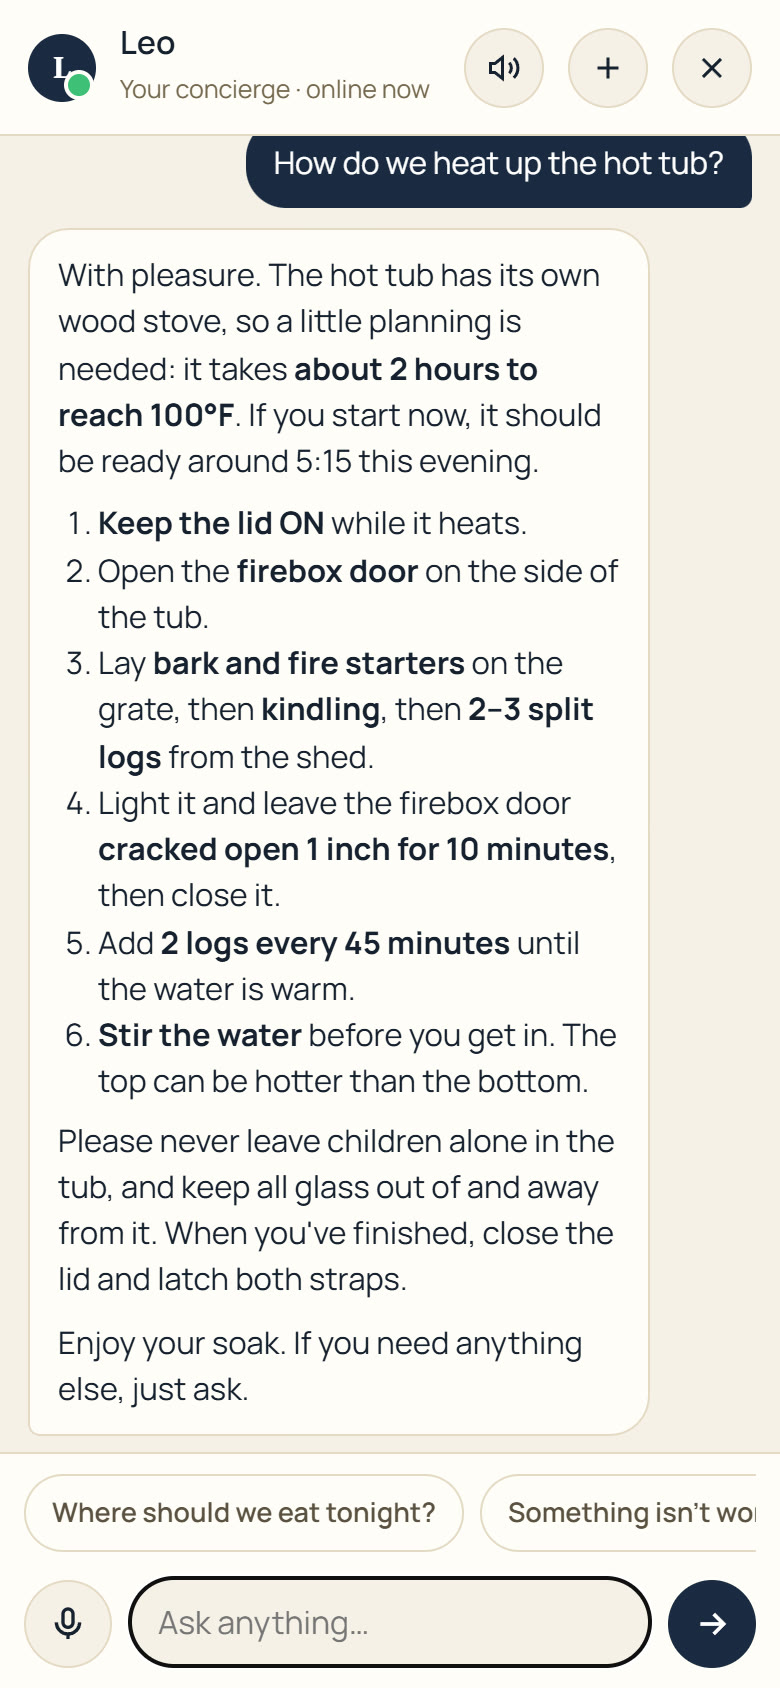
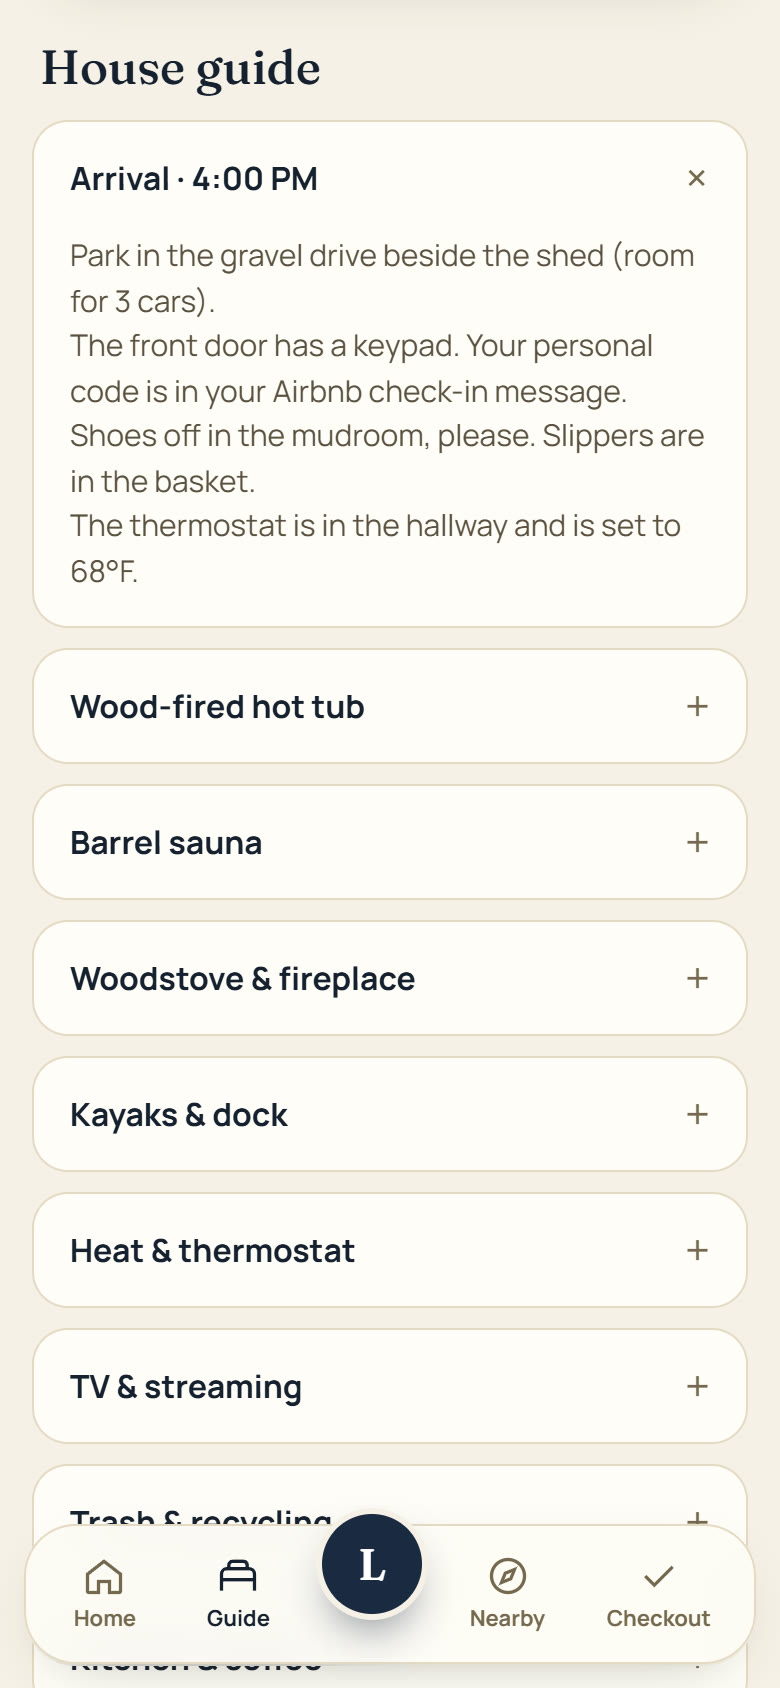
One box per topic: hot tub, fireplace, thermostat, TV, trash day, parking. Leo uses these to walk guests through things step by step.
- Click + Add for a new topic.
- Write instructions as numbered steps when it's a "how to".
- Below that: House rules and Amenities (one per line), and Common questions.
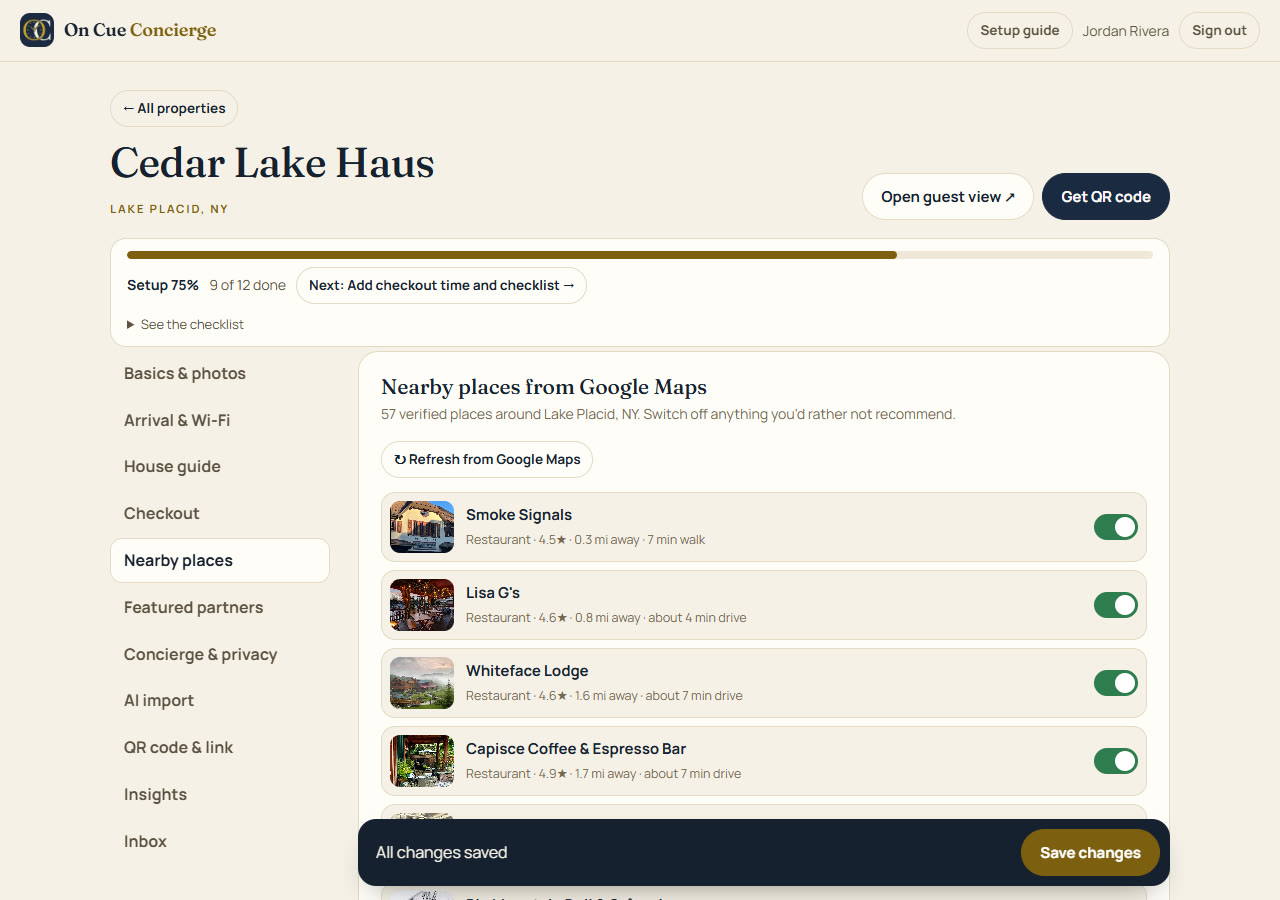
Your area guide (nearby places)
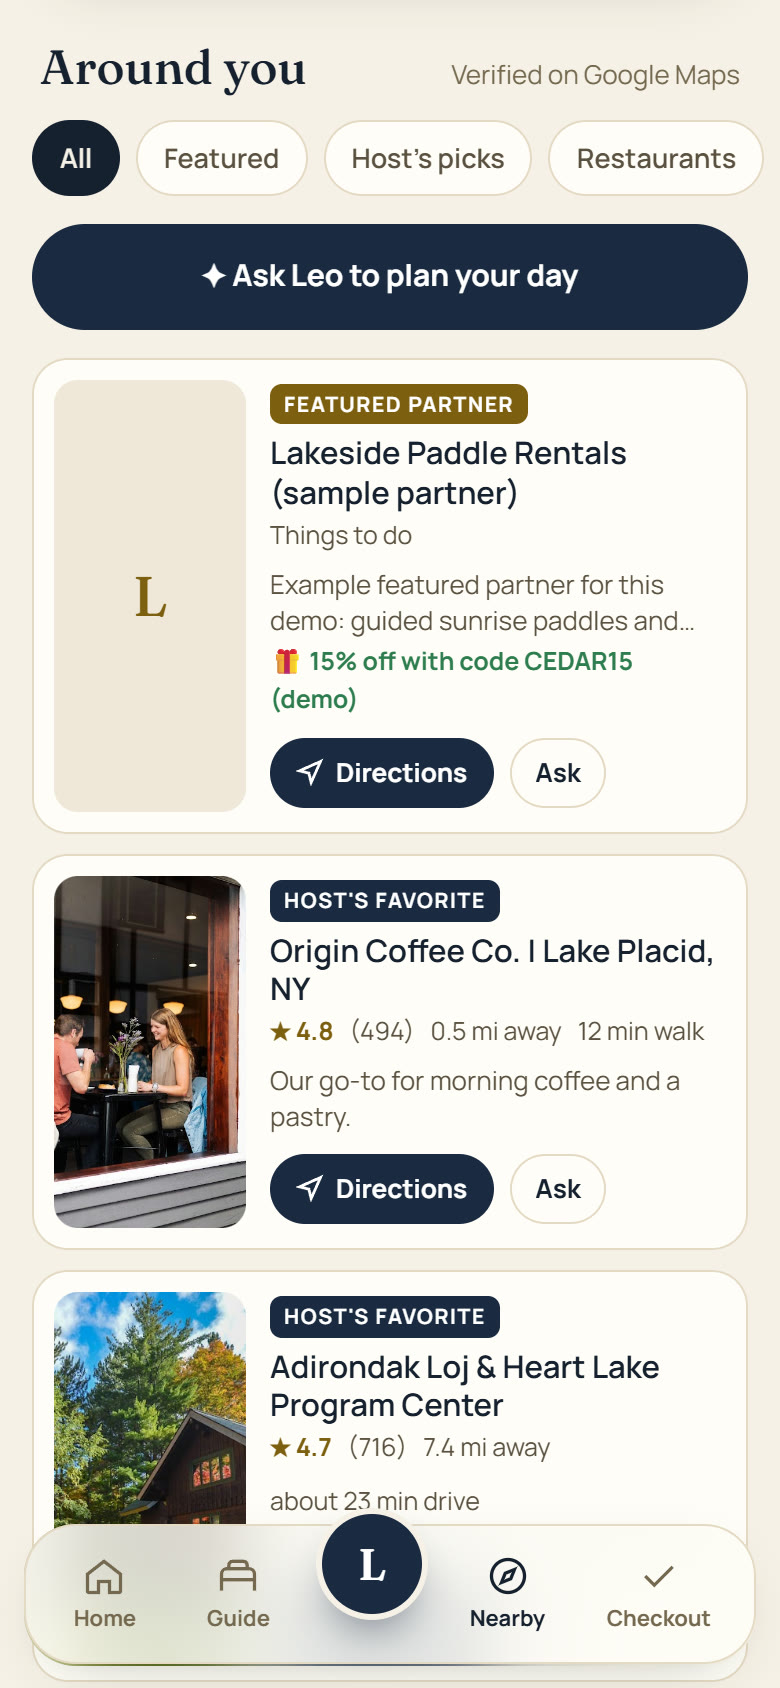
Your area guide is built from Google Maps: restaurants, coffee, bars, groceries, shopping, sights, outdoors, things to do, pharmacy, hospital and gas, each with rating, photo and walk or drive time.
- Switch off anything you'd rather not recommend.
- Click ↻ Refresh from Google Maps to update the list.
- Scroll down to Your personal favorites and add your own picks. They get a "Host's favorite" badge.
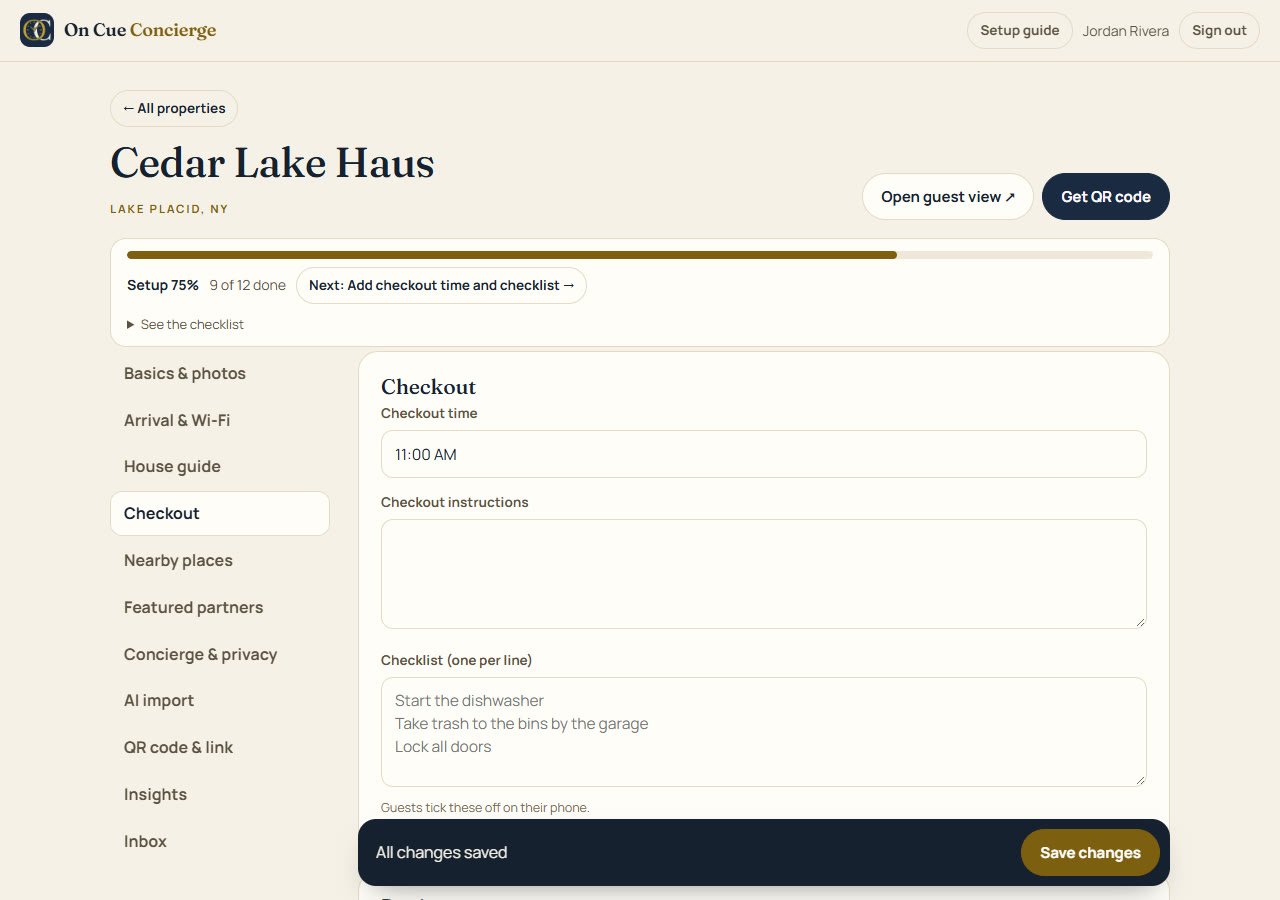
Checkout list
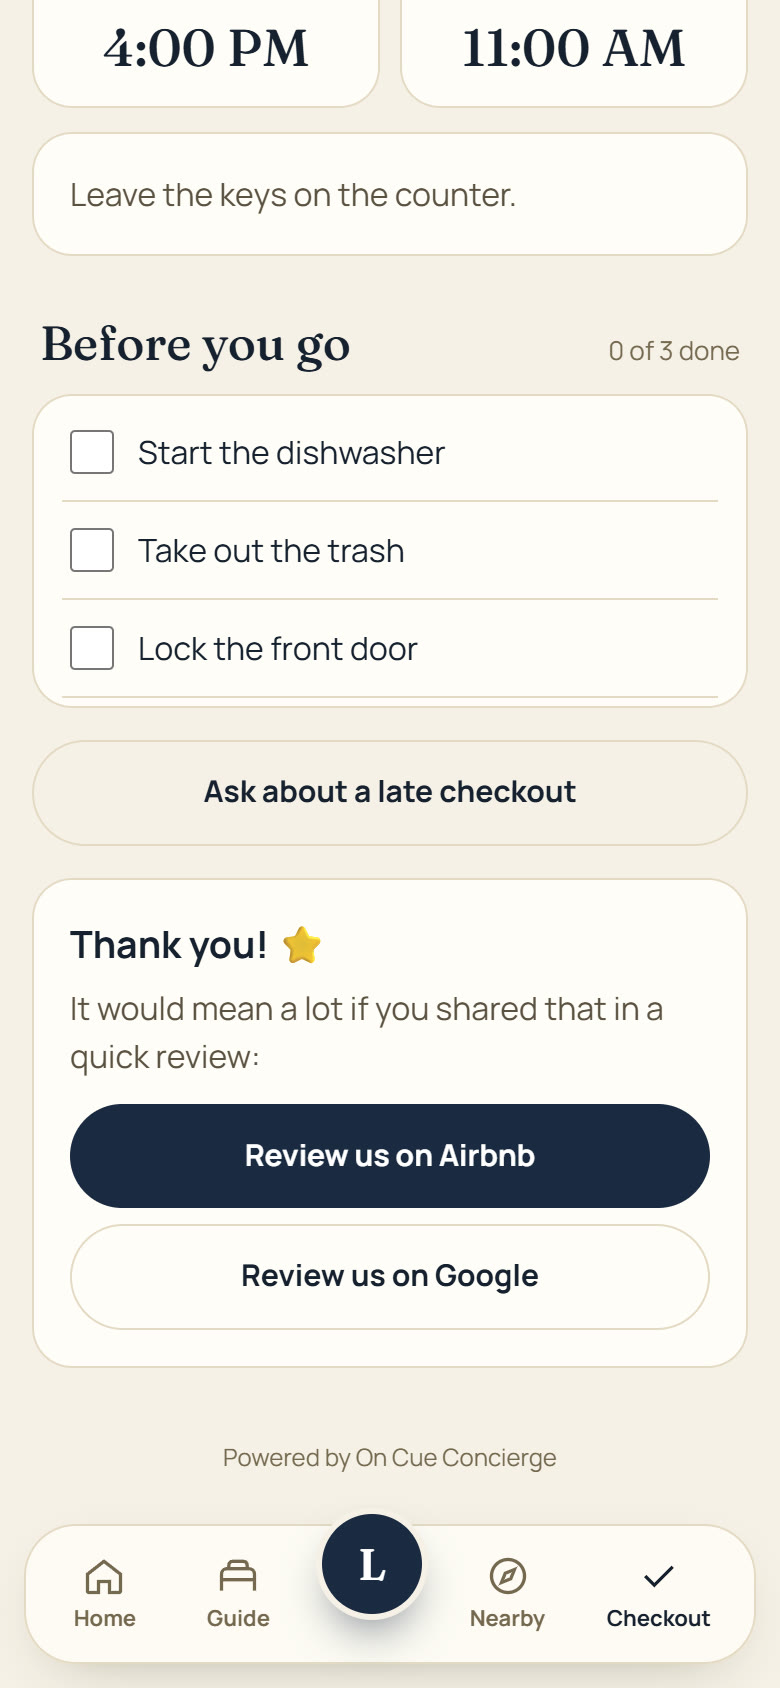
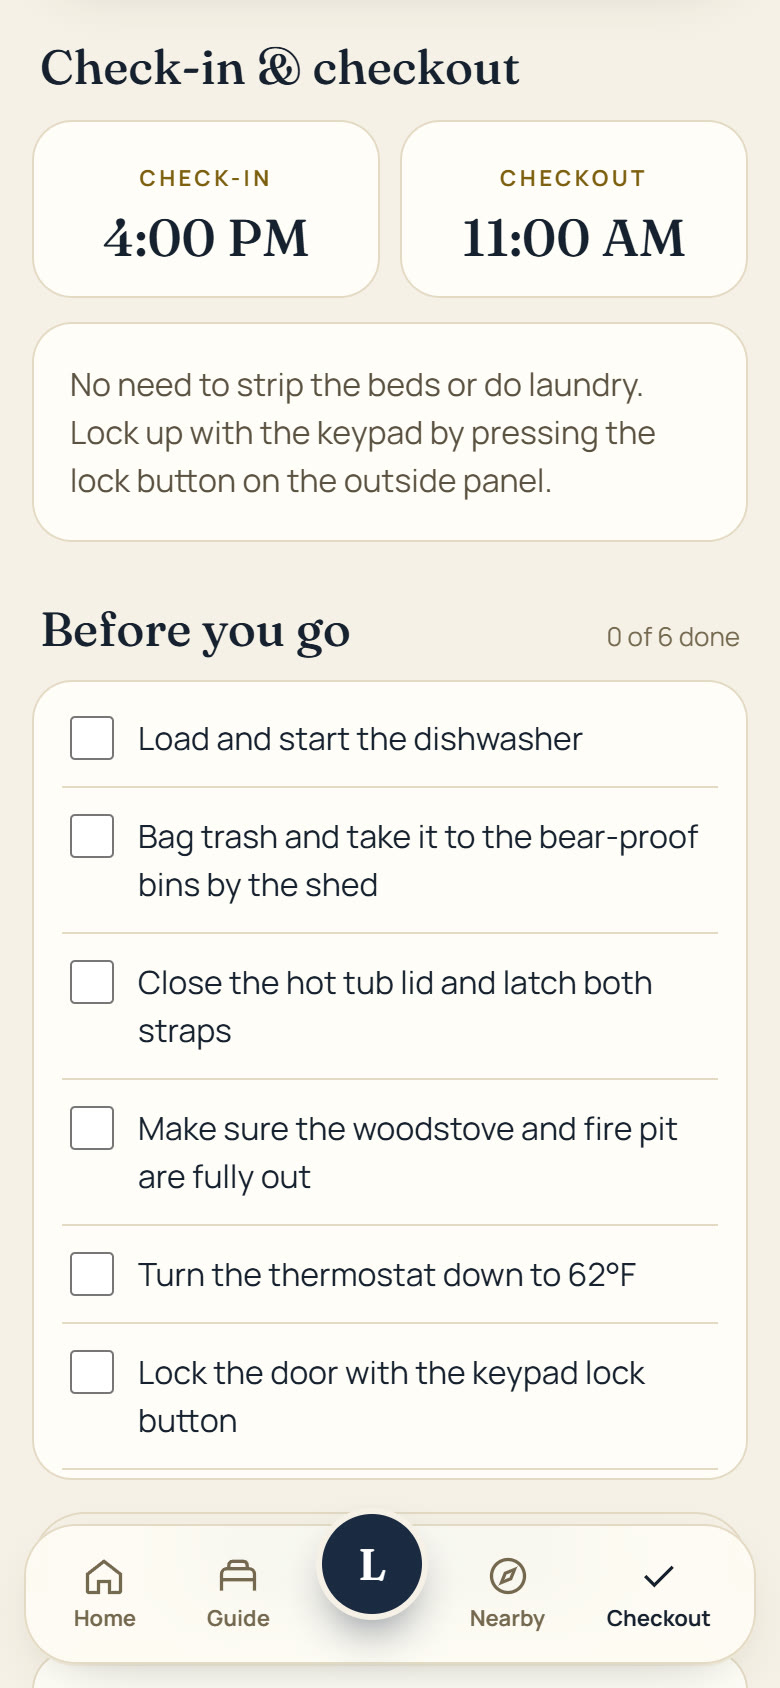
Set the checkout time, any instructions, and a checklist (one task per line). Guests tick the checklist off on their phone.
Send happy guests to your Airbnb review
Lower on the Checkout tab, paste your Airbnb review link (your listing's address, starting with https://). Add Google too if you have a Business Profile.
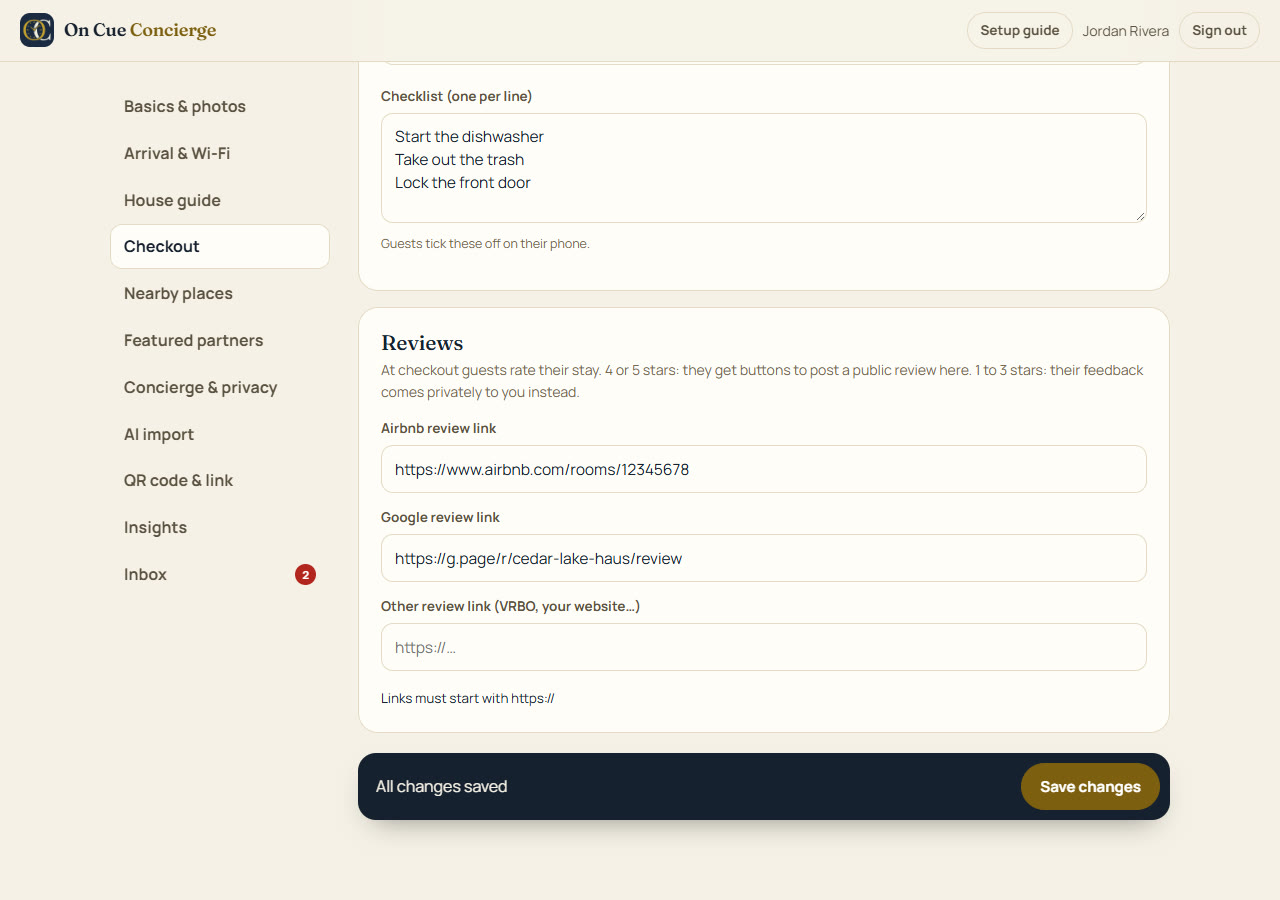 123
- 1Airbnb review link: from your listing page.
- 2Google review link: Google Business Profile → Ask for reviews → copy the link.
- 3Other review link: VRBO, Booking.com or your own site.
At checkout guests rate their stay. 4 or 5 stars → big buttons to your review pages. 1 to 3 stars → a private note that comes only to you, so you can fix it before it becomes a public review.
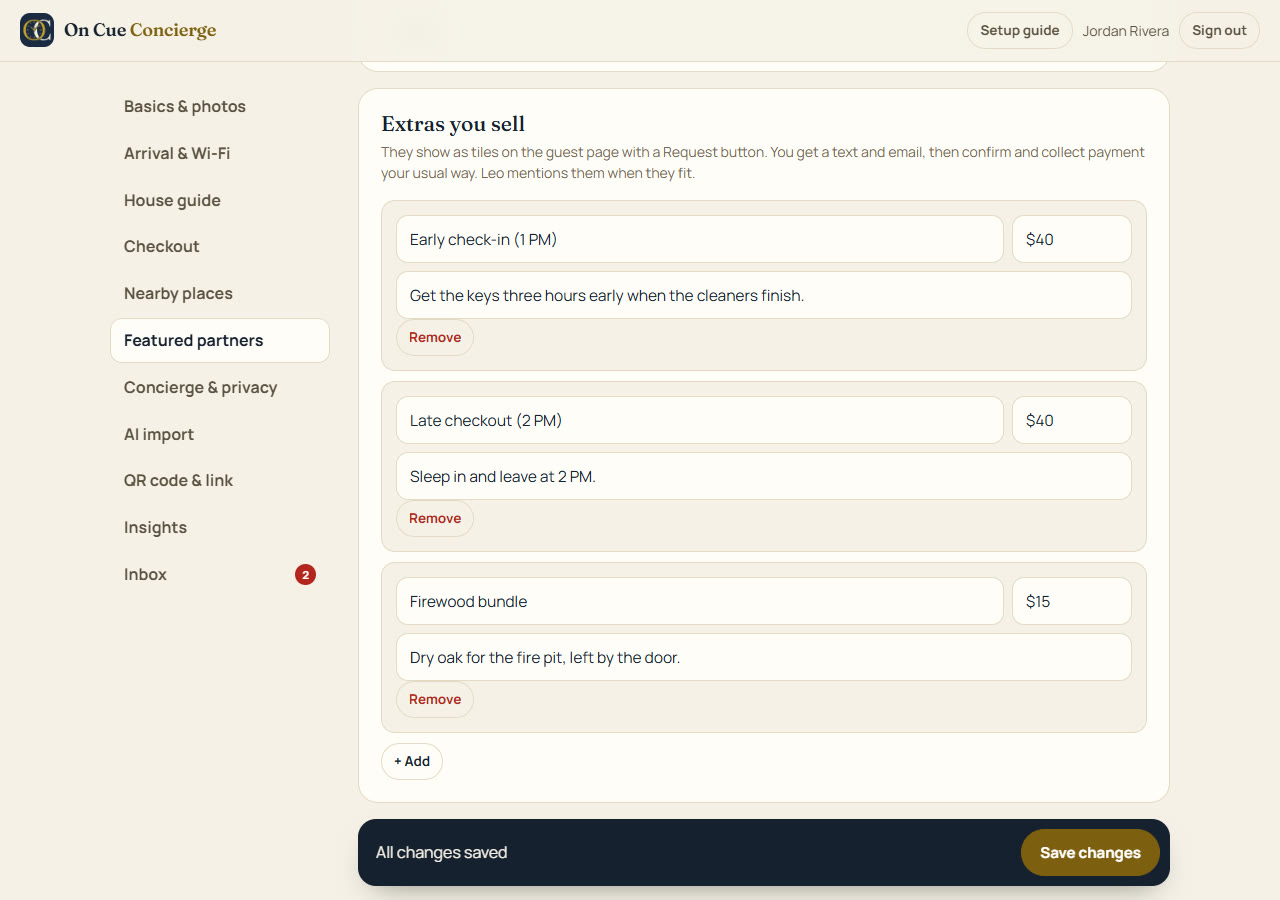
Sell early check-in and late checkout
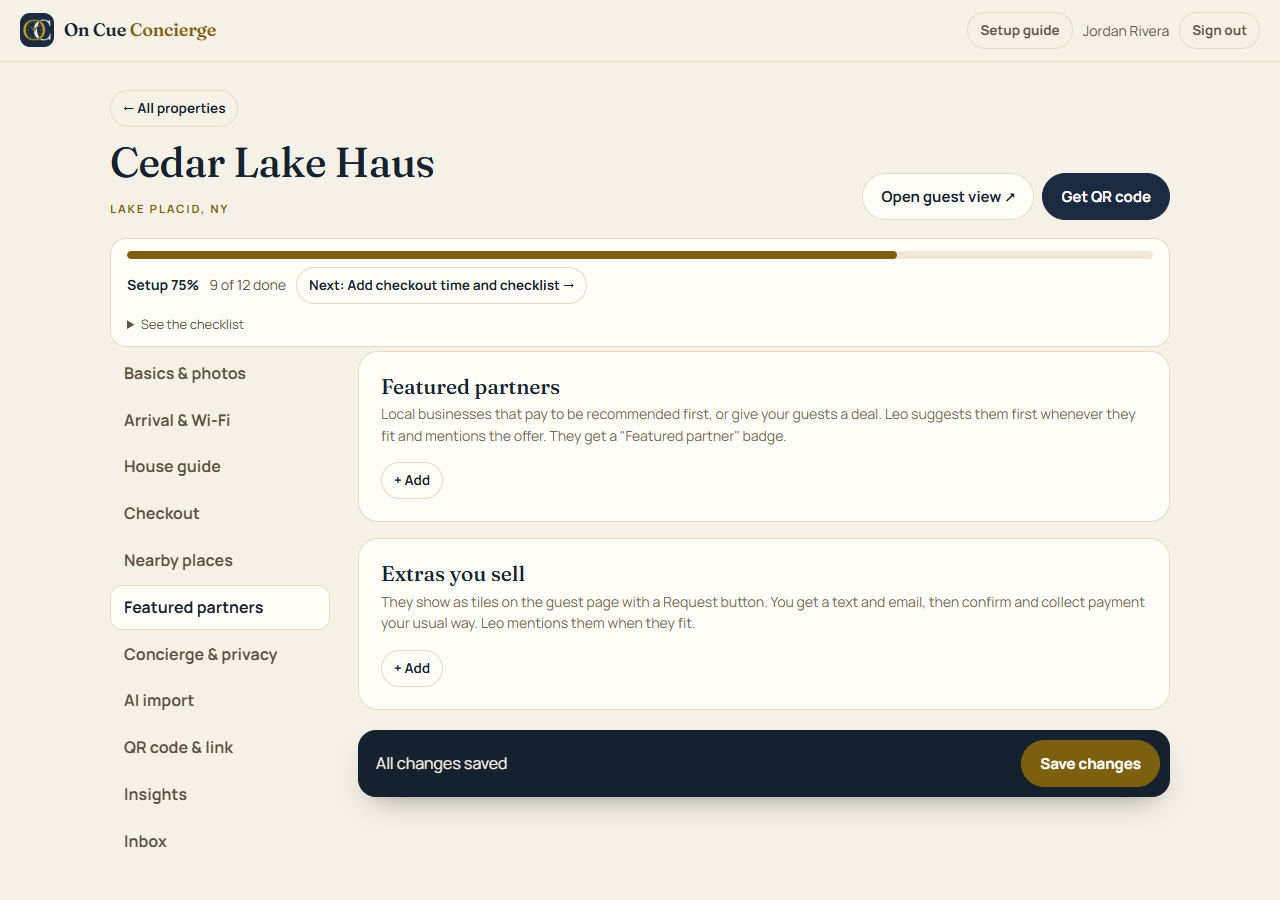
Open Featured partners and scroll to Extras you sell. Add a name, a price and one line: Early check-in (1 PM), Late checkout (2 PM), firewood, a welcome basket.
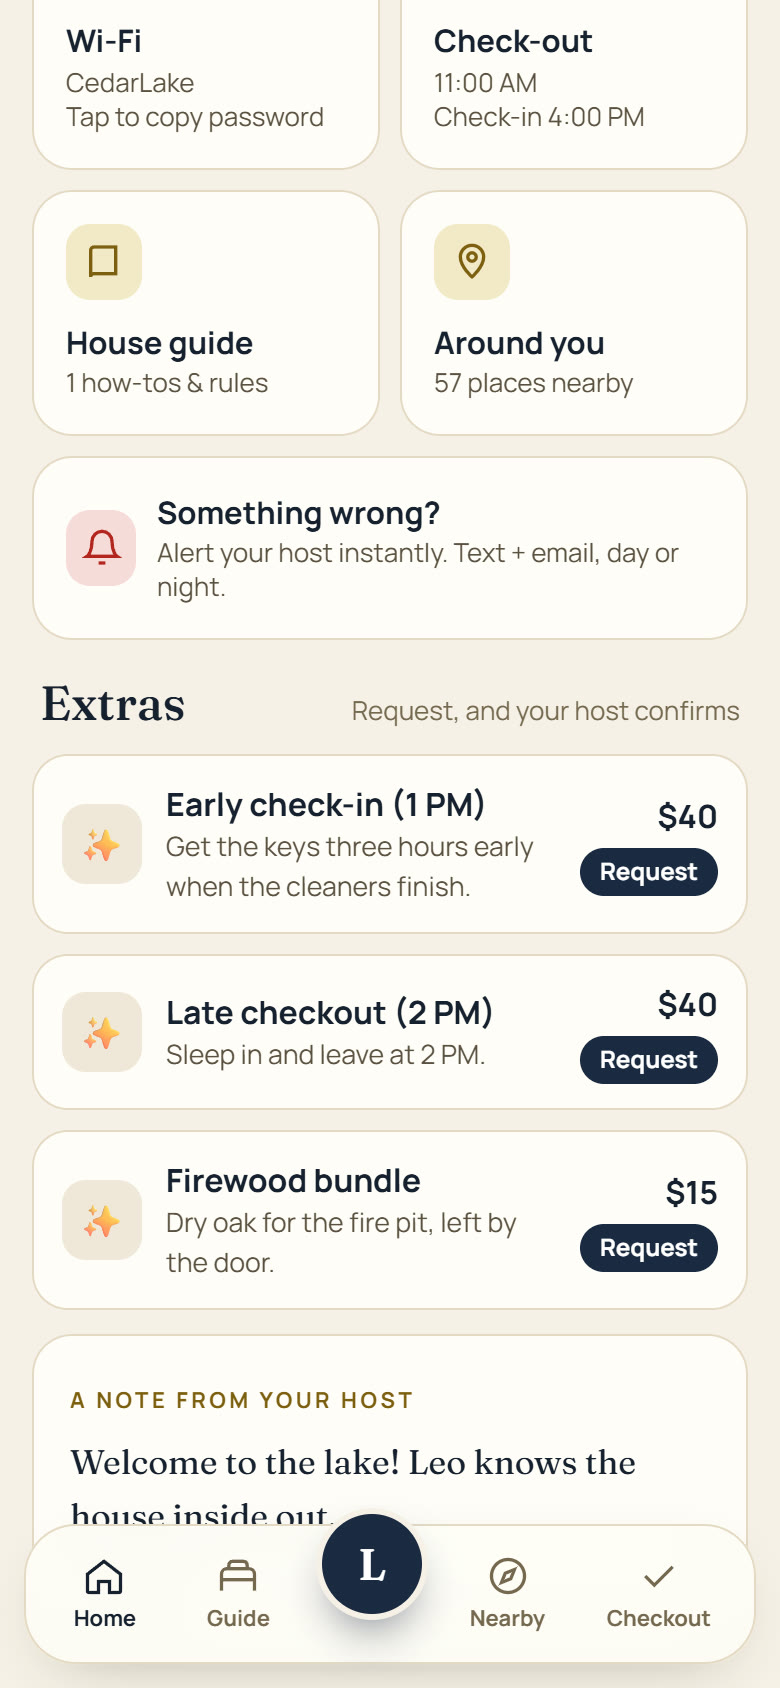
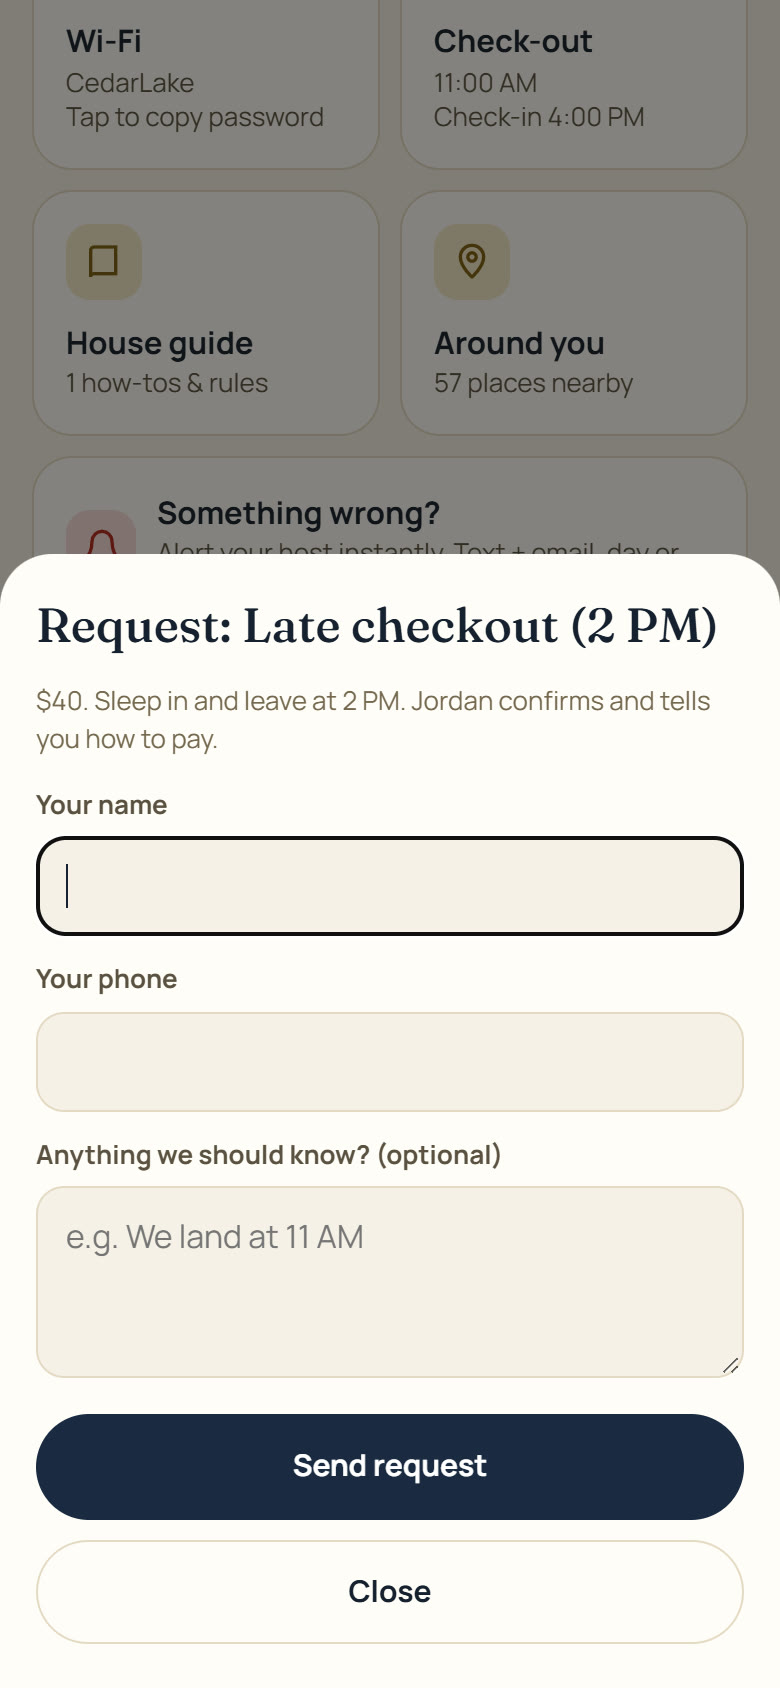
Each extra shows as a tile with a Request button. The guest sends their name and phone, you get an alert, and you confirm and collect payment your usual way.
Concierge & privacy
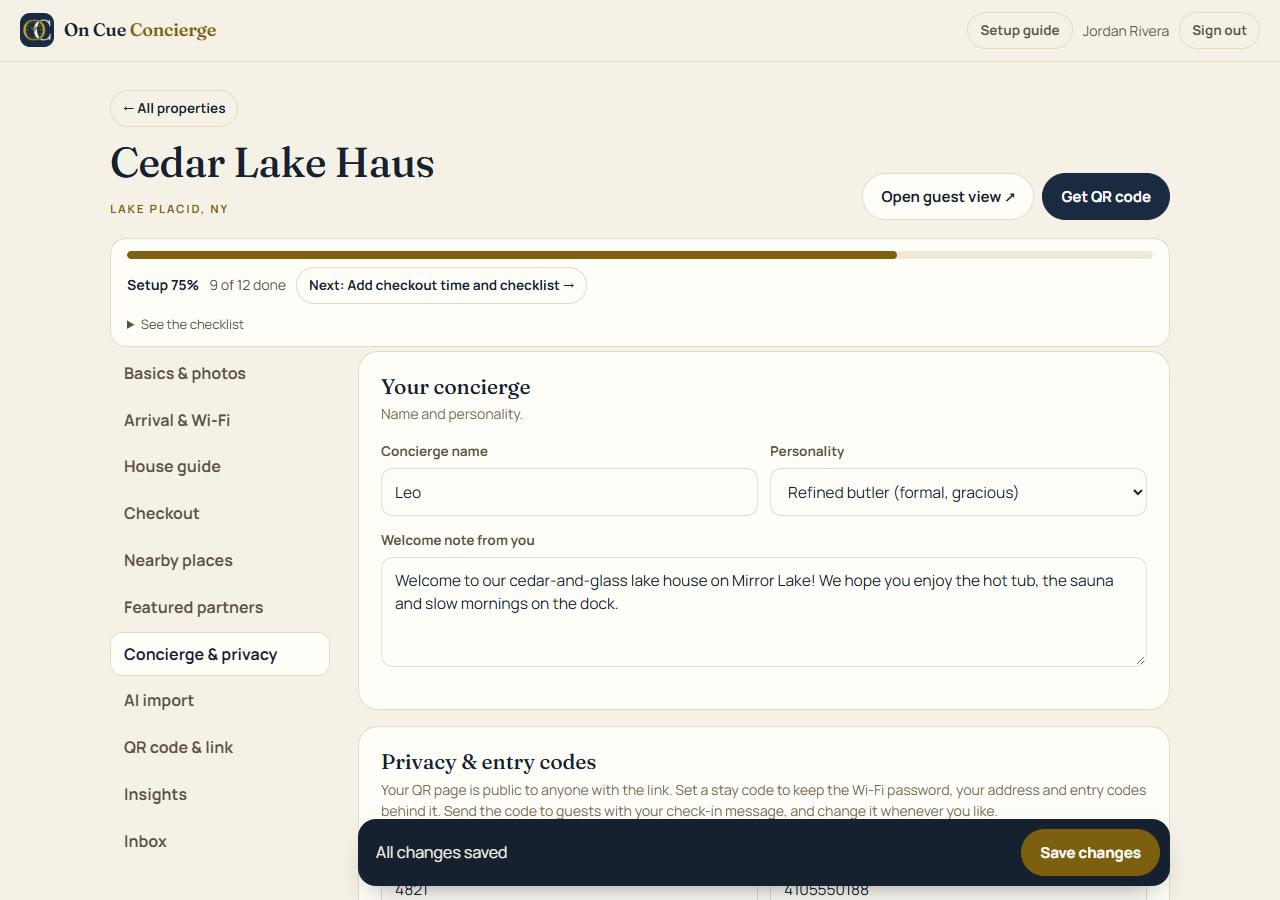 1234
- 1Concierge name: "Leo" by default. Rename it anything.
- 2Personality: Refined butler, Friendly local or Fun host.
- 3Welcome note: a short hello from you, shown on the guest home screen.
- 4Stay code: keeps your Wi-Fi password, address and entry codes private (see below).
Further down: Entry codes & private details, your alert phone and email, the option to show your phone to guests, and Emergency notes (water shutoff, breaker panel, fire extinguisher).
Print the counter card and share the link
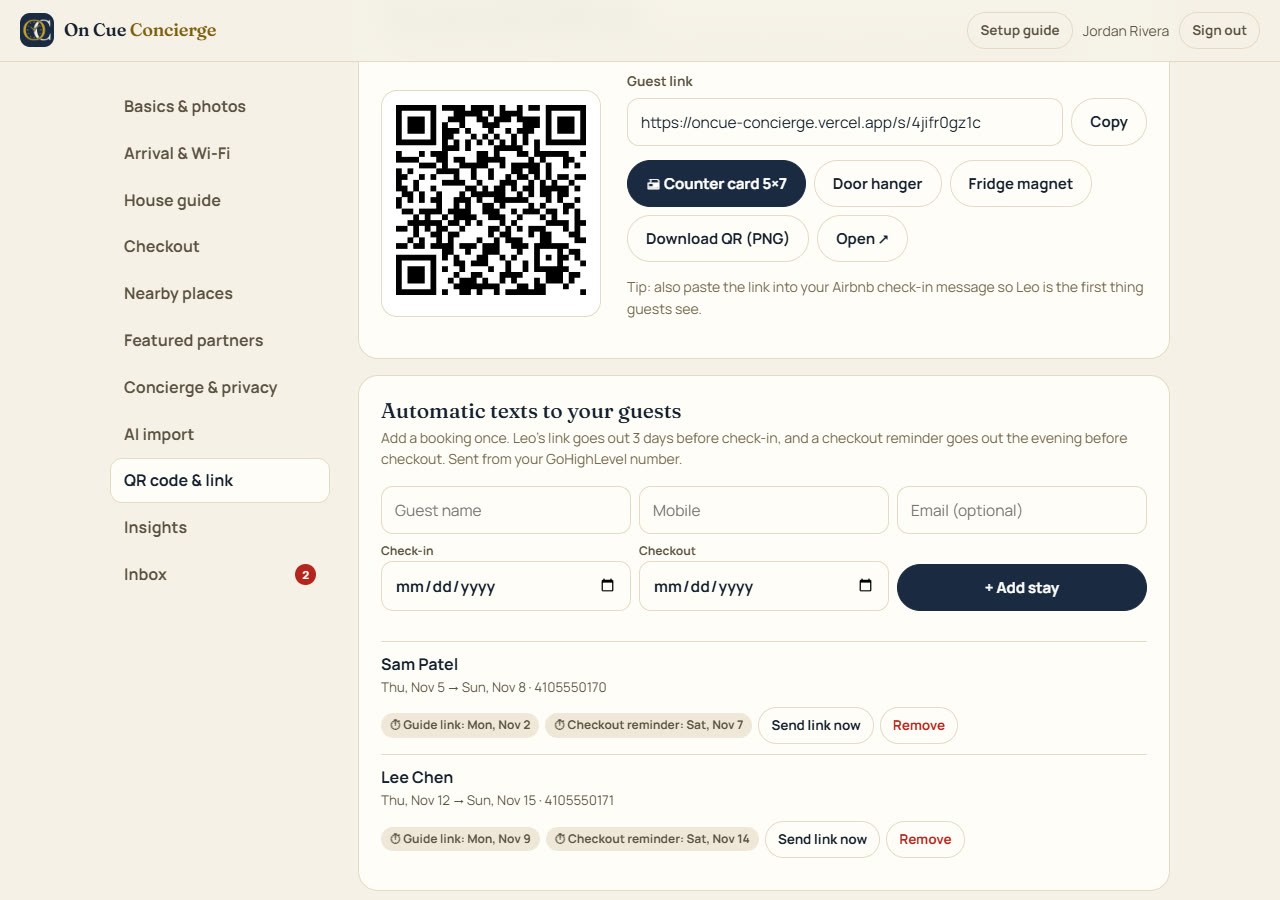 12345
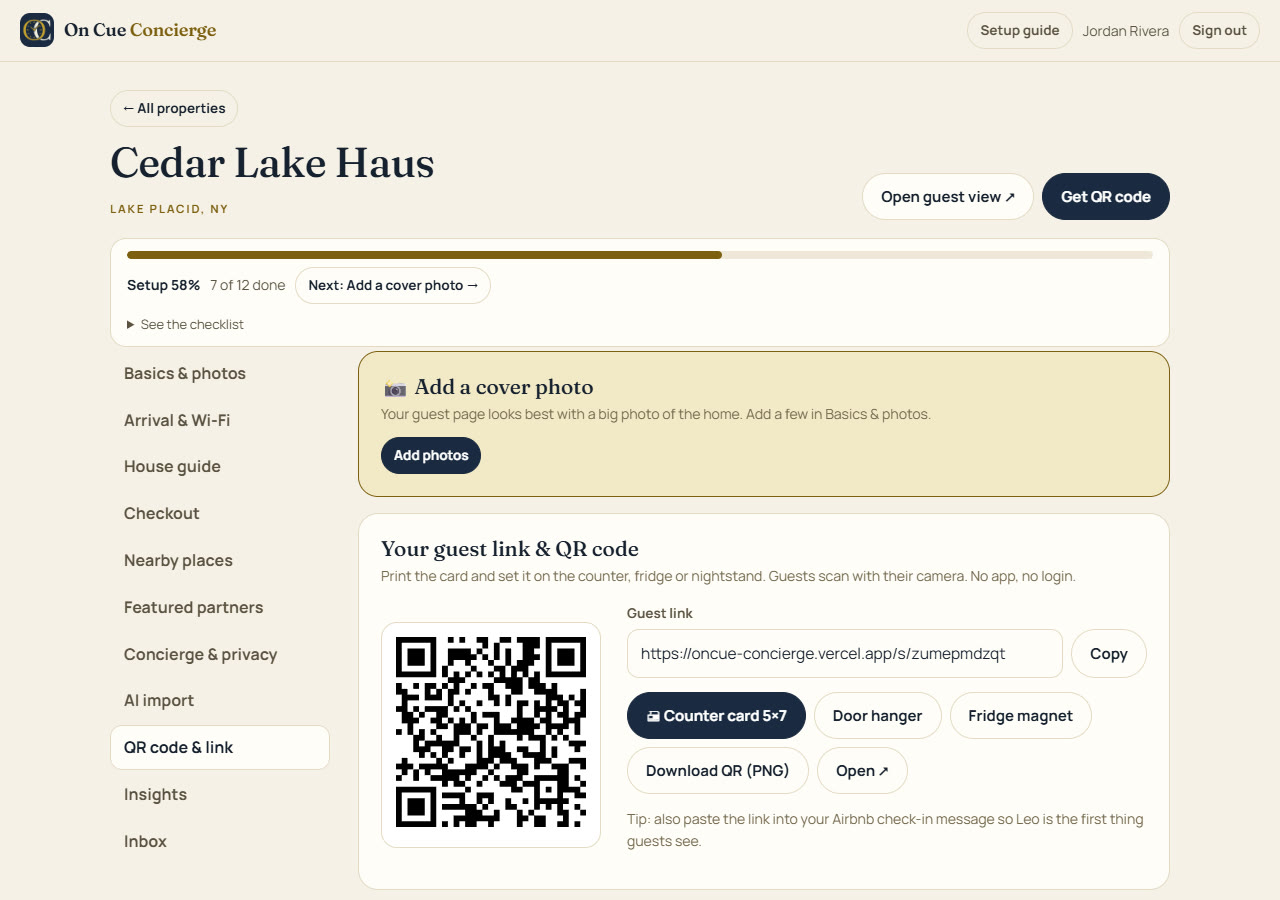
- 1Your QR code: unique to this property.
- 2Guest link: click Copy and paste it into your Airbnb check-in message.
- 3Counter card 5×7: opens a ready-to-print card for the kitchen counter.
- 4Door hanger and Fridge magnet: the same QR in two more shapes (next step).
- 5Download QR (PNG): for your own signs or welcome book.
Further down the same tab: Try it like a guest, a live phone preview. Tap around and ask Leo something.
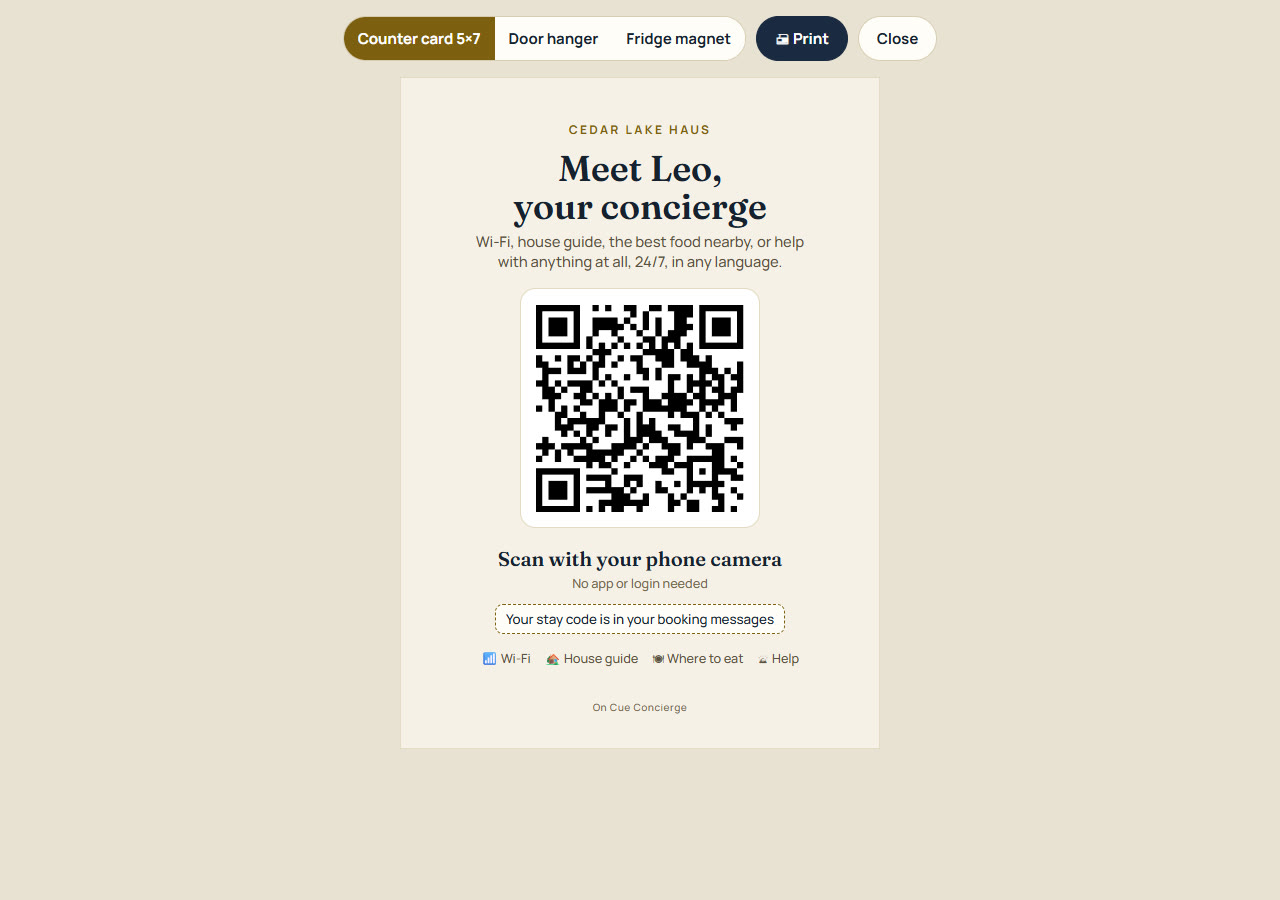
- Print on card stock and put it on the kitchen counter.
- Paste the guest link and your stay code into your Airbnb check-in message (Messages → Scheduled messages). Guests meet Leo before they arrive.
- Scan it with your own phone before the next guest arrives.
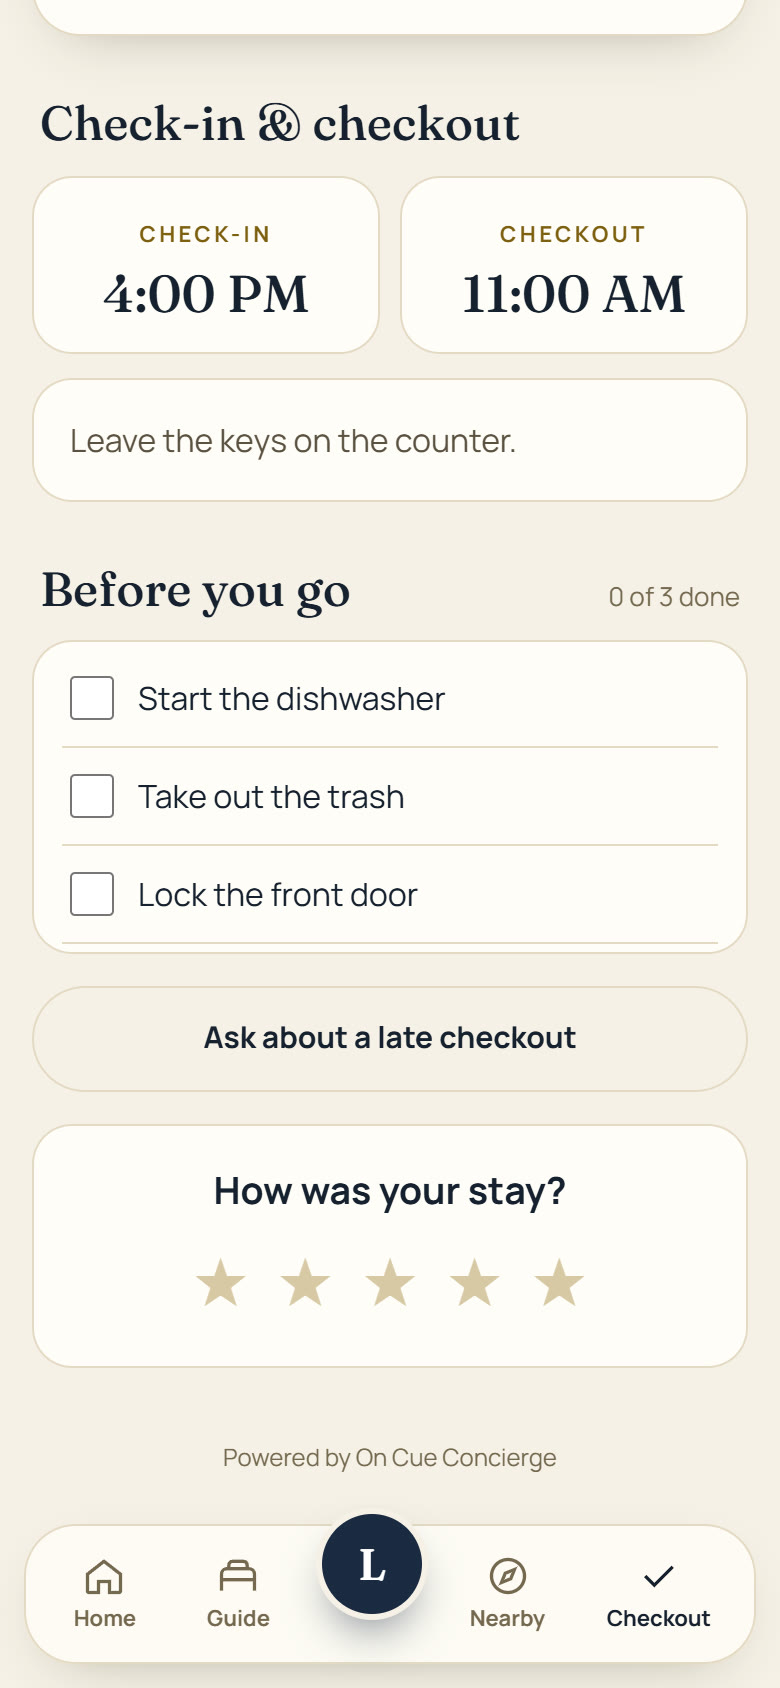
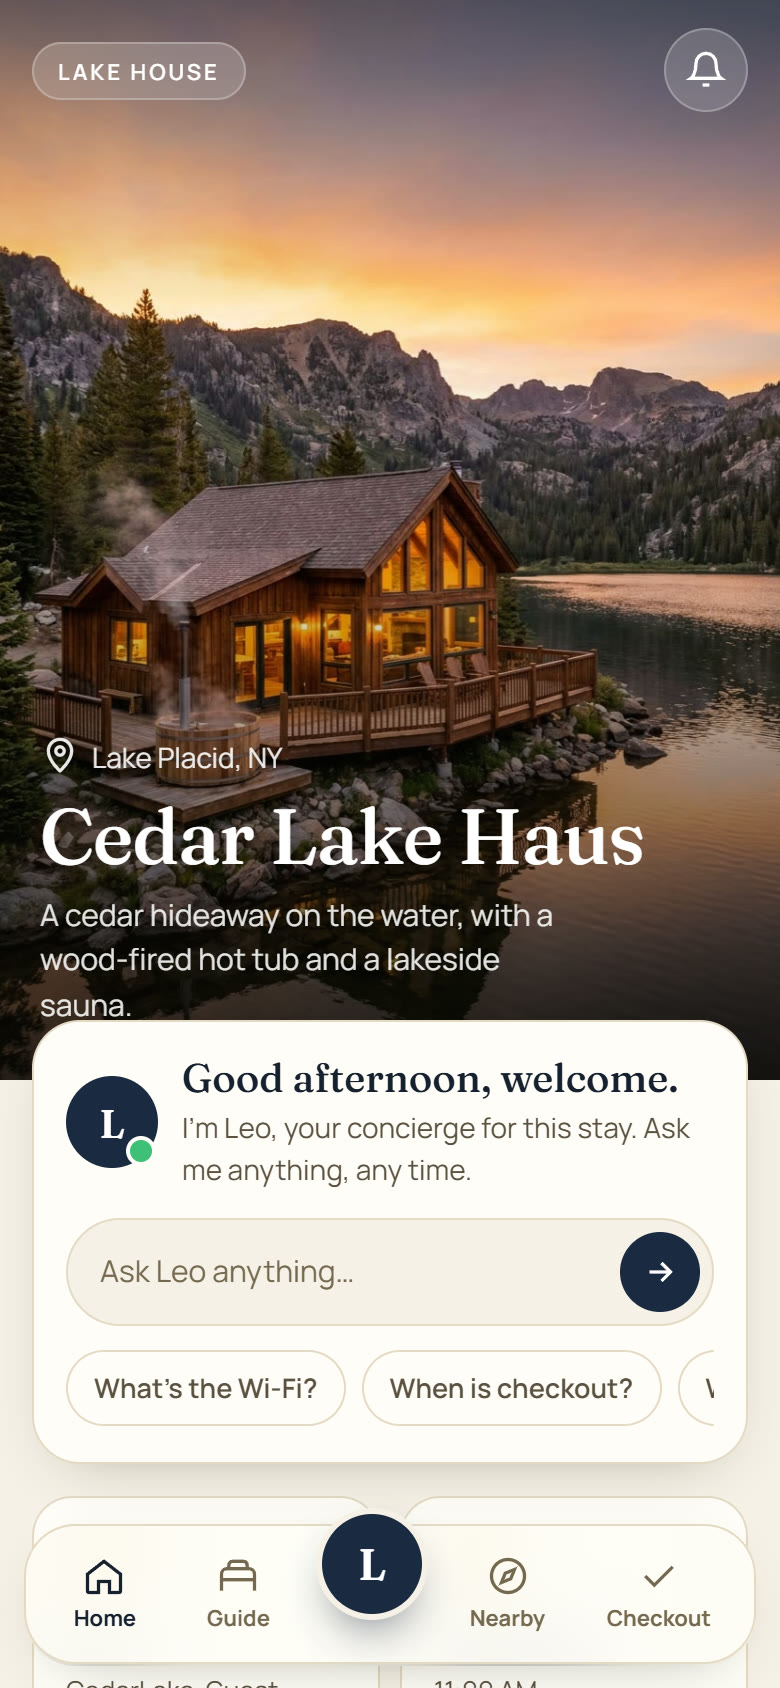
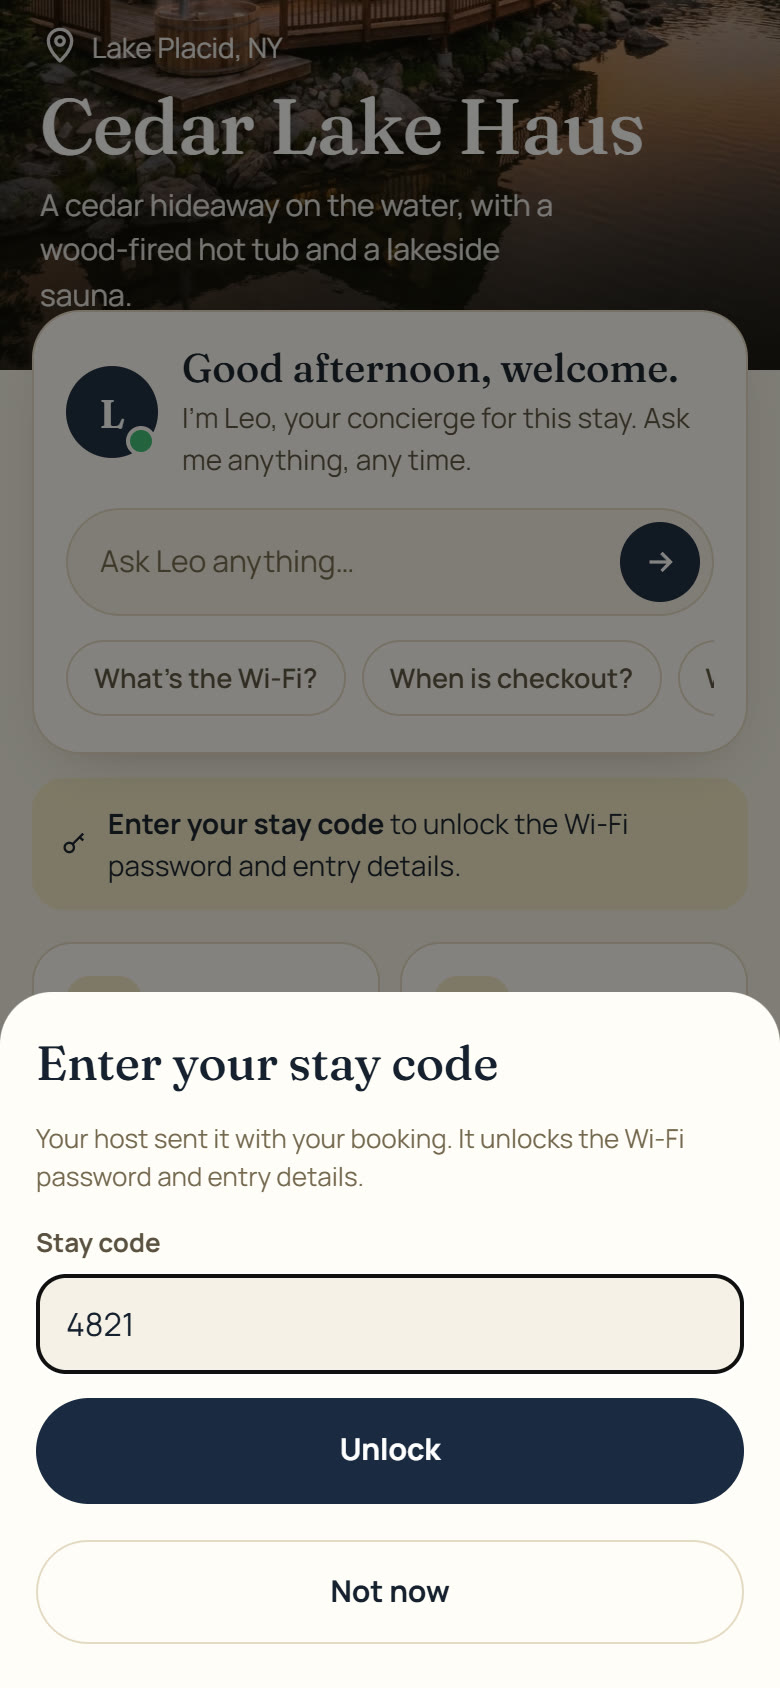
What your guests see
Guests scan the card with their phone camera. No app, no login.
Other tracks: B. Short-term rental · C. Landlord · D. Apartments & managers
If you rent short-term on VRBO, Booking.com or direct
No Airbnb messaging? Leo does the reaching out. Add each booking once and every guest gets the guide link before they arrive and a checkout reminder before they leave.
Add each listing as its own property
Rent on VRBO, Booking.com, Furnished Finder or your own website? Each home gets its own concierge, link and QR code. From All properties click Add a property, pick Short-term guests, and paste that listing's text from VRBO, Booking.com or your site.
The tabs are the same as Track A: Basics & photos, Arrival & Wi-Fi, House guide, Checkout and Nearby places. Steps A2 to A6 show each one.
Set a stay code
Your guest link works for anyone who has it. A stay code keeps the Wi-Fi password, the street address and door codes hidden until the guest types it. Set it on Concierge & privacy.
1- 1Stay code: e.g. 4821. Change it between guests if you share door codes through Leo.
Add booked stays: Leo texts each guest
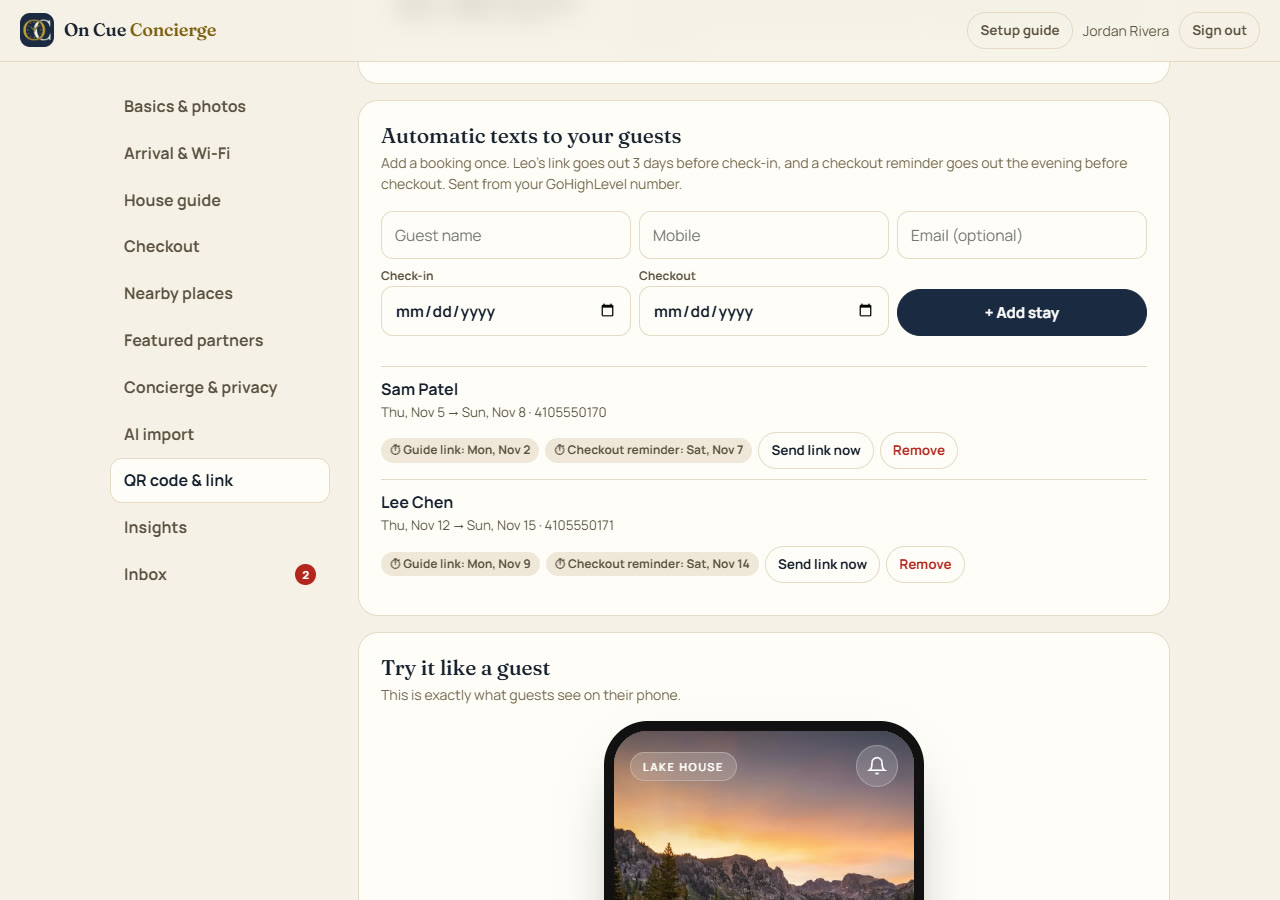
On QR code & link, add each booking once in Automatic texts to your guests. Leo's link goes out 3 days before check-in (with your stay code), and a checkout reminder the evening before checkout. Texts come from your GoHighLevel number.
 1234
- 1Guest name, mobile and email: email is optional.
- 2Check-in and checkout dates.
- 3+ Add stay: saves it. A booking that starts within 3 days gets its link right away.
- 4Your upcoming stays: when each text goes out, Send link now, or Remove.
Add your Google review link
Direct bookings live on Google reviews. On the Checkout tab paste your Google review link, plus a VRBO or website link under Other. Links must start with https://.
123- 1Airbnb review link: from your listing page.
- 2Google review link: Google Business Profile → Ask for reviews → copy the link.
- 3Other review link: VRBO, Booking.com or your own site.
At checkout guests rate their stay. 4 or 5 stars → big buttons to your review pages. 1 to 3 stars → a private note that comes only to you, so you can fix it before it becomes a public review.
Sell extras
On Featured partners, scroll to Extras you sell: early check-in, late checkout, a mid-stay clean, airport pickup. Guests tap Request and you get an alert. You confirm and collect payment your usual way (Track A, step A8, shows the screens).
Hang a door hanger
On QR code & link click Door hanger. It prints 4.25 × 11 in with a cut line for the knob, so it's the first thing guests see inside the door.
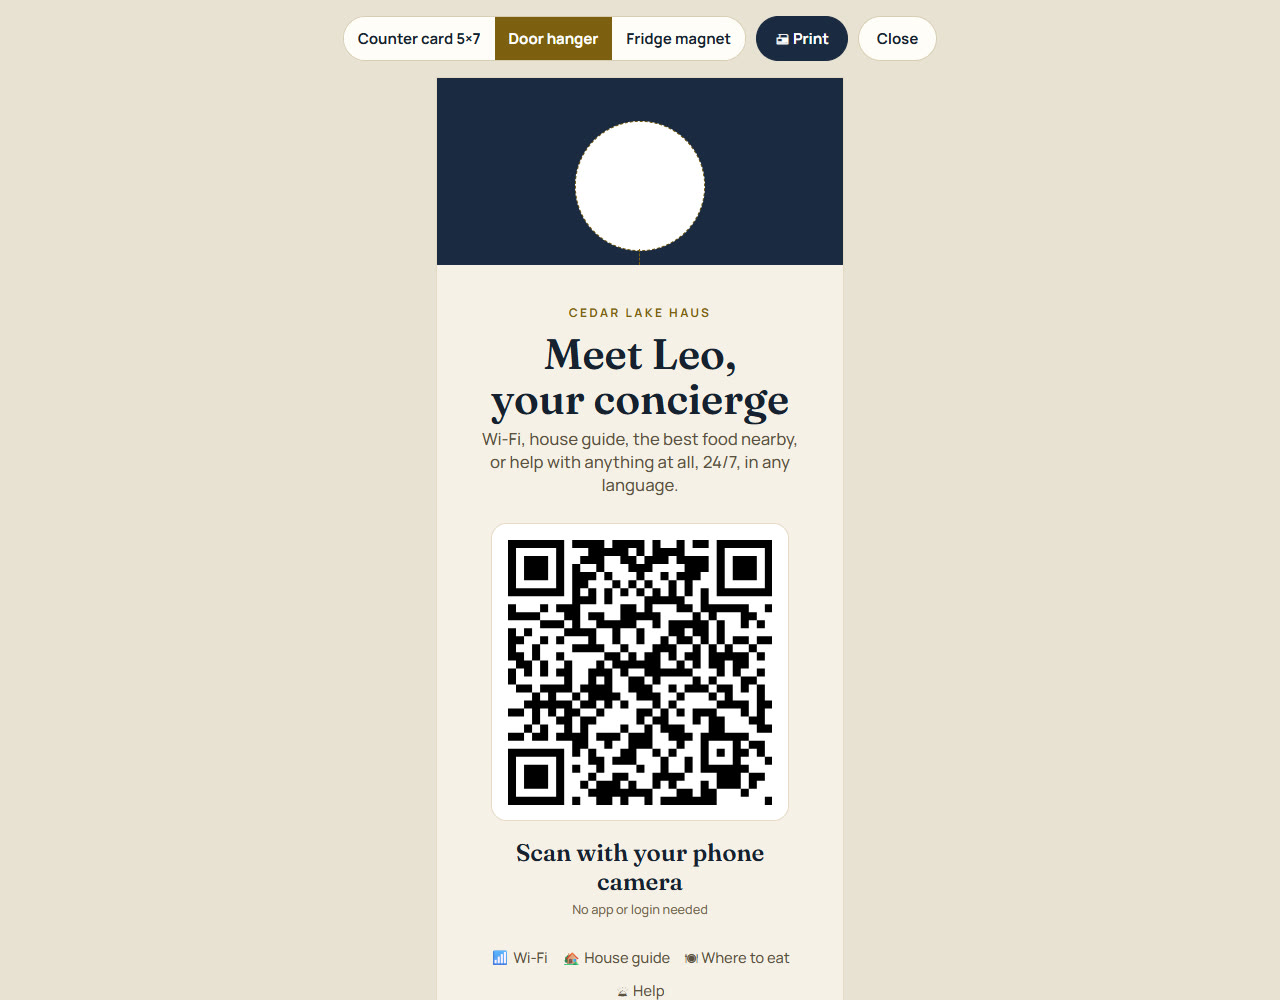
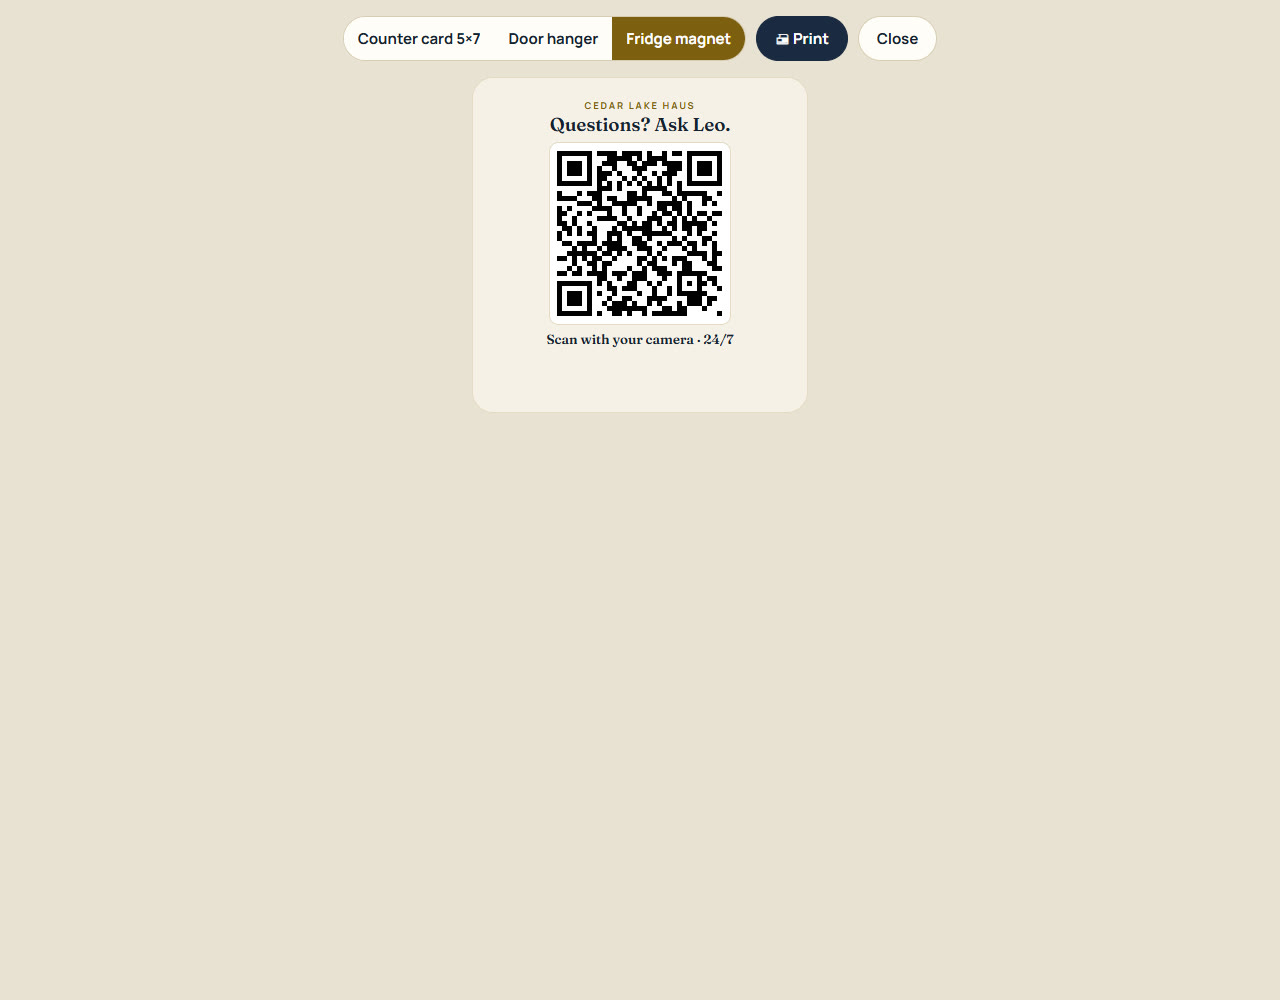
- Print on heavy card stock. Switch styles with the buttons at the top of the card page, then press Print.
- Each listing has its own QR code, so print one set per home.
Featured partners (optional, and it can pay you)
Add local businesses you've partnered with: a kayak rental, a restaurant, a spa. Leo recommends them first whenever they fit and mentions their guest deal.
- Business name and type
- One-line description
- Guest offer, e.g. "15% off with code CEDAR15"
- Address, phone and website (optional)
Other tracks: A. Airbnb host · C. Landlord · D. Apartments & managers
If you rent a home or a duplex to tenants
Tenants stop texting you for rent day and the Wi-Fi password. Repairs arrive with a photo, an AI urgency rating and the unit, and the tenant tells you when it's really fixed.
Pick "Long-term tenants" and list your units
Sign up as a Property manager or Landlord / investor and the build screen starts on long-term tenants.
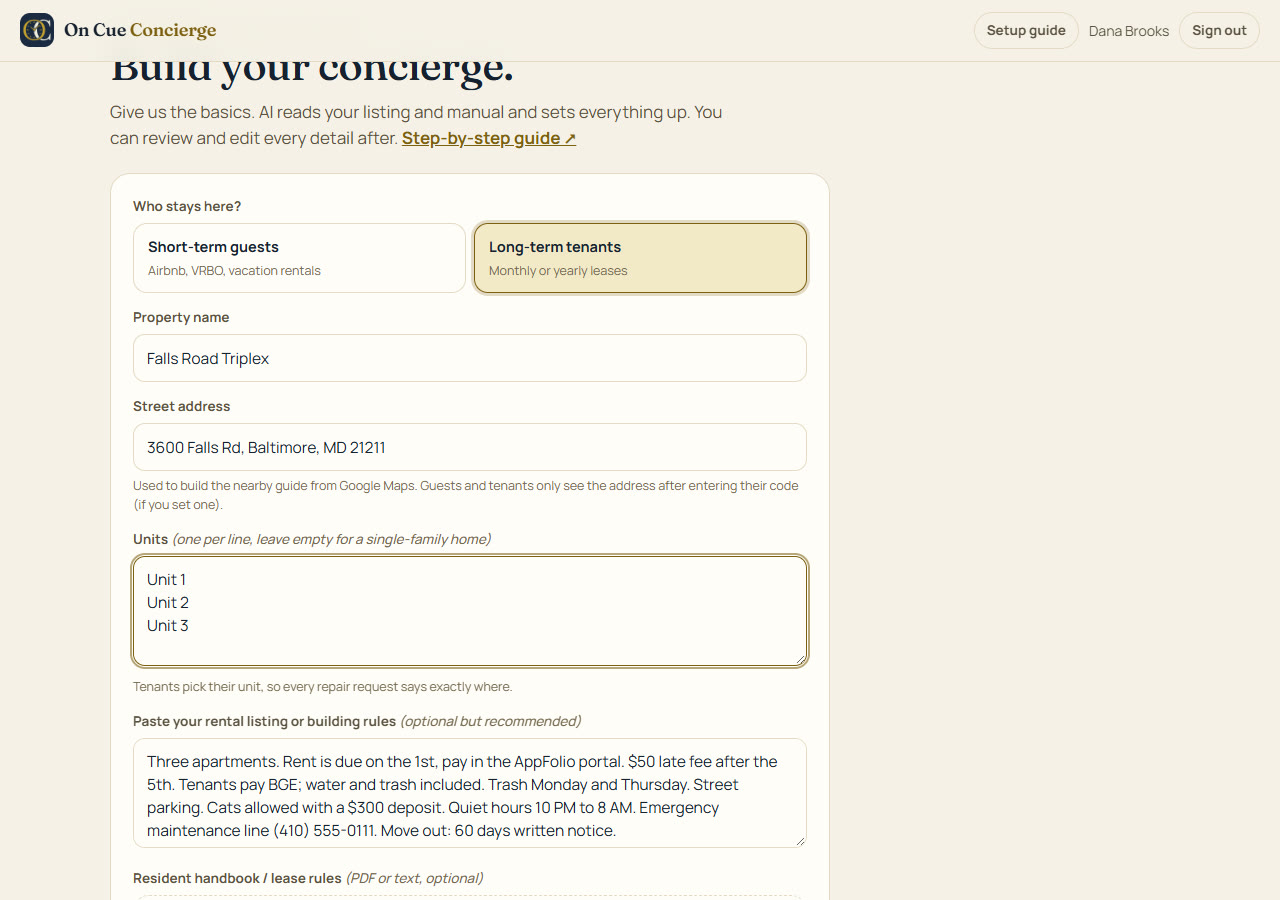 123
- 1Long-term tenants: switches every screen to tenant wording.
- 2Units: one per line ("Unit 1", "Apt 2B"). Leave it empty for a single-family home.
- 3Building rules: paste your rent terms, late fee, utilities, trash days and pet policy. Upload a resident handbook below it.
Rent day, trash day and parking answers
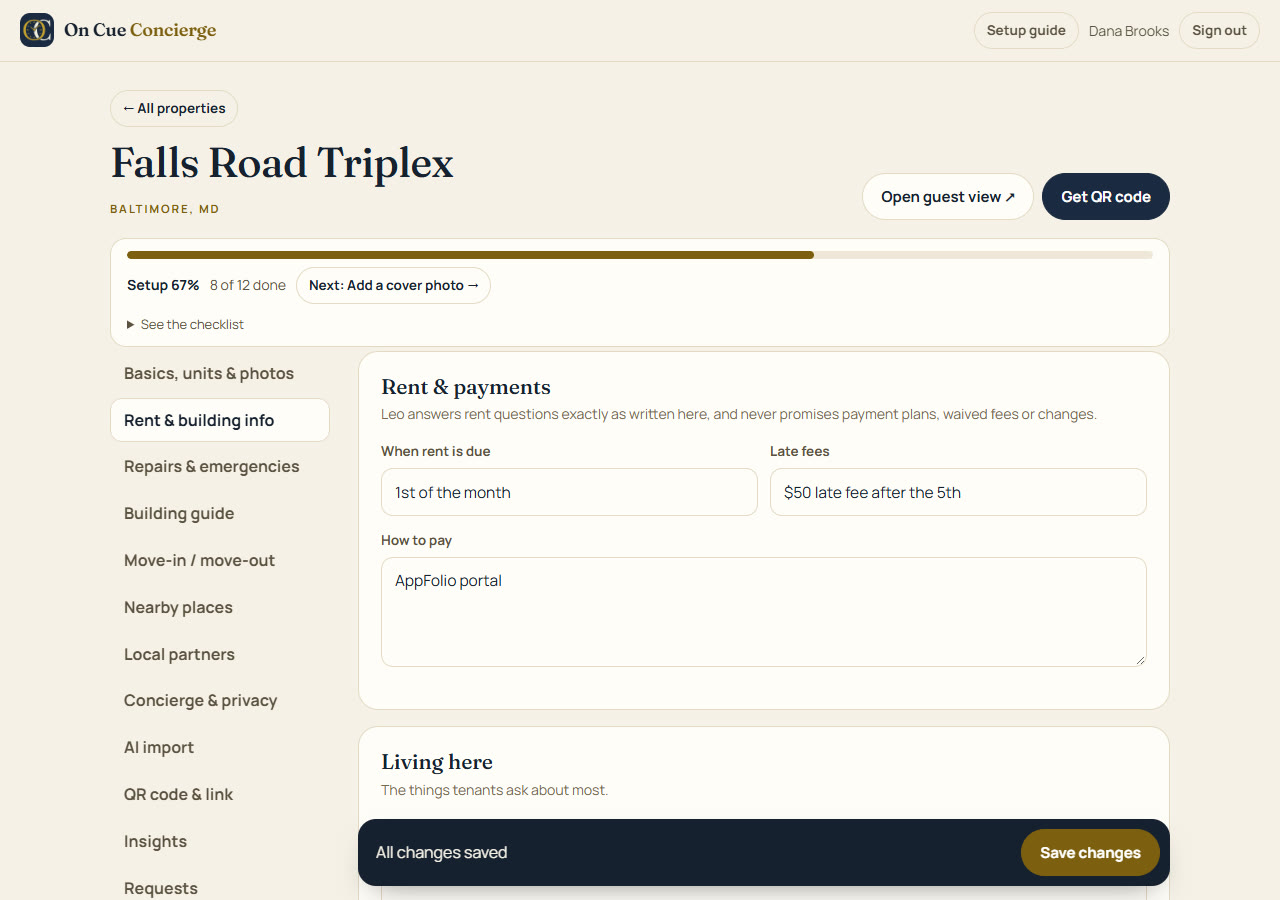
- Rent & building info: when rent is due, how to pay, late fees, utilities, trash, parking, pets, quiet hours.
- Repairs & emergencies: how to report a repair, what counts as an emergency, and your after-hours line.
- Move-in / move-out: the checklists tenants tick off on their phone.
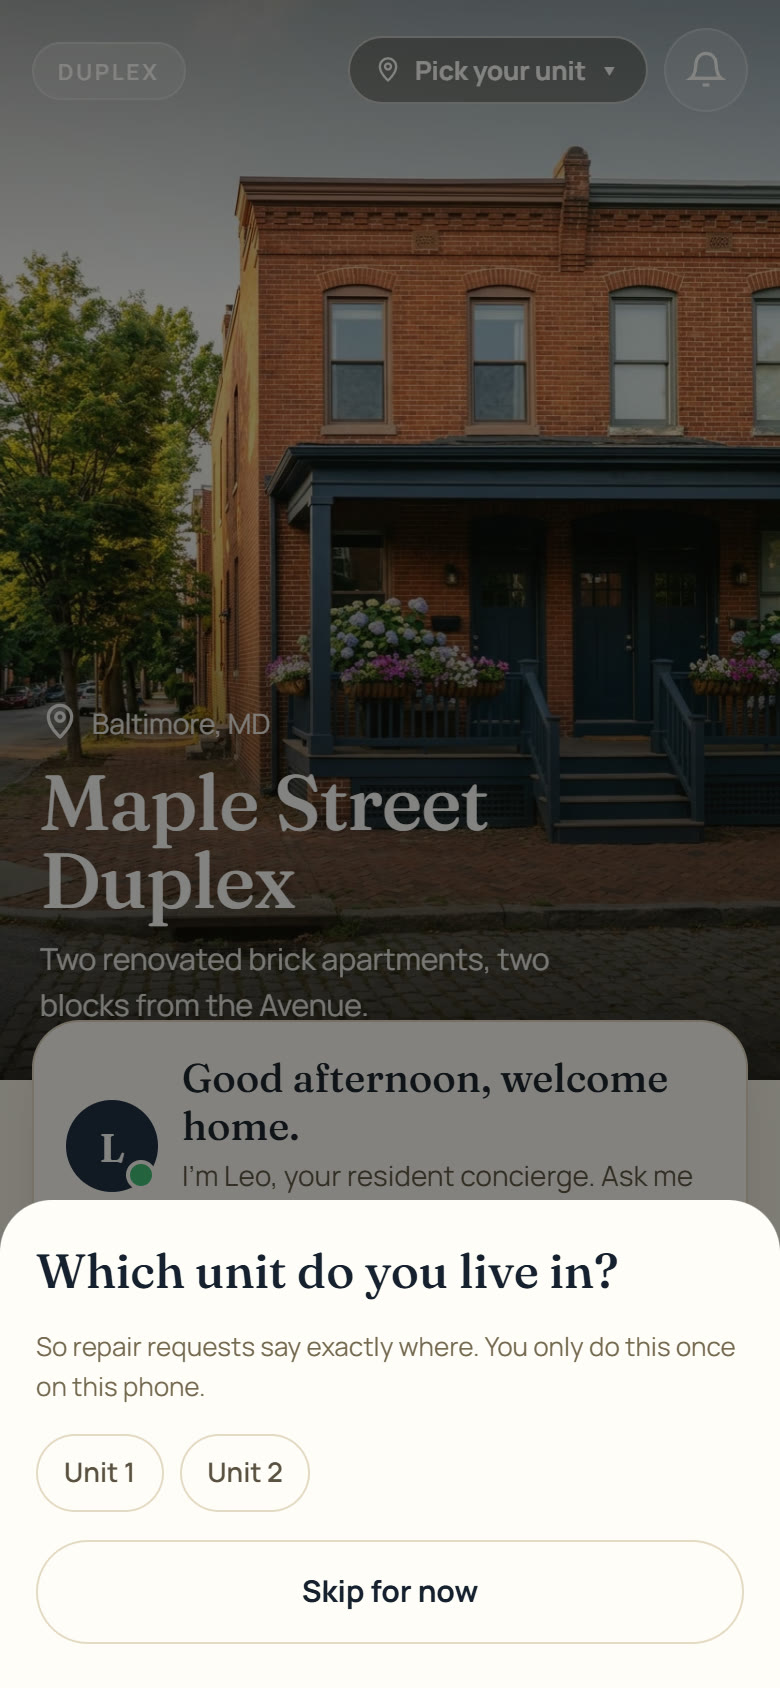
What tenants see
The first scan asks which unit they live in, once per phone. Then they get a Report a repair button, rent and trash-day answers, and the building guide.
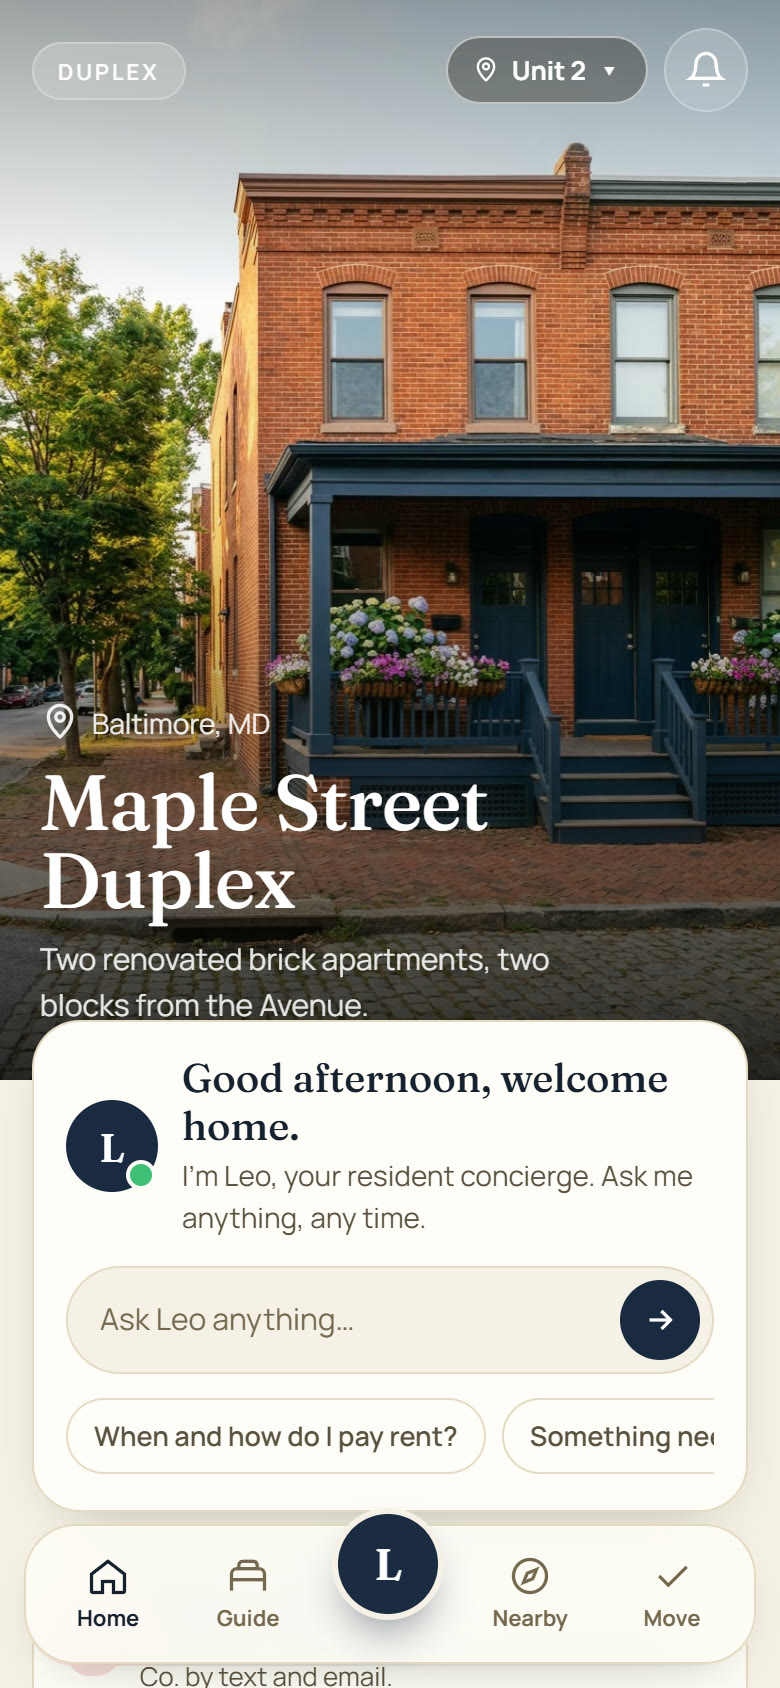
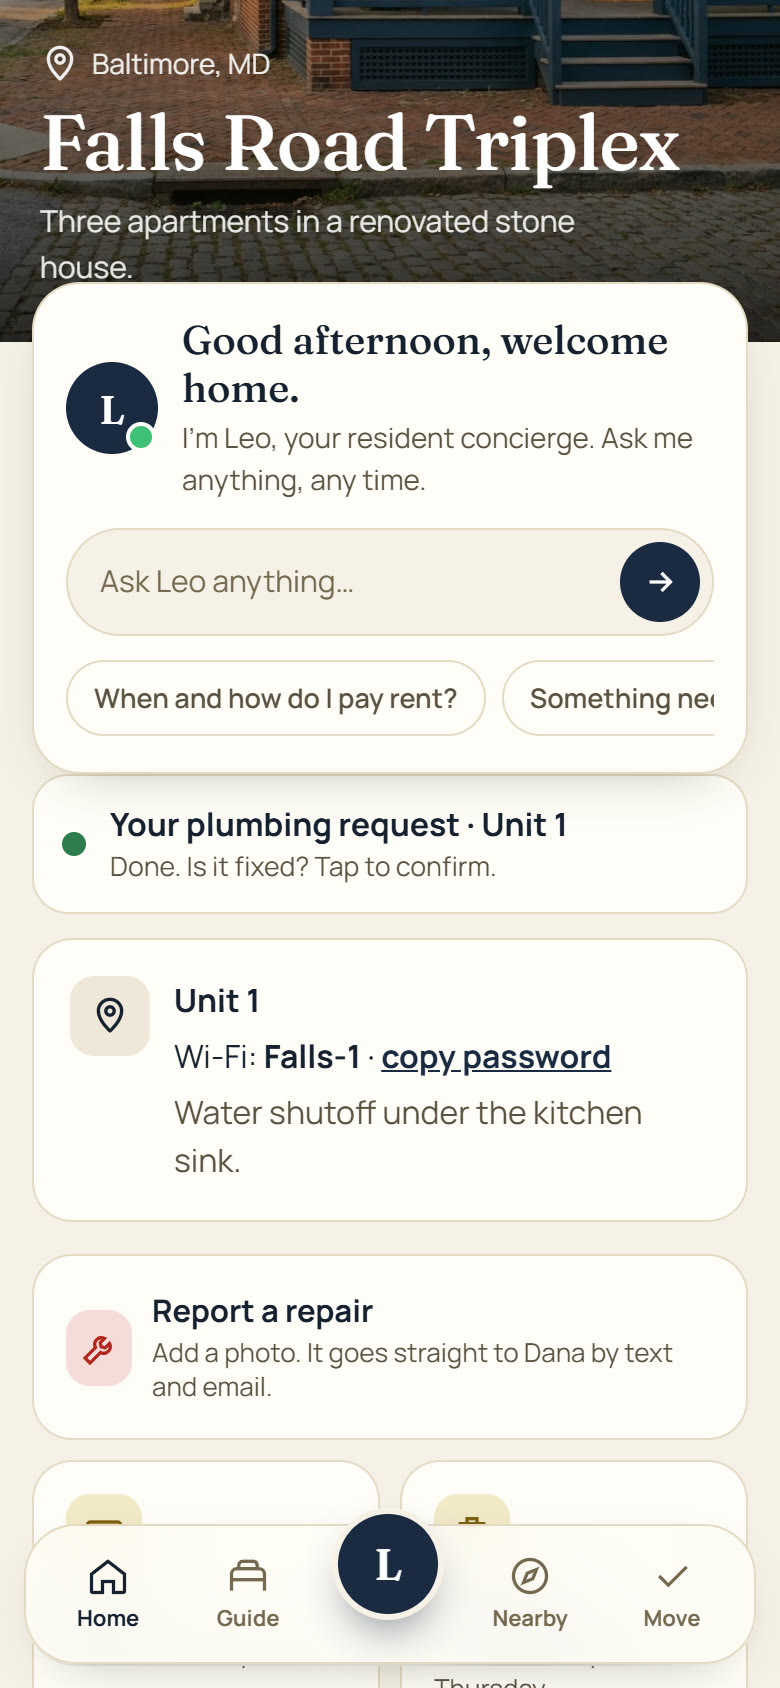
Their unit shows as a pill at the top of the page, with their own Wi-Fi and notes. An open request shows as a status card right under the welcome.
Repairs with a photo, and the emergency button
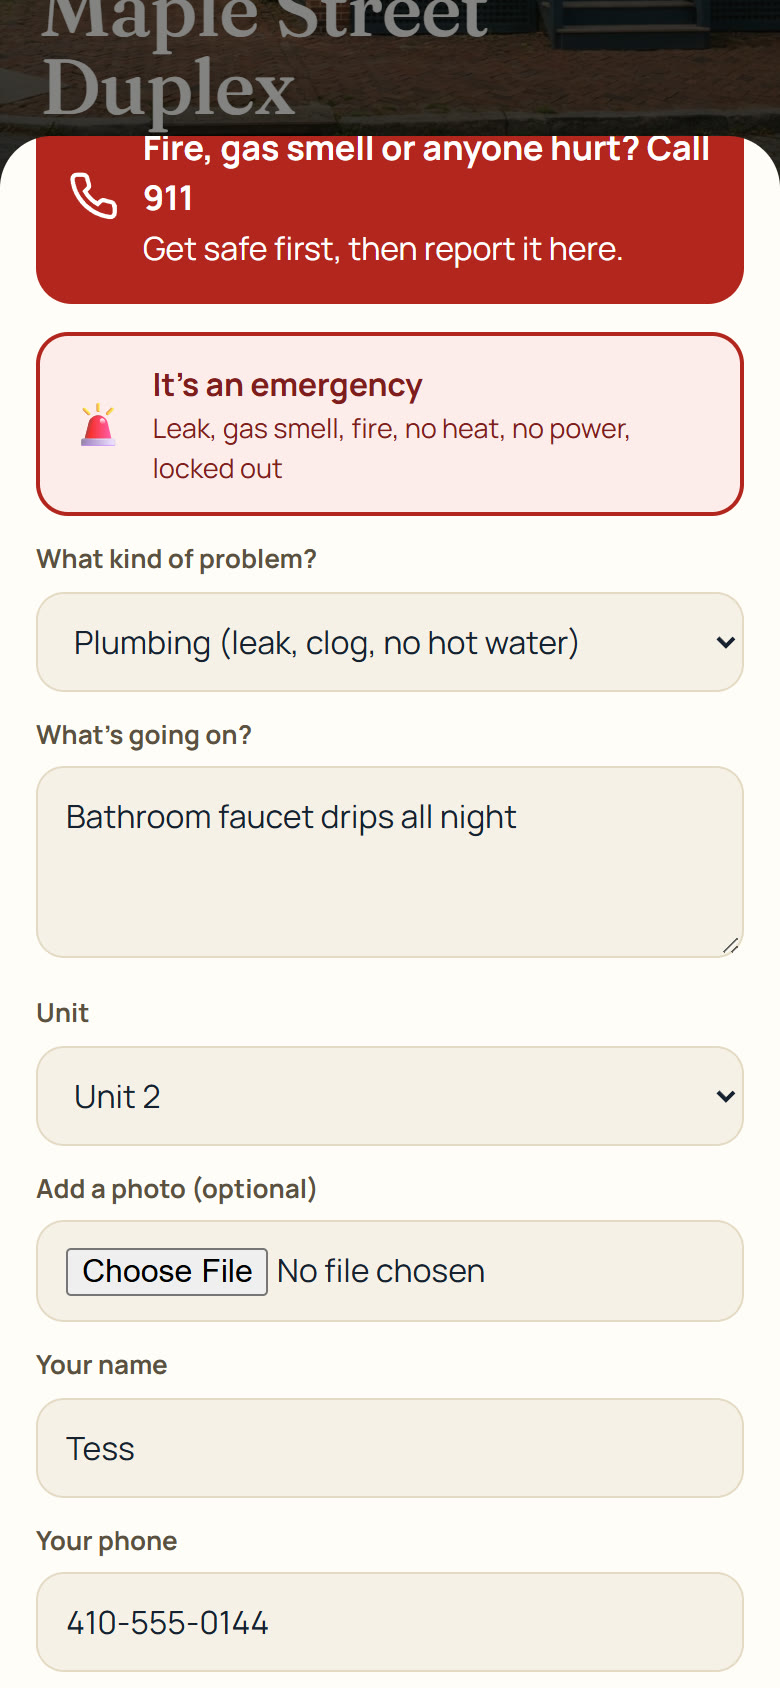
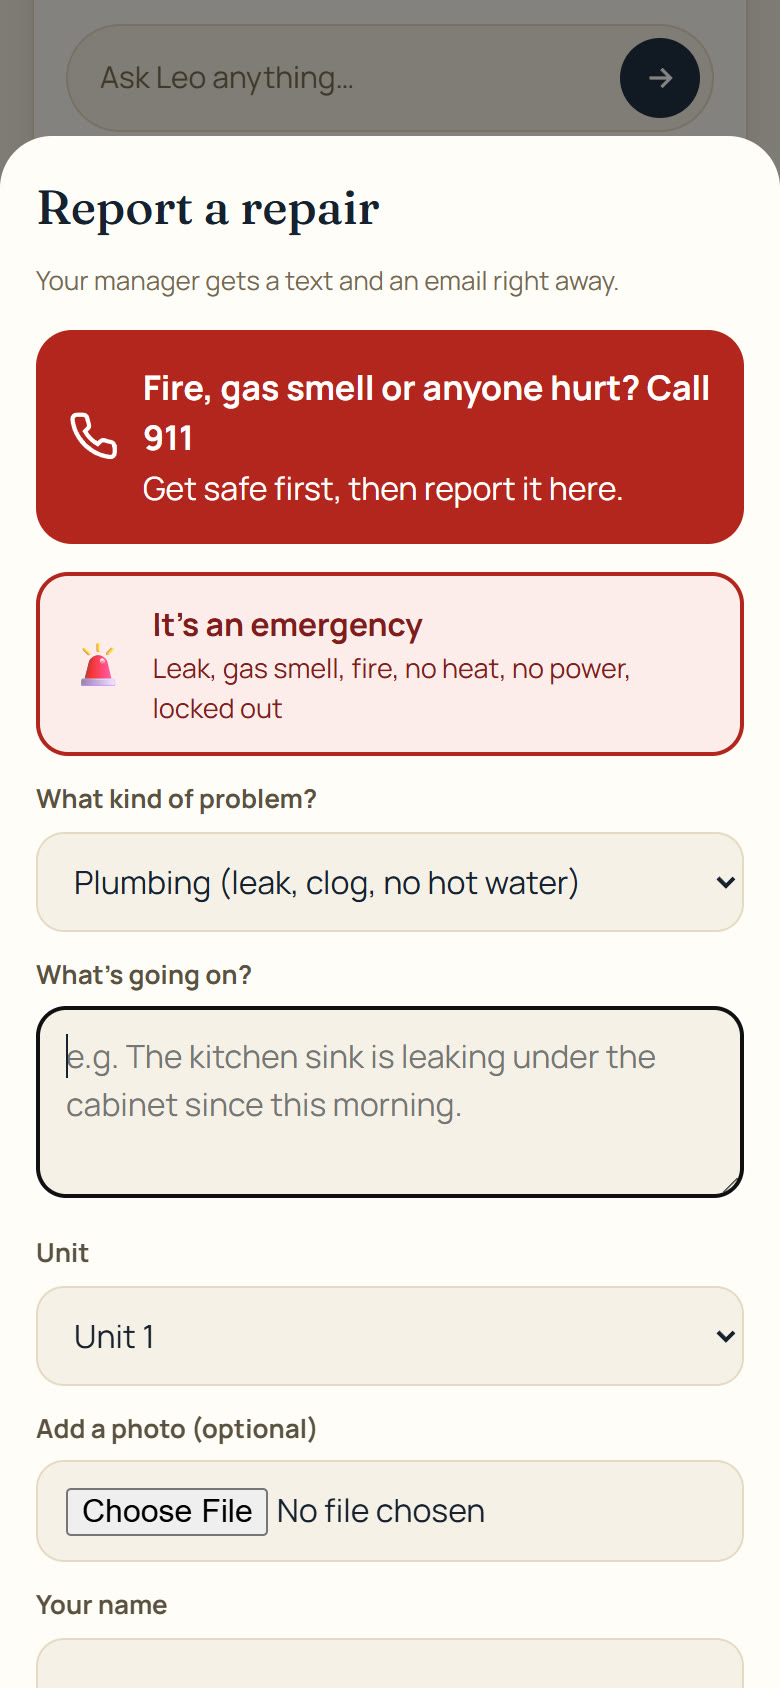
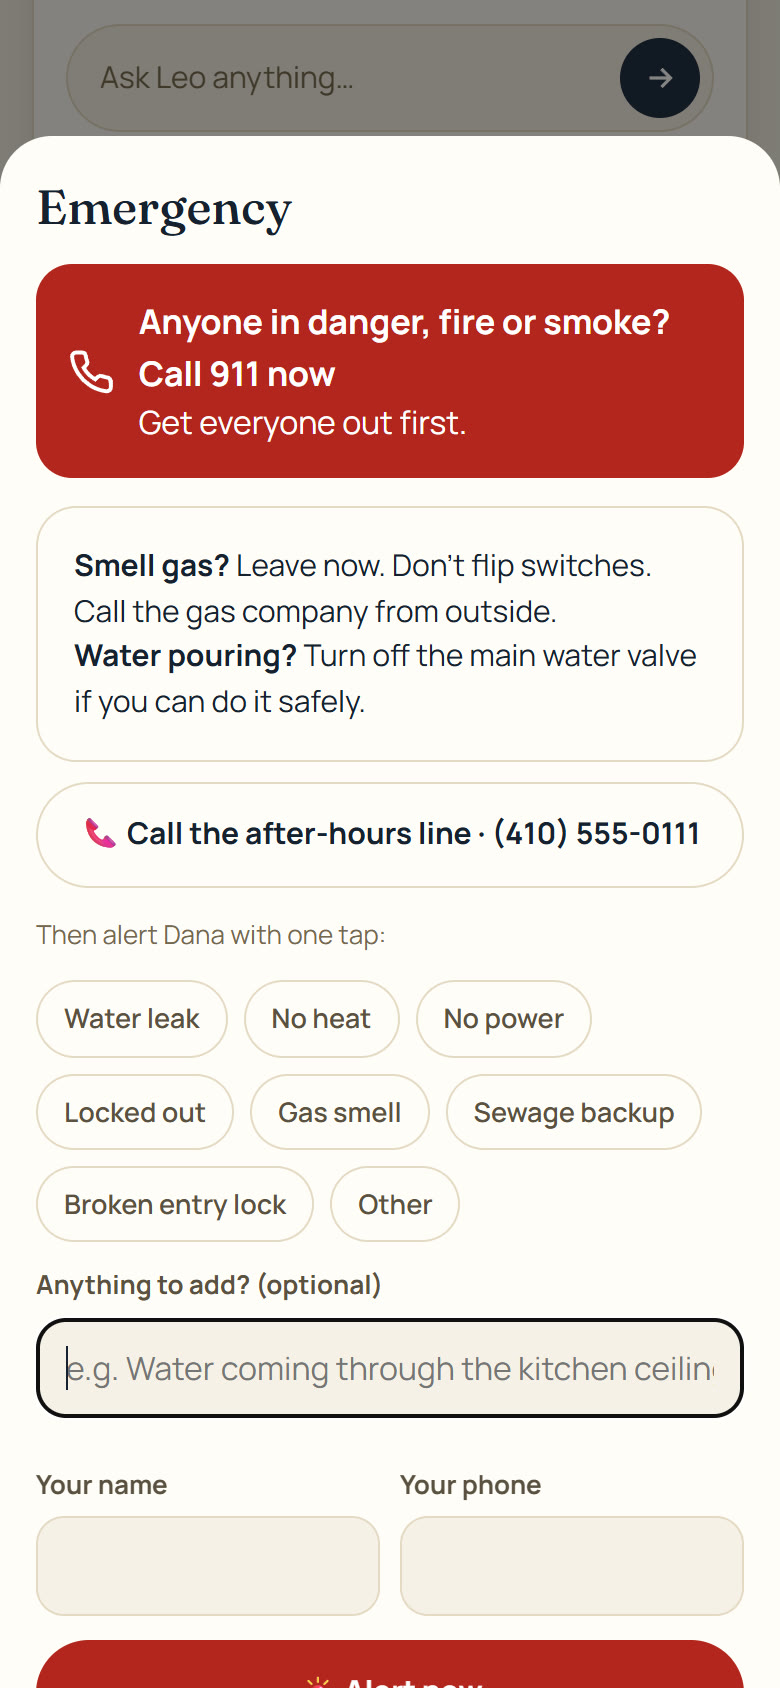
The repair form starts with two red buttons: call 911 when anyone is in danger, and It's an emergency. The emergency screen gives safety steps (gas, water), your after-hours line, and one-tap chips (water leak, no heat, locked out) that alert you as urgent.
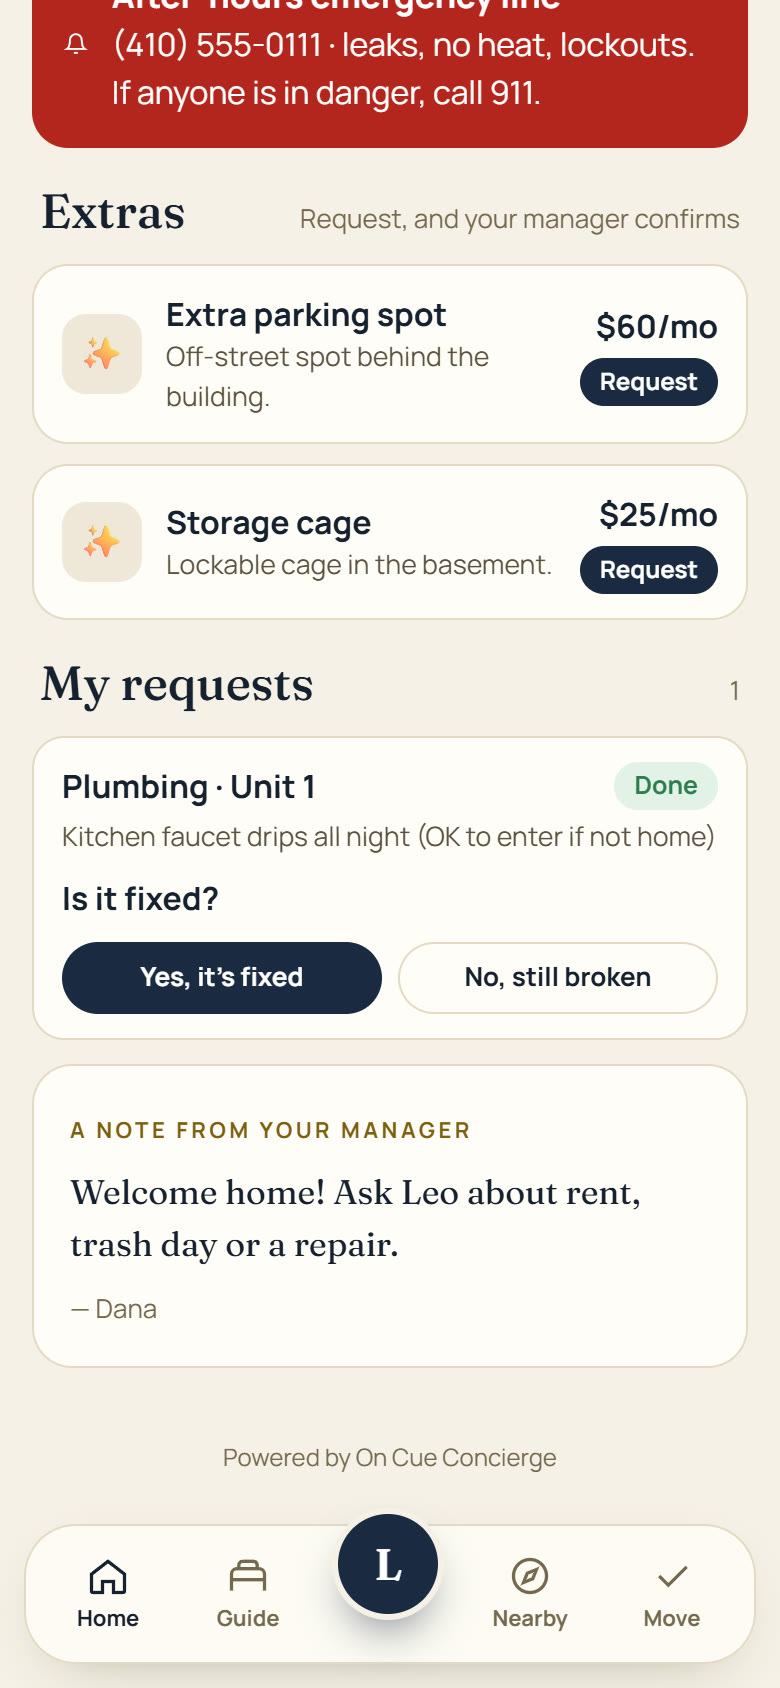
When a tenant ticks Text or email me updates, they get a text when you schedule the repair and when it's done. Their phone keeps a My requests list. When you mark a request Done, they're asked Is it fixed? Yes closes it. No, still broken reopens it and texts you.
Your Requests board with AI urgency
Every repair texts and emails you right away, then sits in Requests. The Board has three columns. Drag a card to move it, or tap it to open the full ticket. Prefer rows? Switch to List.
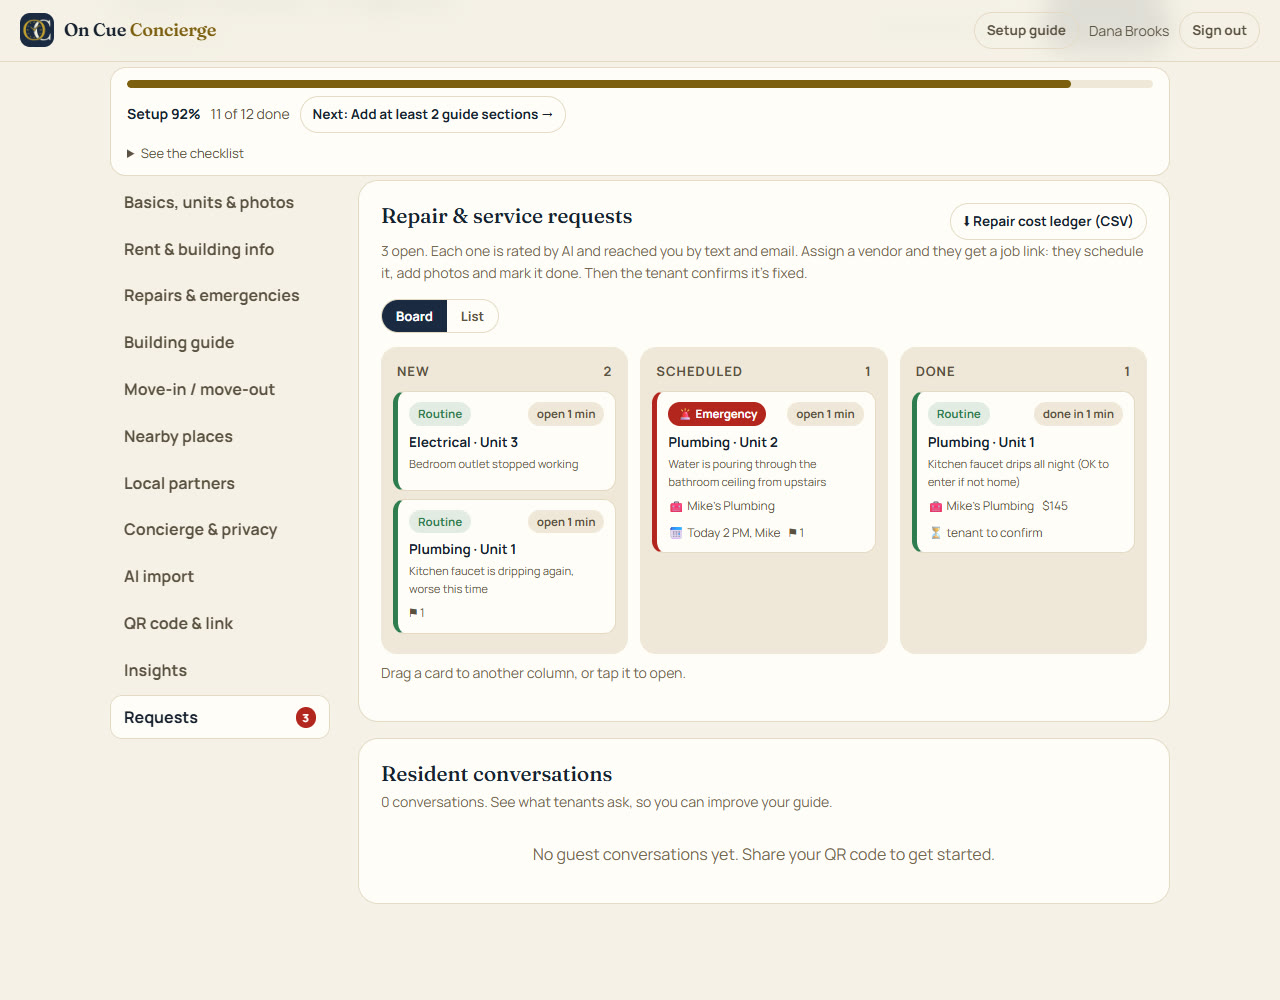 123456
- 1New: just came in.
- 2Scheduled: you typed when the tech is coming. The ticket stays open.
- 3Done: fixed, waiting for the tenant to confirm.
- 4AI urgency: every request is rated Emergency, Urgent or Routine, with the kind of pro to send.
- 5Open time: turns amber after 24 hours, and red when an emergency waits 1 hour (urgent 24 hours, anything 72 hours).
- 6Repair cost ledger (CSV): every request with dates, vendor and cost, ready for your bookkeeper or Schedule E.
Tap any card for the full ticket. Managers with many units: step D4 explains the flags.
"Is it fixed?": the tenant closes the loop
When you mark a request Done (or your vendor does), the tenant gets a text: Is it fixed? Yes closes it. No, still broken moves it back to New and texts you, with their note.
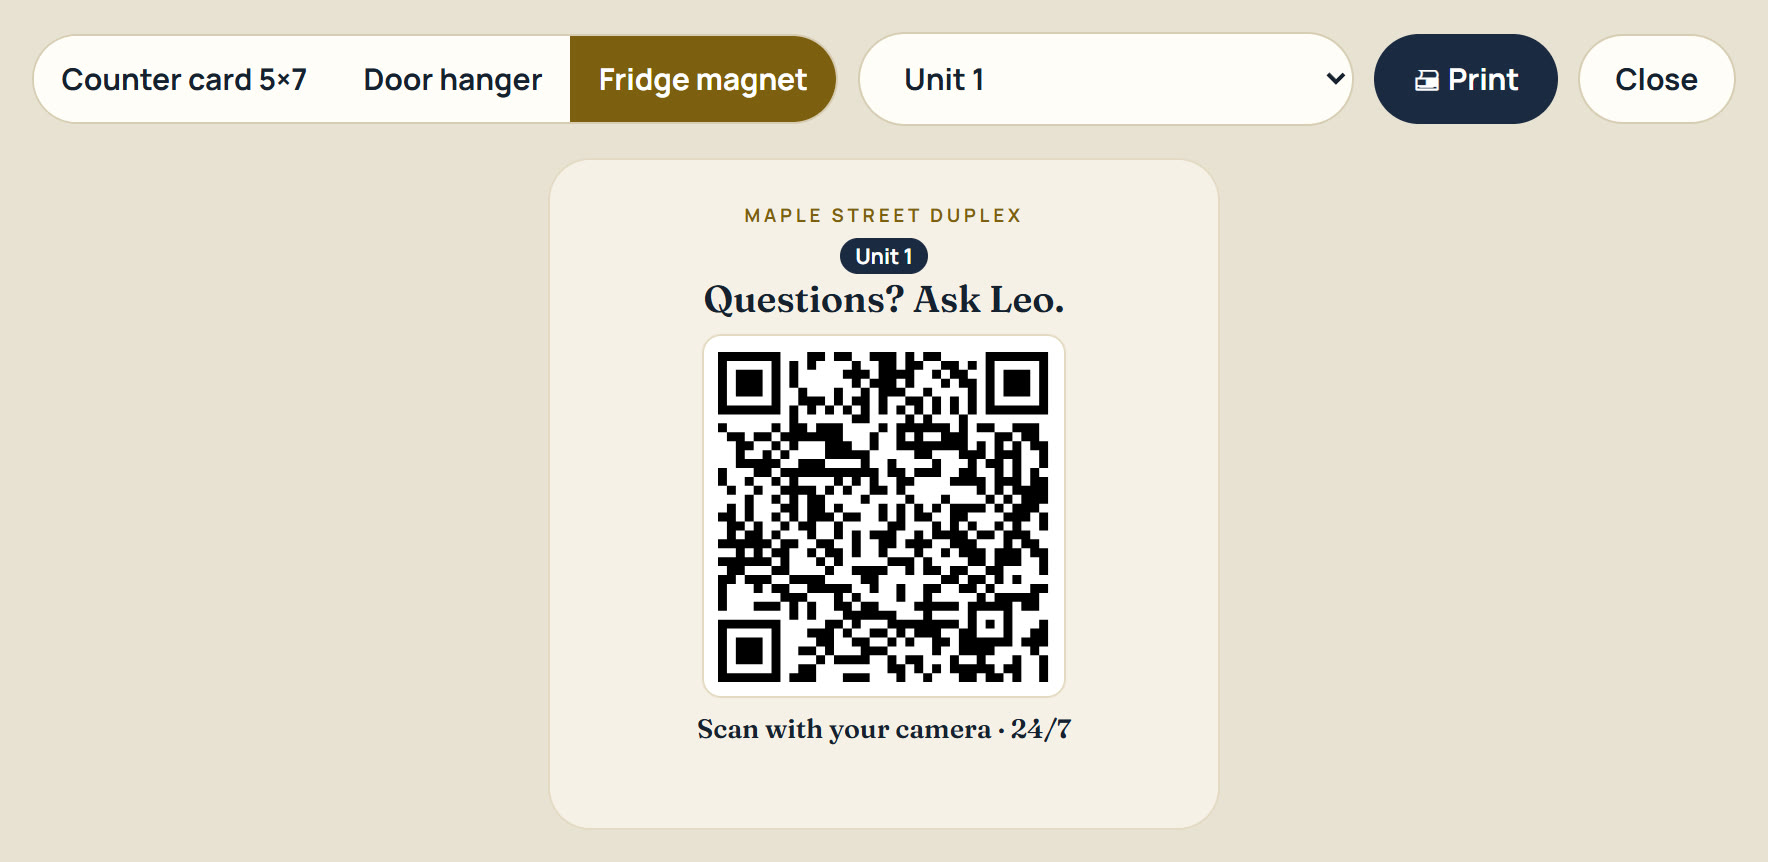
Put a fridge magnet in the home
On QR code & link click Fridge magnet. It prints 3.5 × 3.5 in: print it on magnet sheet and leave it on the fridge, where tenants look when something breaks. Pick the unit and the magnet opens with that unit already chosen.
Other tracks: A. Airbnb host · B. Short-term rental · D. Apartments & managers
If you manage apartments or many units
The same tenant concierge, set up for scale: every unit gets its own details and card, repairs go straight to your vendors, and the ledger and insights show where the money and the questions go.
Do Track C first: it sets up tenant mode, repairs and the Requests board. These steps add what you need for many units.
Import all your units at once
On Basics, units & photos click 📋 Import a list or CSV. Paste one unit per line, or rows copied from a spreadsheet: Unit, Wi-Fi name, Wi-Fi password, Notes. A header row is skipped. Then Add units and Save changes.
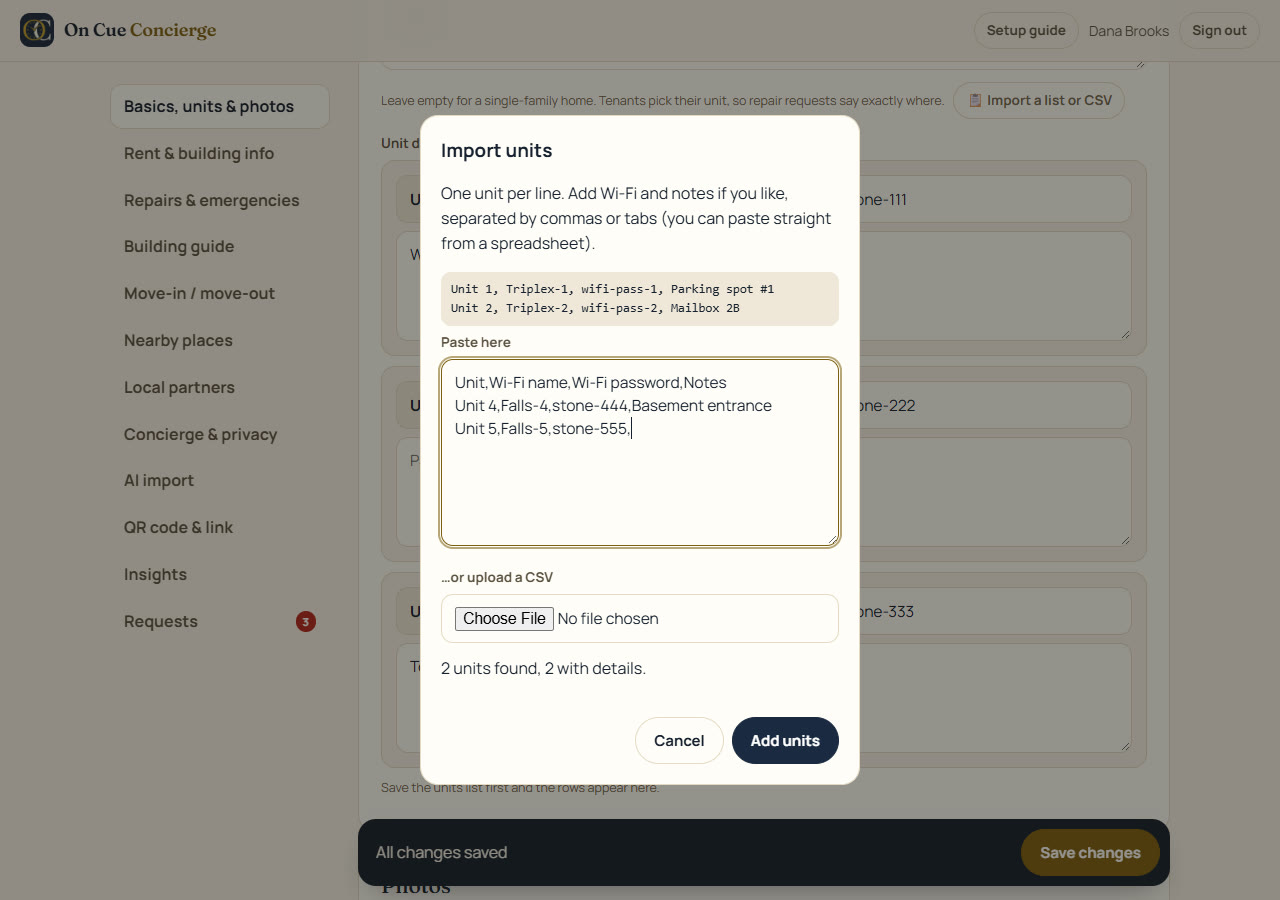
Per-unit Wi-Fi and notes
Each unit can have its own Wi-Fi name, password and a note (water shutoff, mailbox number). A tenant only ever sees their own unit's details, and the password only after they unlock the page.
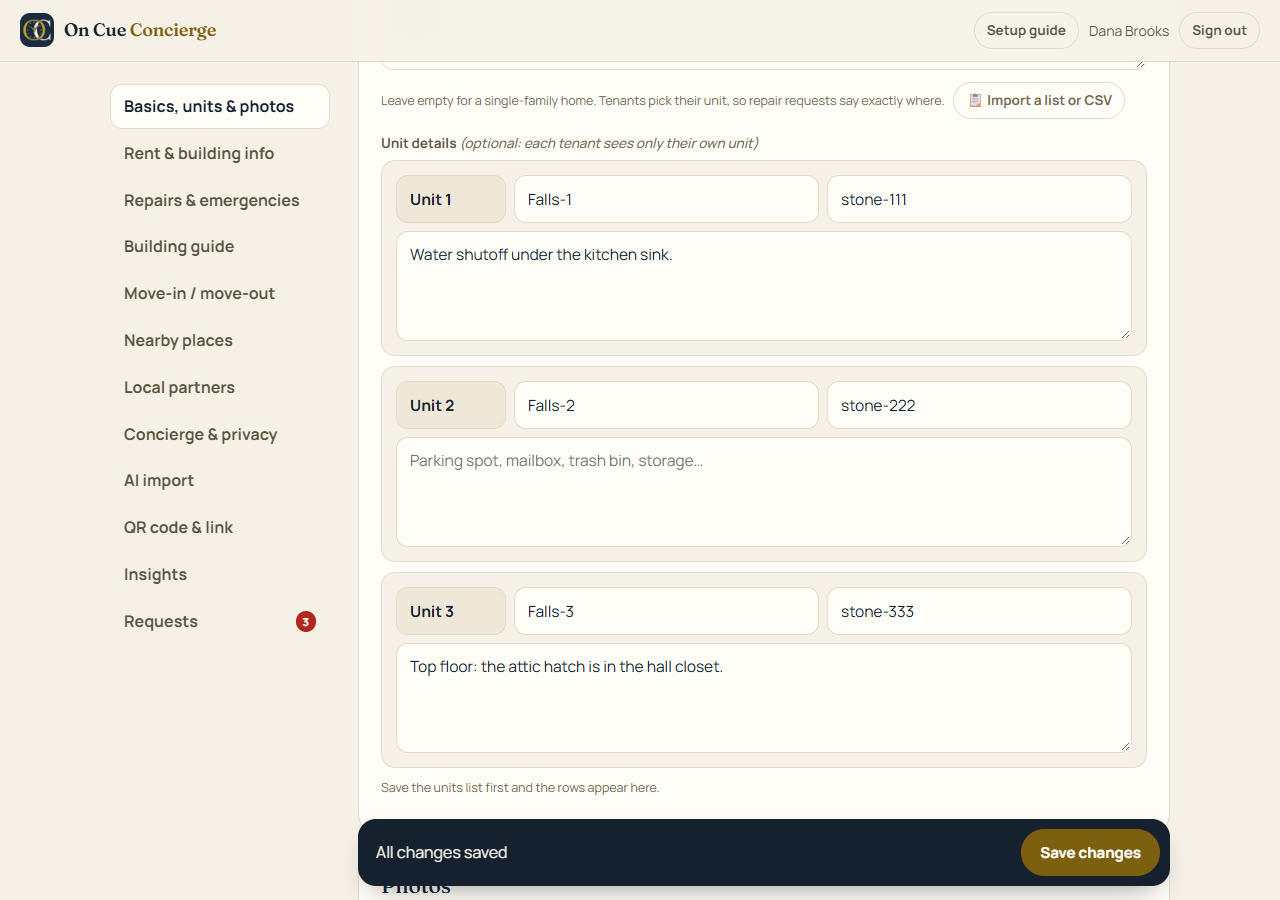
One QR card per unit
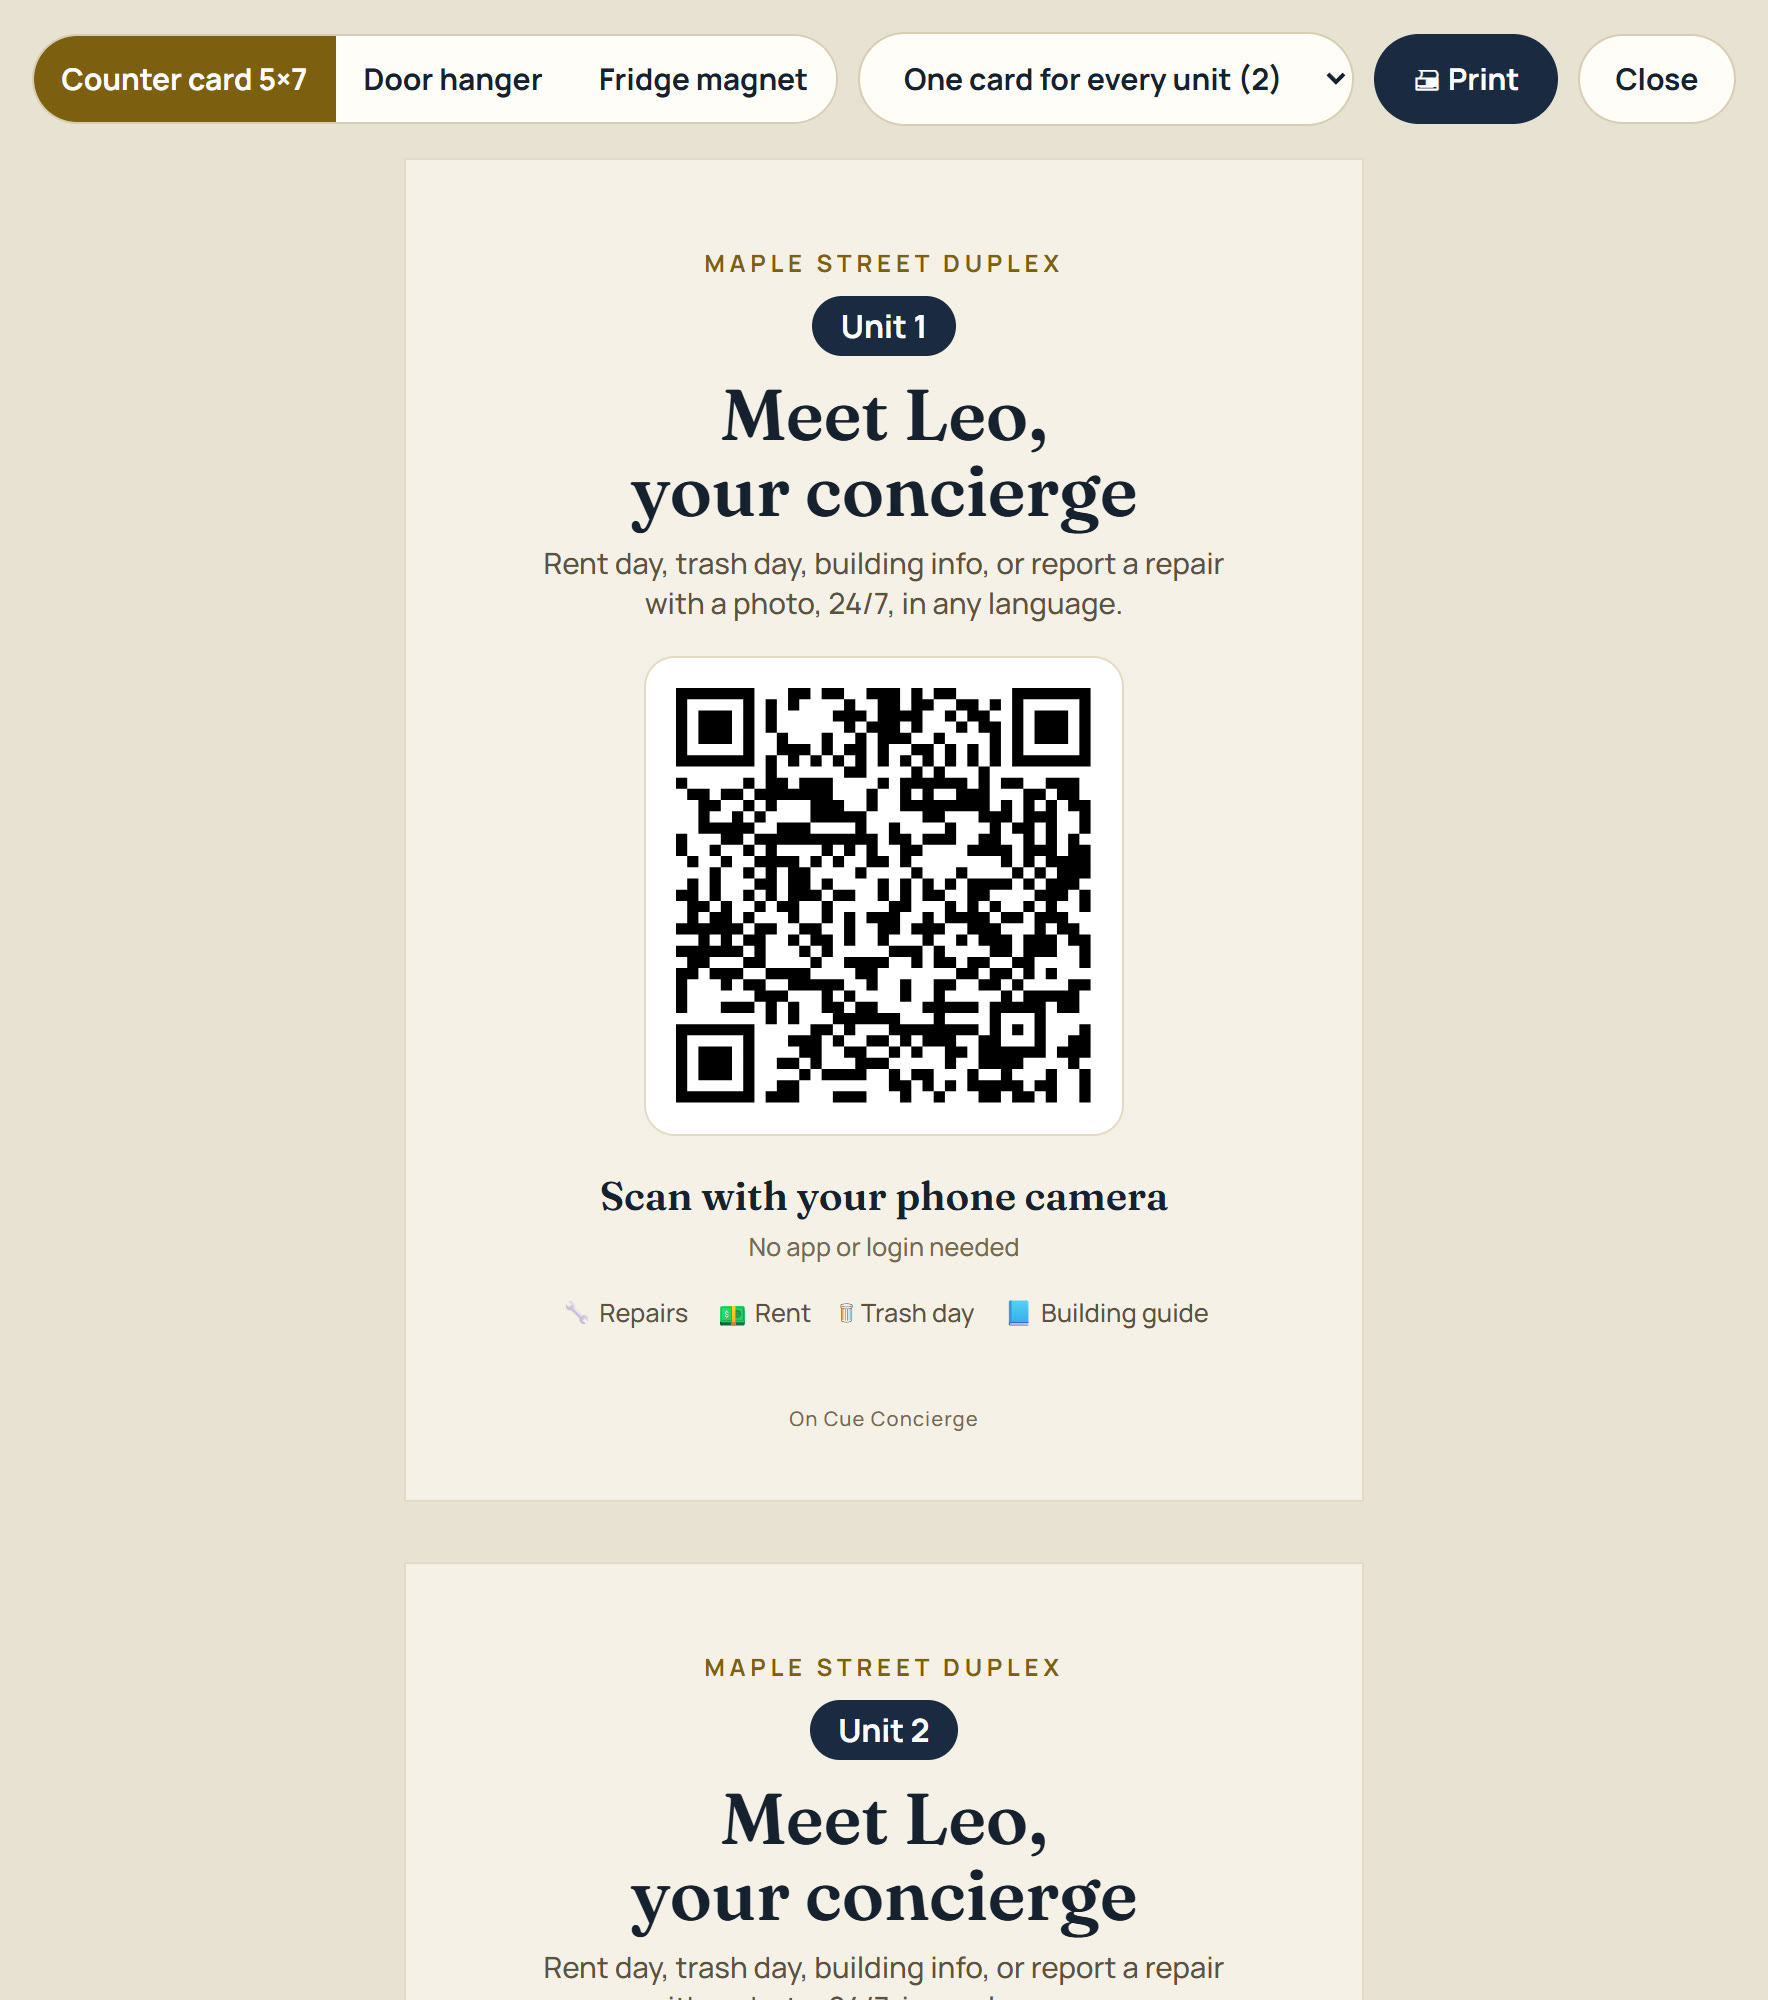
On QR code & link click A card for every unit. It prints one card per unit, each with the unit name, and each QR opens with that unit already picked. Any style works: counter card, door hanger or fridge magnet.
Read the flags on each ticket
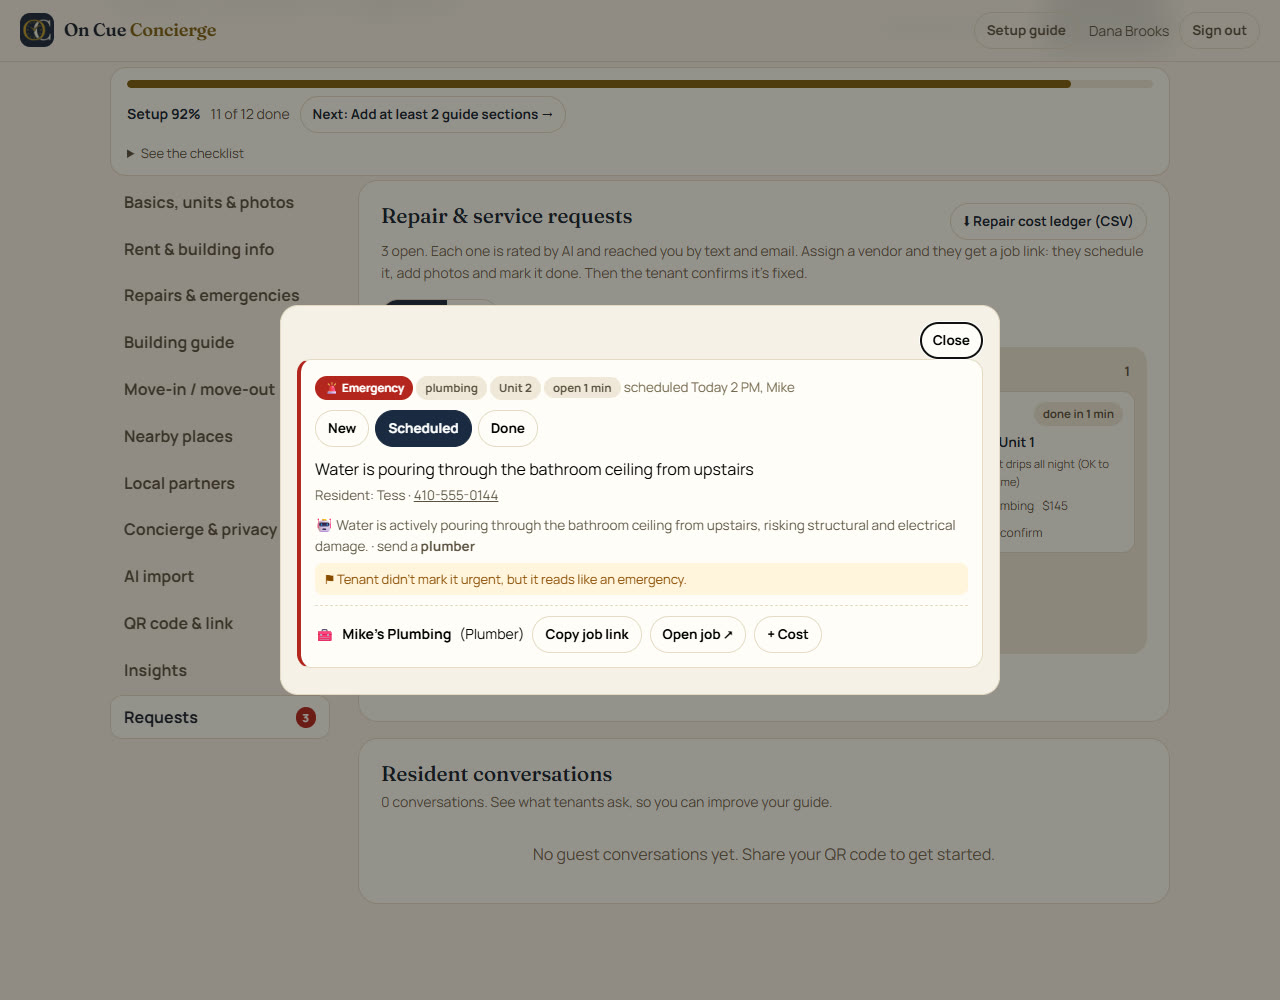
Tap a card on the Requests board to open the full ticket. Two flags help you sort many requests fast:
- Mismatch: the tenant didn't mark it urgent, but it reads like an emergency (or the other way around).
- Repeat: the same kind of problem came back in the same unit within 90 days. Time for a bigger fix.
 12345
- 1Rating, category, unit and open time, plus the AI's one-line reason below.
- 2Flags: the tenant's urgency disagrees with the AI, or the same problem came back in the same unit within 90 days.
- 3Vendor: copy or open their job link.
- 4+ Cost: log what the repair cost. It goes into the ledger.
- 5New / Scheduled / Done: Done asks the tenant "Is it fixed?"
Send vendors a signed job link
On a ticket, click Assign a vendor. Pick a saved vendor or add a new one (name, trade, mobile, email). Leave Text/email them the job link now on and press Assign.
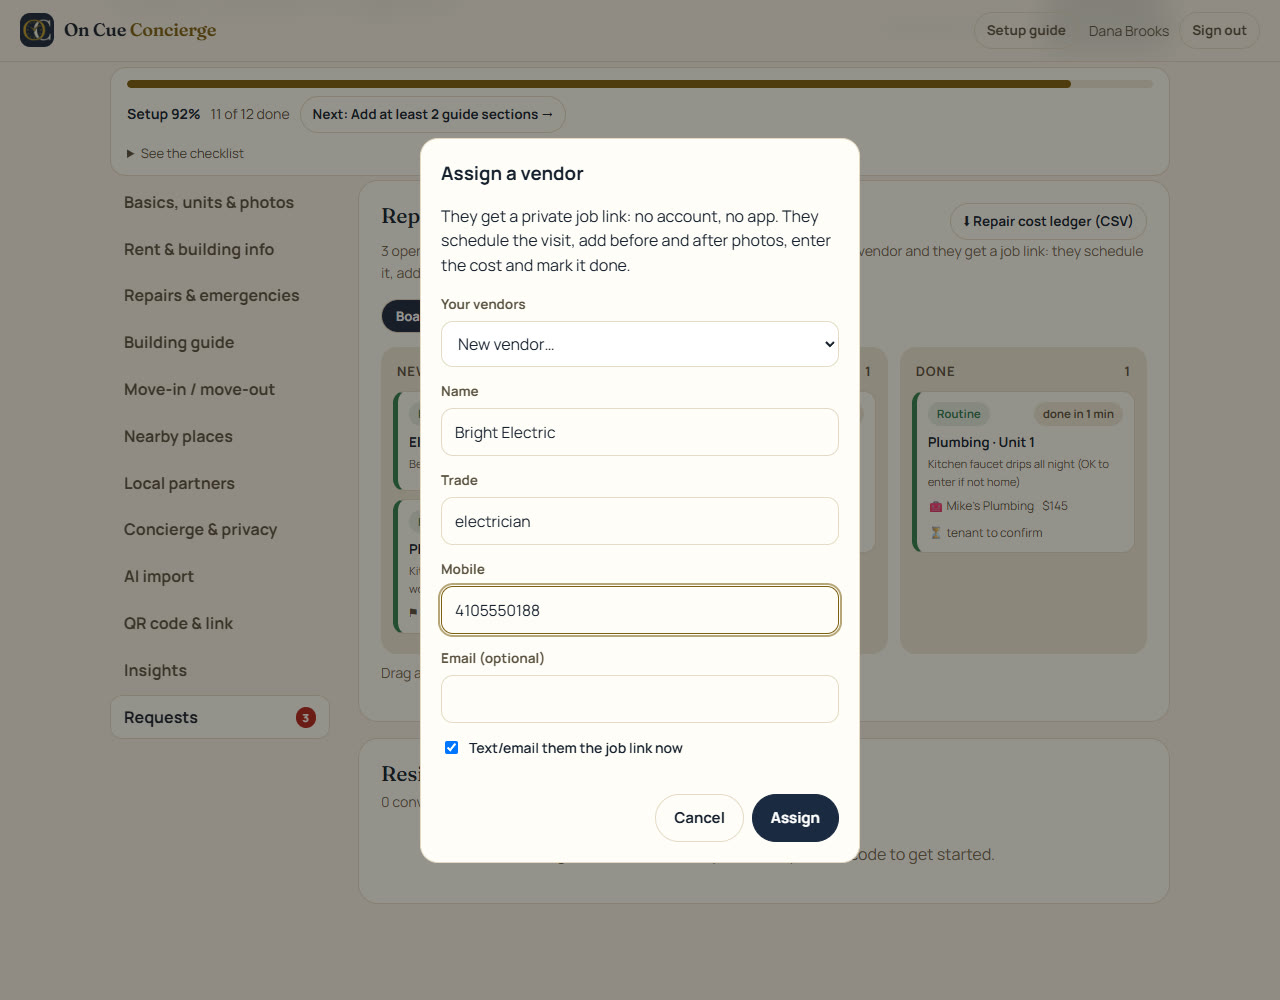
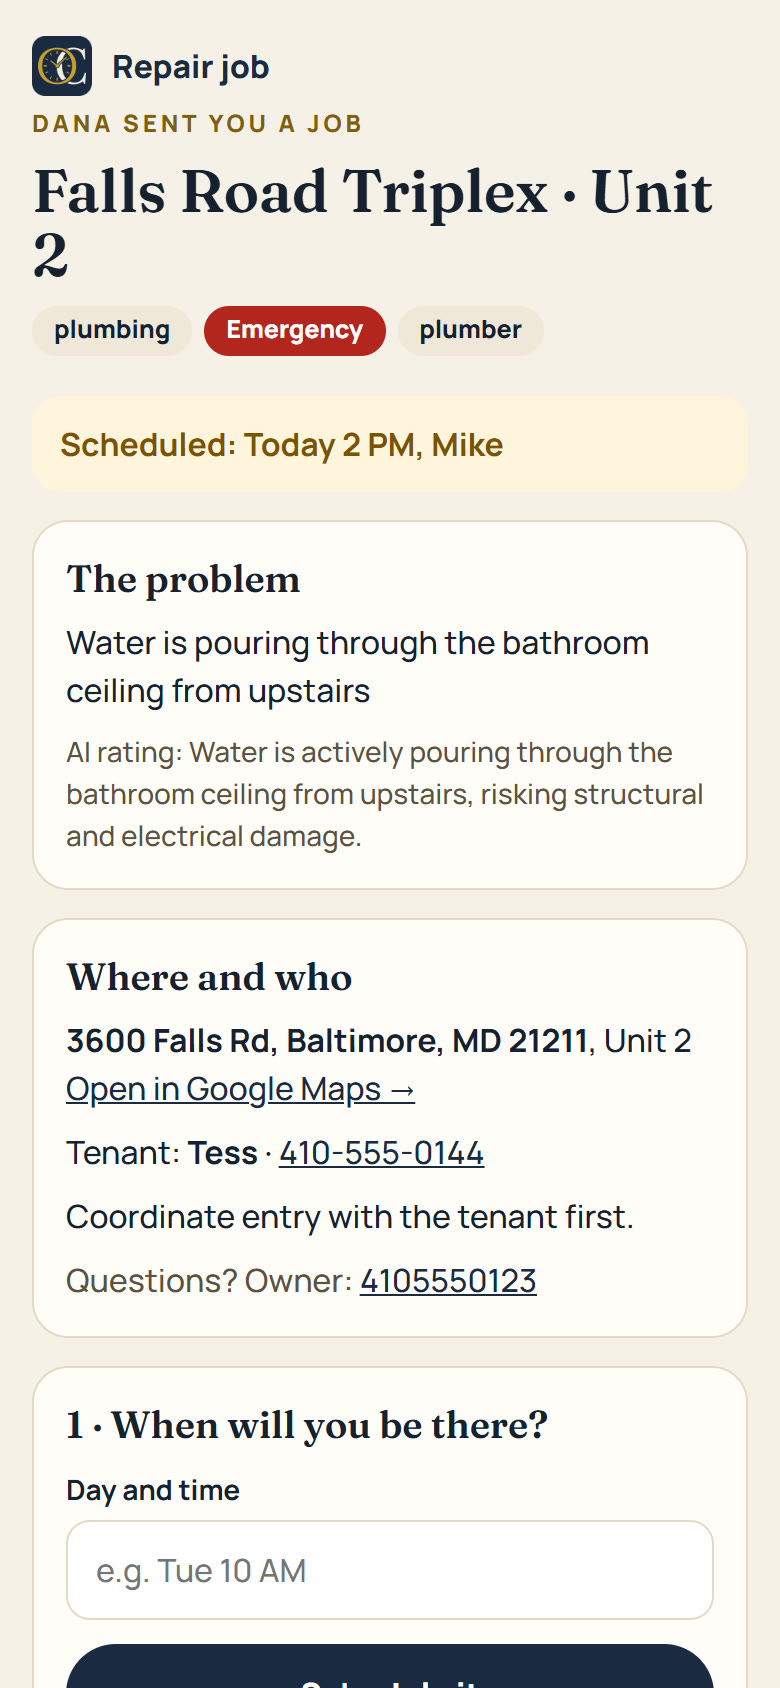
The vendor gets a private job link: no account, no app. They see the problem, photo, address, unit and tenant contact, then schedule the visit, add before and after photos, enter the cost and mark the job done. You get a text when it's done, and the ticket moves on the Board by itself.
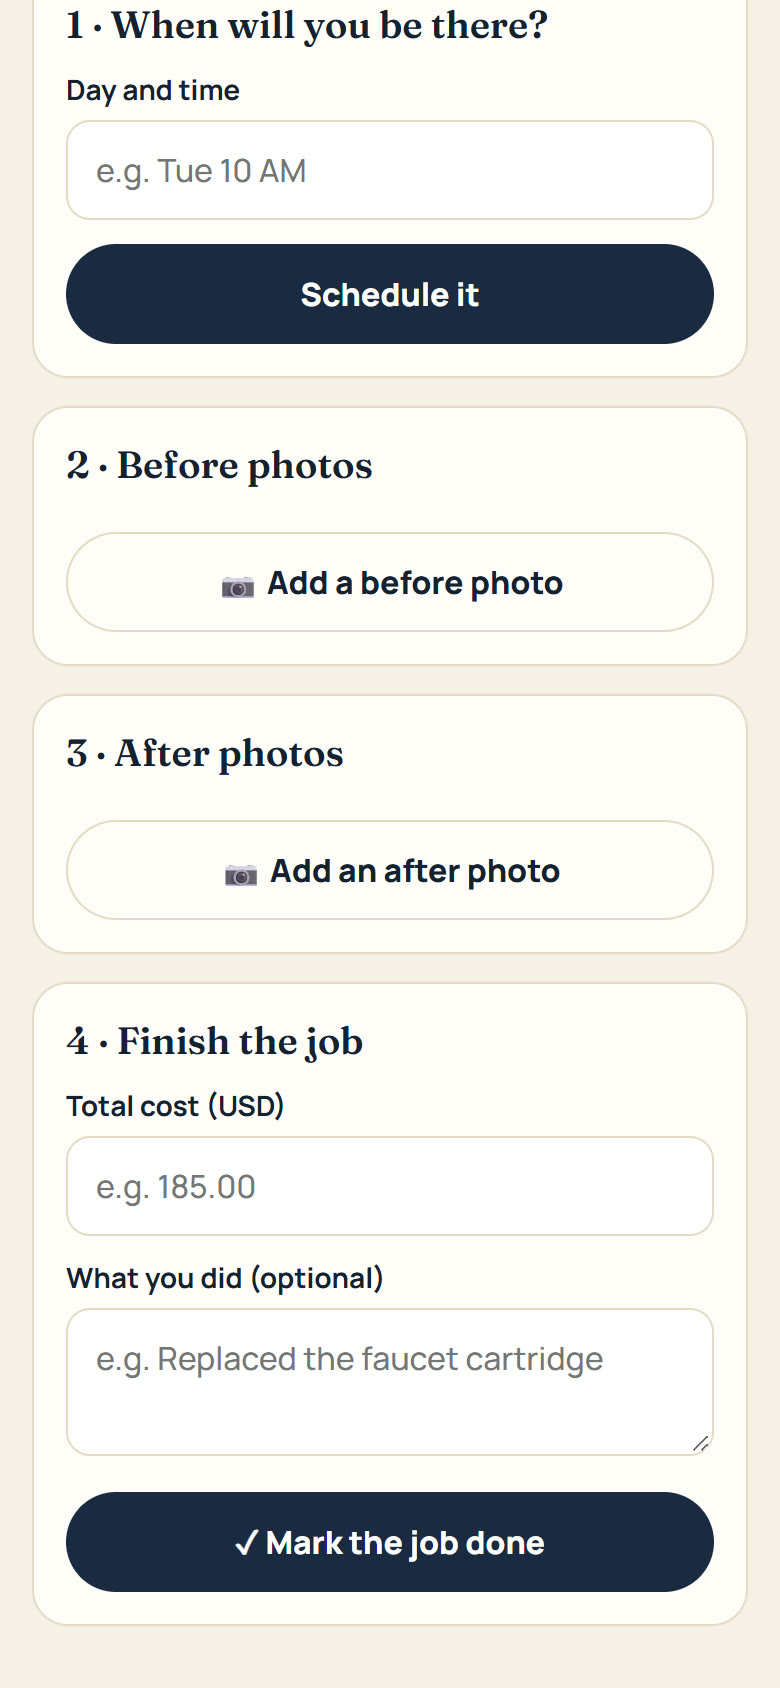
Export the repair cost ledger
Log what each repair cost with + Cost on the ticket (vendors can enter it on their job page). Then click ⬇ Repair cost ledger (CSV) at the top of Requests: every request with dates, unit, category, vendor and cost, ready for your bookkeeper or Schedule E.
1- 1Repair cost ledger (CSV): opens in Excel or Google Sheets.
Watch every building from one screen
All properties shows a health strip on each building: open requests (red when one is urgent), chats this week, and gaps in the guide. Start each day here.
Insights: fill the gaps once
The Insights tab shows the last 30 days: conversations, questions asked, what guests ask about, the busiest hours and your star ratings. For your buildings you also get requests by unit, type and urgency, the average time to fix and repair spend.
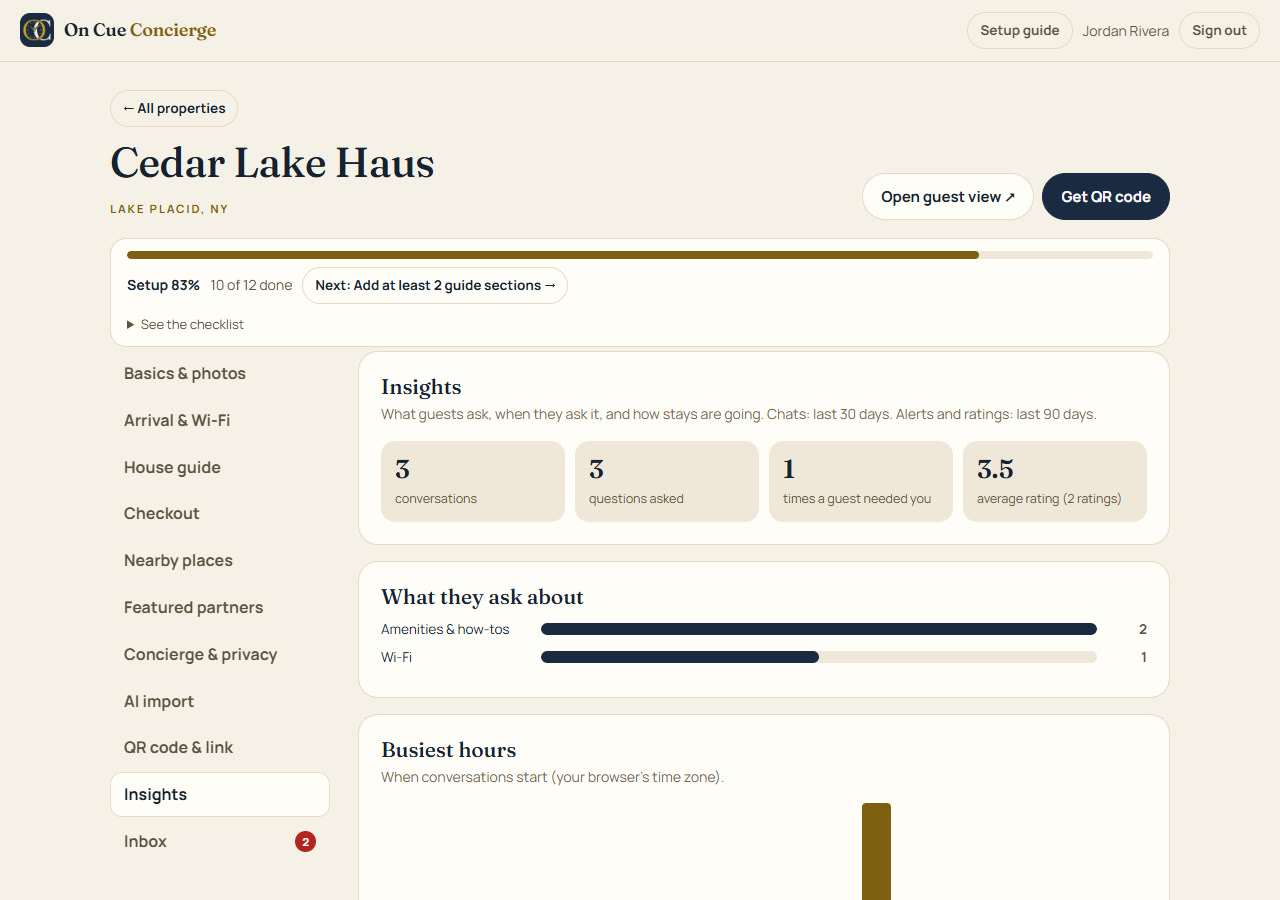
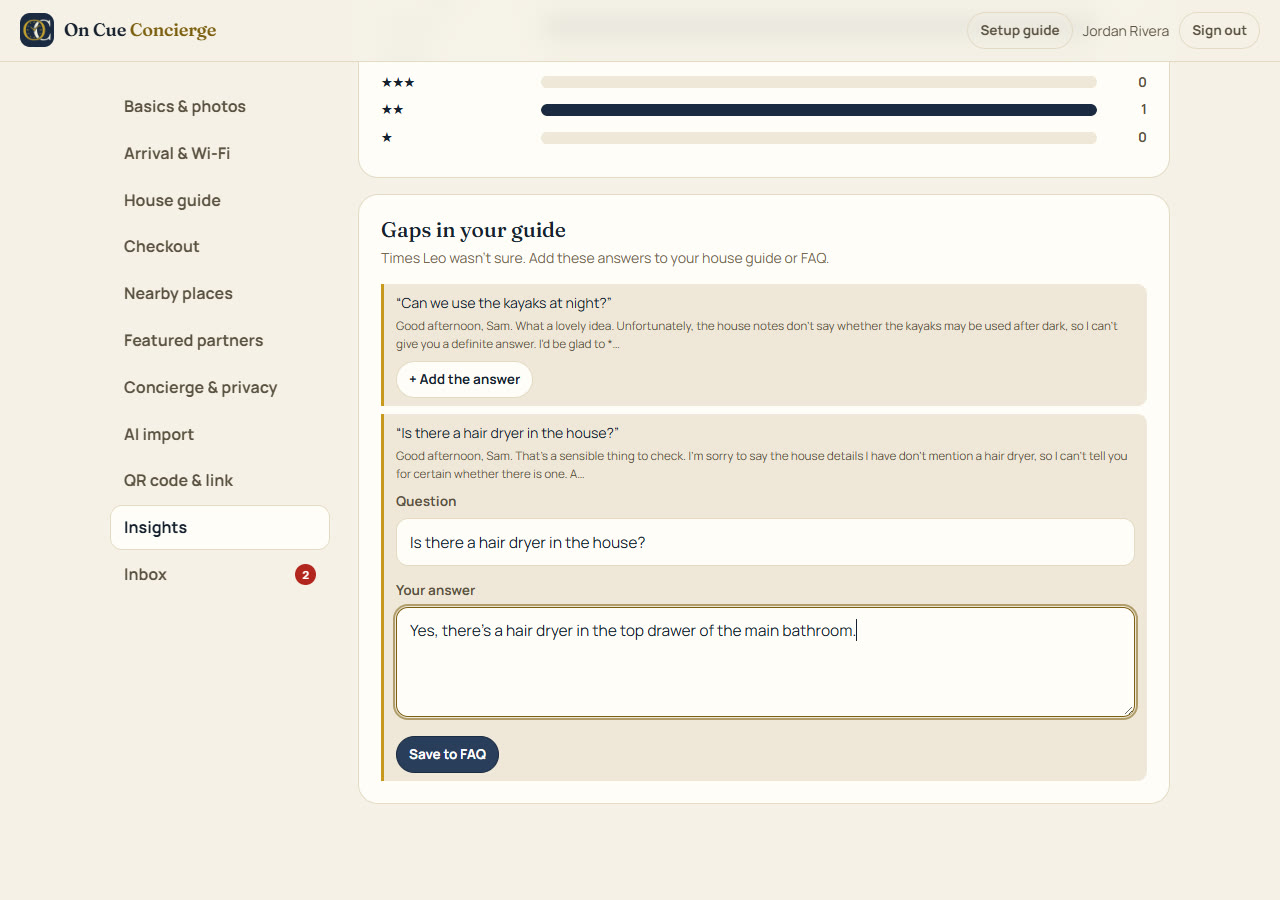
At the bottom, Gaps in your guide lists every question Leo wasn't sure about. Click + Add the answer, type it once, and press Save to FAQ. Leo uses it from the next question on.
 123
- 1Question: the guest's own words. Tidy it up if you like.
- 2Your answer: short and specific.
- 3Save to FAQ: it moves into House guide → Common questions and leaves this list.
Other tracks: A. Airbnb host · B. Short-term rental · C. Landlord
Make Leo great: 8 habits
- Ask Leo 10 test questions before your first guest or tenant: Wi-Fi, checkout or rent day, trash day, parking, "where should we eat", "something isn't working".
- Open Insights weekly. Click + Add the answer on every gap. Leo learns it right away.
- Follow the setup score until it reaches 100%.
- Change your stay code between guests if you share entry codes through Leo.
- Keep instructions in steps. "1. Open… 2. Press… 3. Wait…" makes Leo's answers clearer.
- Add 3 to 5 personal favorites. Guests love "the host's go-to coffee".
- Refresh Nearby places each season so closed places drop off.
- Put the link in your check-in message or welcome email as well as the card in the home.
Your launch checklist
- Account created and your alert phone confirmed (Part 1)
- Concierge built from your listing, manual or building rules
- Every tab in your track checked, setup score at or near 100%
- Guests: stay code set, review links added, extras listed, bookings added for automatic texts
- Tenants: units and unit details in, a test repair sent, your vendors saved
- QR cards printed (counter card, door hanger, fridge magnet or one per unit) and placed
- Link added to your check-in message or welcome email
- Scanned it yourself and asked Leo a question